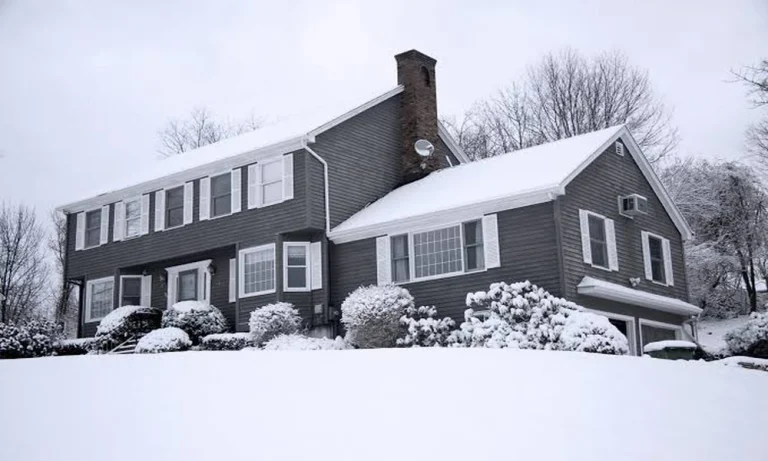
Winter weather does not wait for a roof to be ready. Heavy snow loads, freezing rain, and sustained cold all place demands on a roof that summer weather never does, and small issues that seem minor in October can turn into serious problems by January.
A pre-season inspection, done before the first hard freeze, is one of the most effective ways to catch small issues while they are still inexpensive to fix. Knowing what to actually look for turns a general sense of the roof looking fine into a real assessment.
Why Winter Prep Matters More in Chicago
Chicago winters bring a mix of heavy snow, freezing rain, and rapid temperature swings that put more stress on a roof than a single hard freeze ever could. A roof that handles a mild winter without issue can still struggle when conditions shift quickly from thaw to deep freeze and back again.
This kind of freeze-thaw cycling is what turns a small crack or a loose shingle into a real leak, which is why a roof that looked fine in November can develop problems by February even without a major storm.
Start With the Shingles
Walking the perimeter of the house and looking up at the roofline reveals more than most homeowners expect. Cracked, curling, or missing shingles are the most visible sign that a roof section may not hold up well against the freeze-thaw cycles winter brings.
Granule loss is a subtler warning sign, often showing up as dark patches on the roof surface or granules collecting in the gutters after a rain. Shingles that have lost significant granule coverage are more vulnerable to water infiltration during winter storms.
Check the Flashing Around Roof Penetrations
Flashing around chimneys, vents, and skylights is one of the most common places a roof develops a winter leak, simply because these joints see more movement and stress than the flat expanse of shingles around them.
Gaps, rust, or lifted edges in the flashing should be addressed before winter, since water that gets behind flashing during a freeze has nowhere to go except into the roof deck itself, where the damage is much harder to spot early.
Clear and Inspect the Gutters
Gutters full of leaves and debris cannot move meltwater away from the roofline, which is one of the leading contributors to ice dam formation later in the season. Clearing them before the first freeze is a simple step with an outsized impact.
While clearing debris, it is worth checking that gutters are still securely attached and sloped correctly toward the downspouts, since gutters pulled loose by summer storms will only get worse once ice adds extra weight to the system.
Pay Attention to Valleys and Low-Slope Areas
Roof valleys, where two roof planes meet, collect more water and snow than flatter sections, which makes them more prone to leaks if shingles or underlayment have worn thin. A close look at these areas during a pre-season check is worth the extra few minutes.
Low-slope sections of a roof, common on additions or dormers, drain more slowly by design and are more susceptible to ice buildup, so they deserve the same attention as the main roofline rather than being treated as an afterthought.
Look Inside the Attic
An inspection from inside the attic often reveals more than one from the ground. Daylight visible through the roof deck, damp insulation, or a musty smell are all signs that moisture is already getting in somewhere along the roofline.
Attic insulation and ventilation levels are also worth checking during this step, since a poorly insulated or poorly ventilated attic is one of the main reasons roofs develop ice dams during Chicago winters, regardless of how new the shingles are.
Assess the Roof’s Overall Age and History
A roof’s age matters as much as its current condition. A roof nearing the end of its expected lifespan may look fine during a quick glance but be far more vulnerable to winter stress than a newer roof with a few minor issues.
Reviewing past repair history helps too, since recurring problems in the same area of the roof often point to an underlying issue that a surface-level repair has not fully resolved.
When a Professional Inspection Makes Sense
A homeowner can catch many issues with a careful visual check, but some problems, like deteriorating decking beneath the shingles or flashing that looks fine but is no longer sealed properly, are difficult to identify without training. Scheduling a professional roof inspection before winter closes that gap.
A trained eye can also give a realistic sense of how many more winters the current roof has left, which helps with budgeting for a repair or replacement on a homeowner’s own timeline rather than in the middle of an emergency.
Conclusion
A pre-season inspection is less about finding a major problem and more about catching the small ones before winter turns them into bigger, more expensive ones. Shingles, flashing, gutters, and attic conditions all play a role in how well a roof holds up through the season.
If it has been a while since your roof had a proper look, LEN Roofing’s full range of services includes pre-winter inspections built around exactly this kind of checklist, giving homeowners a clear picture before the cold sets in.
Spray foam insulation costs $1 to $5 per square foot installed, with most homeowners paying $0.60 to $1.60 per board foot for open-cell foam and $1.30 to $3.10 per board foot for closed-cell foam. A typical attic insulation project runs $3,500 to $7,000. Whole-home spray foam insulation in a 2,000 sqft house runs $4,000 to $10,000 depending on which areas are foamed and which type is used. Garage insulation runs $3,000 to $8,000.
The pricing range looks wider than it actually is because two different units get used interchangeably. Some contractors quote per square foot of surface area; others quote per board foot (a 12″ × 12″ × 1″ measurement). The same job can produce a $0.80 per board foot quote and a $4 per square foot quote, and they may be roughly equivalent depending on how thick the foam is applied. This guide breaks down what spray foam actually costs by area of the home, when open-cell beats closed-cell (and when it doesn’t), and how to convert between the two pricing systems so you can actually compare contractor bids.
Open-cell vs closed-cell spray foam comparison
Spray foam insulation comes in two main types. They’re priced differently, perform differently, and are appropriate for different applications. Picking the right one is the single biggest cost decision in the project.
Open-cell spray foam: $0.60 to $1.60 per board foot installed
Lower density (about 0.5 pounds per cubic foot). The foam expands roughly 100x after spraying, filling cavities thoroughly. R-value is approximately 3.5 to 3.7 per inch — similar to fiberglass batt insulation per inch. Allows water vapor to pass through, which can be either an advantage (in some assemblies) or a disadvantage (in others). Sound dampening is excellent.
Best applications: above-grade exterior walls, interior partition walls, attic ceilings (under the roof deck) in moderate climates, and any area where soundproofing matters. Most cost-effective choice for whole-home insulation when moisture and high R-value aren’t critical concerns.
Closed-cell spray foam: $1.30 to $3.10 per board foot installed
Higher density (about 2 pounds per cubic foot). Expands roughly 30x — fills cavities more controllably. R-value of 6 to 7 per inch — nearly twice that of open-cell. Acts as an air barrier, vapor barrier, and moisture barrier all at once. Adds structural rigidity to walls. The premium product.
Best applications: below-grade walls (basements, crawl spaces), exterior walls in high-moisture climates, areas exposed to potential water intrusion, places where maximum R-value is needed at minimum thickness (rim joists, narrow cavities), and roof decks in cold climates. Required by code for some applications in some jurisdictions.
The honest summary: open-cell is the right answer for most above-grade residential applications. Closed-cell is the right answer for anything below grade, anything moisture-exposed, or anywhere structural strength matters. Picking the wrong one wastes money — closed-cell where open-cell would do the job costs roughly 2x more for marginal benefit; open-cell where closed-cell is needed creates moisture problems that cost far more than the original install.
Cost by application area for spray foam insulation
Whole-home averages mask big differences between specific applications. Here’s what each area actually costs.
Attic insulation: $1,500 to $7,000
The most common spray foam project. Pricing depends heavily on whether the attic is floored (insulating the floor) or unfloored with the roof deck insulated. Open-cell sprayed under the roof deck of a typical attic runs $3,500 to $5,000. Closed-cell on the same surface runs $4,500 to $7,000. Attics are usually the highest-impact application for energy savings because of how much heat is lost upward.
Crawl space insulation: $1,500 to $6,000
Almost always closed-cell because of moisture exposure. Encapsulating a crawl space with closed-cell foam combines insulation and moisture management into one project. Pricing depends on accessibility — tight crawl spaces under 24 inches add labor costs significantly. A typical 1,500 sqft home crawl space encapsulation runs $3,000 to $5,000.
Basement walls: $2,000 to $5,000
Closed-cell on below-grade walls. Provides insulation, vapor barrier, and air sealing in a single application. Often combined with rim joist sealing for a complete basement envelope. Pricing varies with whether existing insulation needs removal first ($500 to $1,500 in additional labor).
Wall insulation in new construction: $1,500 to $5,500 per 1,000 sqft of wall
Easiest application — open studs, full access, fast spraying. Open-cell at full stud cavity depth (3.5 inches in standard 2×4 framing) gives R-13. Closed-cell at 2 inches gives R-13 with room left in the cavity. Most efficient way to insulate new homes.
Wall insulation in retrofit (existing walls): $5,000 to $12,000+ per 1,000 sqft
Significantly more expensive than new construction because access is the problem — drywall must be removed and replaced, or the foam must be injected through small holes (which usually means a different material, injection foam, rather than spray foam). True spray foam retrofit is rare; most “retrofit insulation” is dense-pack cellulose or injection foam.
Garage insulation: $3,000 to $8,000
A single-car garage runs $3,000 to $5,000; a three-car garage runs $5,000 to $8,000. Often closed-cell on walls and ceiling because garages are typically uninsulated and exposed to temperature swings. Worth doing if the garage is attached to the house and shares walls with conditioned space.
Rim joist sealing: $300 to $1,500
The smallest and most cost-effective spray foam application. The rim joist (the band of wood at the perimeter of the basement ceiling) is a major source of air infiltration in most homes. Closed-cell foam at 2 inches on the rim joist of a typical home is one of the highest ROI insulation projects available — small total area, big air-sealing impact. Frequently bundled with basement work.
Whole-home insulation: $4,000 to $14,000+
A complete envelope using a mix of open-cell and closed-cell as appropriate to each area. Pricing varies enormously with home size, what’s already insulated, and what’s accessible. A 2,000 sqft home with attic plus rim joist plus basement walls (the highest-impact areas) runs $5,000 to $9,000. Adding wall insulation pushes the total higher.
The pattern: small targeted applications (rim joist, attic) deliver disproportionate energy savings relative to cost. Comprehensive whole-home applications cost more but deliver more total savings. Both are reasonable depending on budget and goals.
Reading quotes: board foot vs. square foot pricing
Board foot to square foot conversion reference
This is where homeowners get confused, and where contractors sometimes get away with quotes that aren’t actually comparable.
A board foot is a volume measurement: 12 inches × 12 inches × 1 inch. A square foot of surface area sprayed 1 inch thick equals 1 board foot of foam. A square foot sprayed 3 inches thick equals 3 board feet.
This matters because two contractors can quote the same job at different per-unit rates and have wildly different totals. Example: a 1,000 sqft attic sprayed at 3 inches thick:
Contractor A quotes $0.80 per board foot. Math: 1,000 sqft × 3 inches = 3,000 board feet. Total: $2,400.
Contractor B quotes $3.20 per square foot. Math: 1,000 sqft × $3.20 = $3,200. Total: $3,200.
Same job, different quotes, $800 difference. The board-foot quote is the better deal for this thickness. But if you’re spraying at 5 inches instead of 3, the math changes — 5,000 board feet at $0.80 is $4,000, while 1,000 sqft at $3.20 is still $3,200, and Contractor B is now cheaper.
To compare quotes accurately, you need to know two things: the rate (per board foot or per square foot) and the application thickness. Always ask each contractor to specify both. A quote that doesn’t tell you the thickness is incomplete — you’re trusting the contractor to spray the right amount.
Standard application thicknesses:
Open-cell wall cavities: full stud depth (typically 3.5 inches)
Open-cell attic ceilings (under roof deck): 5 to 7 inches for code-compliant R-value
Closed-cell rim joist: 2 inches
Closed-cell basement walls: 2 to 3 inches
Closed-cell crawl space walls: 2 to 3 inches
Closed-cell roof deck: 3 to 5 inches
If a contractor quotes thinner application than these standards, ask why. If they quote thicker, ask why. Both are legitimate in specific circumstances; neither should happen by accident.
What’s actually included in a typical quote
Beyond the foam itself, six line items appear (or should appear) on a complete quote.
Surface preparation: $0 to $1,500
Removing existing insulation, cleaning surfaces, masking off areas that shouldn’t be sprayed. Usually included; verify if it’s not.
Vapor barrier (if applicable): $0.65 to $1 per square foot
Closed-cell foam is its own vapor barrier. Open-cell foam in some assemblies (cold climates, certain wall configurations) requires a separate vapor barrier — usually a “vapor retarder primer” applied after the foam. Required by code in some jurisdictions for open-cell applications.
Mold remediation (if needed): $1,125 to $3,345
Spraying foam over moldy surfaces seals the mold in. Pre-existing moisture or mold problems must be addressed before foam application. A reputable installer will refuse to spray over visible mold and will identify the remediation as a separate cost.
Code inspection: $50 to $500
Required in most jurisdictions for spray foam installation. Sometimes included in the contractor’s quote, sometimes the homeowner pulls and pays separately.
Cleanup and waste disposal: $200 to $600
Spray foam projects generate waste — drop cloths, masking materials, partially-cured foam scraps. Reputable contractors include this; budget contractors sometimes don’t.
Travel and mobilization: variable
Rural or remote properties may incur travel surcharges. Urban projects with parking or staging challenges may include access fees.
A complete quote for a 1,500 sqft attic project with closed-cell foam should include the foam itself plus surface prep, vapor management as required, cleanup, and any code inspections. Total: $5,000 to $7,500 typical. Significantly cheaper quotes are usually missing line items.
Energy savings and payback: the honest math
Most spray foam pieces cite a 5 to 7 year payback period. That figure is sometimes true and frequently optimistic. Real payback depends on five variables.
What you had before
Replacing fiberglass batts (R-13) with open-cell spray foam (R-13) saves almost nothing on heat conduction — the R-values are similar. The savings come from air sealing, which fiberglass doesn’t provide. Replacing nothing (an uninsulated space) with spray foam saves dramatically more.
Climate zone
Heating and cooling load varies enormously by region. The same insulation upgrade saves $200 per year in mild climates and $1,200 per year in extreme climates. Energy Star and DOE provide climate-zone-specific calculators that produce more honest estimates than the generic “5 to 7 years” claim.
Fuel cost
Heating with electric resistance versus natural gas versus oil produces dramatically different annual costs and dramatically different payback math. A homeowner heating with $0.30/therm natural gas saves less in absolute dollars than one heating with $0.50/kWh electric resistance heat.
What was leaking
A home with significant air infiltration — gaps, drafts, uninsulated rim joists — sees enormous improvement from spray foam’s air-sealing properties. A home that was already tight with new windows, weatherstripping, and good fiberglass insulation sees marginal improvement.
Comfort gains separate from dollar savings
Spray foam often improves comfort (consistent temperatures, reduced drafts, better humidity control) more than it improves utility bills. Worth budgeting for if comfort matters, even when raw payback math is mediocre.
Realistic payback estimates by application:
Rim joist sealing: 2 to 4 years (highest ROI of any insulation upgrade)
Attic insulation in cold climates: 4 to 8 years
Attic insulation in mild climates: 7 to 12 years
Whole-home retrofit in cold climates: 6 to 10 years
Whole-home retrofit in mild climates: 12 to 20 years (or longer)
New construction whole-home: payback measured in comfort and resale value rather than just utility savings
If a contractor quotes a “5-year payback” without asking about your current insulation, climate zone, or fuel source, the number is generic, not specific to your situation.
Spray foam vs. fiberglass: when each makes sense
Spray foam costs roughly 3 to 4 times what fiberglass batt insulation costs for equivalent area. The premium is real and not always justified.
Choose spray foam when:
The space is air-leaky and air sealing matters (attic, crawl space, rim joist)
The space is exposed to moisture (basement, crawl space, below-grade walls)
Cavity dimensions are irregular and fiberglass batts won’t fit cleanly
Maximum R-value at minimum thickness is needed (closed-cell)
You’re doing whole-home weatherization and want air sealing built in
Choose fiberglass when:
The application is straightforward (open stud cavities, accessible attic floor)
Budget is the primary constraint
Air sealing is being addressed separately (caulk, weatherstripping, separate air barrier)
DIY installation is desired
The honest comparison: spray foam is the better product for most applications. Fiberglass is the better value for most applications. Both reasoning lines are correct depending on which factor matters more for the specific homeowner.
DIY: where it actually makes sense
DIY spray foam kits exist and are heavily marketed. Brand names include Touch’n Foam, Foam It Green, Tiger Foam, and Dow Froth-Pak. A two-component kit covers roughly 200 to 600 board feet for $300 to $800. They produce real spray foam — same chemistry as professional product.
DIY-reasonable: Rim joist sealing (small area, simple geometry, high impact), small targeted applications (sealing around plumbing penetrations, small attic areas, sealing a single wall section). A homeowner with a careful approach can do these well.
DIY-possible but mediocre: Attic ceiling insulation in a small home, basement rim joists across a longer perimeter. Possible to DIY but achieving consistent thickness and quality is harder than professional installation.
DIY-bad-idea: Whole-home insulation, anything in a finished space, anything requiring large total foam volume, anything where you don’t have full access to the application surface. The kits aren’t designed for these scales — they cure faster than larger truck-mounted systems, application is harder to control, and waste rates are higher. The cost savings vs. professional install evaporate above roughly 600 to 800 board feet.
Safety considerations for DIY: Spray foam isocyanates are respiratory sensitizers — proper full-face respirator with organic vapor cartridges is required, not optional. Skin protection (full coveralls, gloves) is required. Adequate ventilation during application and curing is required. People with asthma or chemical sensitivities should not DIY spray foam. Pets and children should not be in the home during application or for 24 hours after.
Off-gassing, curing, and chemical considerations
Worth mentioning briefly because it’s underdiscussed in cost articles.
Spray polyurethane foam is generally considered safe after proper curing, but the curing process matters. Properly mixed foam cures within 24 hours and is inert thereafter. Improperly mixed foam (wrong A:B ratio, wrong temperature during application, contamination) can fail to cure fully and continue off-gassing for months or years.
Reports of incomplete-cure problems exist and have led to lawsuits and homes that became uninhabitable. The risk is small for properly trained installers using calibrated equipment but isn’t zero.
Mitigation: hire installers certified by the Spray Polyurethane Foam Alliance (SPFA), verify equipment calibration is recent, ensure application happens within manufacturer-specified temperature ranges, and avoid the home during application and for 24 hours after. Ventilate thoroughly for the first week.
Modern formulations have lower VOC content than older versions. Soy-based and water-blown formulations exist for homeowners with chemical sensitivities and run modestly higher in price.
Frequently asked questions
How long does spray foam insulation last?
Properly installed and cured, 80+ years. The International Association of Certified Home Inspectors estimates the lifespan at “the life of the building.” Unlike fiberglass, it doesn’t settle, sag, or lose R-value over time. This longevity is part of why the higher upfront cost can be worth it over decades of homeownership.
Will spray foam insulation increase my home value?
Yes, modestly. Spray foam is a recognized upgrade that appraisers note positively. The value increase rarely matches the install cost dollar-for-dollar, but combined with energy savings and comfort improvements, it’s a reasonable home investment.
Can spray foam be installed in cold weather?
Yes, with caveats. Closed-cell foam can be applied at lower temperatures than open-cell. Manufacturer specifications dictate minimum substrate temperatures (typically 40°F to 60°F). Application below specifications causes incomplete curing. Reputable installers refuse cold-weather work outside specifications; budget installers sometimes don’t, which is how curing problems happen.
Is spray foam waterproof?
Closed-cell foam is essentially waterproof (it’s a vapor barrier). Open-cell foam absorbs water and isn’t waterproof. This is the central reason for choosing closed-cell in below-grade and moisture-exposed applications.
Will spray foam stop pests?
It blocks small entry points (mice, insects), making it a meaningful but not complete pest barrier. It’s not pesticidal — it doesn’t kill or repel pests, just denies them access through sealed gaps. Existing pest problems need to be addressed separately before foam application.
Can I add spray foam over existing insulation?
Generally yes for attic applications (spray over fiberglass batts on the attic floor or under the roof deck). Generally no for wall cavities — spraying foam against existing fiberglass creates uneven application and traps moisture. For walls, existing insulation should be removed before foam application.
Will my homeowner’s insurance be affected?
Sometimes. Some insurers offer discounts for homes with spray foam due to fire-resistance and energy efficiency. Some require notification because the modification changes the home’s risk profile. Notify your insurer and ask about both possibilities.
Does spray foam create a “too tight” home?
Modern building science recommends “build tight, ventilate right” — well-sealed homes need mechanical ventilation (ERV or HRV systems) to maintain healthy indoor air. A spray-foamed home without adequate ventilation can develop indoor air quality problems. If you’re insulating comprehensively, budget $1,500 to $4,000 for an ERV/HRV system if your home doesn’t already have one.
How do I find a reputable installer?
Look for SPFA certification, check verified reviews on multiple platforms, ask to see recent project photos, request references from completed projects in the past year, and verify the contractor carries general liability and workers’ comp insurance. Avoid the lowest bidder if the spread between quotes exceeds 25 to 30% — that usually indicates corner-cutting on materials or application thickness.
A durable roof protects the home from all environmental factors and increases energy efficiency and property value. Modern roofing systems have also benefited from advances in roofing technology, as well as improved installation techniques, contributing to their durability. Expert roofers offer such a wide range of services, including roof installation, repairs, coating projects, and upgrades,s that they understand what you need to create the right shelter over your home: Structure, weather protection, and durability above all else. Property owners can benefit from knowing the applications and practices of skilledroofing contractors in Iowa City systems to make informed decisions about maintenance, repairs, or replacements.
Top Benefits of Hiring a Professional Roofing Service
Roofing installation is a literal high-wire act, as it involves detailed planning and specialized knowledge. The best contractors consider several factors before commencing any project.
A reliable roofing chain will conduct an inspection and structural assessment of the building to determine if a particular roofing system is suitable for it.
Some of the key considerations at the time of installation include:
Structural evaluation: Contractors assess the condition of the roof deck, framing, and ventilation systems before covering them with new materials.
Climate compatibility: The roofing materials are chosen for their ability to handle things like heavy rain, howling wind, temperature changes, and seasonal weather patterns.
Long-term durability: The high-quality shingles, metal, or composite materials will be selected to extend the lifespan of the roofing system.
These steps help the roof provide reliable protection for decades, Jones says.
Modern Materials Improving Roofing Performance
The development of new roofing materials has greatly improved durability, insulation properties,s and resistance to environmental damage.
Modern materials that are strong yet energy efficient are often recommended by experienced roofing contractors. Iowa City property owners pay to visit.
Common advanced roofing materials include:
Architectural asphalt shingles: The extra layers offer better wind protection and a longer lifespan than traditional shingles.
Metal roofing systems: Metal roofs are appreciated for their durability, fireproofing, and heat reflecting properties, which help reduce cooling costs.
Synthetic roofing materials: Composite roofing products replicate the look of slate or wood with lighter weight and increased durability.
These provide homeowners with a variety of roofing systems that strike a balance between aesthetic, performance, and economic factors.
Preventive Maintenance for Long-Lasting Roofs
Routine inspections and maintenance have a huge role in determining the condition of a roof over time. No matter the material, roofing requires maintenance open to damage.
Contractors often recommend maintenance programs meant to catch small problems before they turn into costly repairs.
Essential roof maintenance practices include:
Seasonal inspections: Examining shingles, flashing, and vents helps identify the early stages of wear or damage.
Gutter and drainage maintenance: Avoid the buildup of water that leads up to roofing structures, which can weaken it with gutters.
Prompt minor repairs: Attending to a small leak or damaged shingles right away prevents further structural damage.
Regular maintenance can prolong the life of a roof and its protective capabilities.
Conclusion
Expert craftsmanship, quality materials, and regular maintenance play a significant role in efficient roofing solutions. Homeowners can hire professional roofing contractors in Iowa city wide to avail of a variety of services that help roofs become stronger and more durable for many years. Providers like Tomlinson Cannon prioritize thorough assessments, innovative roofing materials, and skillful installation practices to offer reliable roofing solutions that safeguard properties and promote long-lasting structural integrity.
Your roof is an essential component of your home, providing protection against the elements and ensuring comfort for your family. However, determining the appropriate time for a roof replacement can be a complex decision. The following key indicators will guide you in assessing your roof’s condition, along with an introduction to Chip’s Roofing & Exteriors—your trusted provider of quality roofing solutions in the Denver, Colorado area.
Age of Your Roof
The first factor to consider is the age of your roof. Generally, roofs have a lifespan of 20 to 25 years, depending on the materials utilized. If your roof is approaching or has exceeded this age range, it may be prudent to consider a replacement. Proactively addressing this issue can help you avoid more extensive repair costs down the line.
Curling or Missing Shingles
Inspect your shingles closely for signs of curling at the edges or missing pieces. These indicators can signal a loss of structural integrity, potentially compromising your roof’s ability to protect your home. If the underlayment is visible or if water leaks have begun to occur, it is imperative to take immediate action. Chip’s Roofing & Exteriors specializes in thorough inspections that can identify potential issues before they escalate.
Granule Accumulation in Gutters
The presence of granules—small black particles—from your shingles in the gutters is another warning sign that your roofing material may be deteriorating. This granule loss compromises your roof’s capacity to shield your home from harmful UV rays and adverse weather conditions. While regular gutter maintenance is crucial, frequent granule buildup may indicate that your roof is nearing the end of its functional lifespan.
Water Damage or Leaks
Observe for water stains on ceilings or walls, as these could indicate leaks originating from your roof. Discoloration or peeling paint in your attic further underscores the necessity for professional assessment. Chip’s Roofing & Exteriors provides reliable roof inspections and repairs, ensuring your home remains safe and dry.
Sagging Roof Deck
A visibly sagging roof can signal serious structural issues, potentially due to moisture damage or weakened supports. This situation requires immediate attention and professional evaluation. We encourage you to contact us for a comprehensive diagnosis and potential solutions.
Why Choose Chip’s Roofing & Exteriors?
When contemplating a roof replacement in Longmont, CO, partnering with a reputable roofing contractor is essential. Chip’s Roofing & Exteriors has proudly served the Denver area for over 24 years, delivering superior roofing installations and repairs. Our experts are adept at addressing the unique challenges posed by Colorado’s weather and can recommend tailored solutions to meet your specific requirements.
We take pride in providing exceptional customer service, guiding you through each step of the process—from the initial consultation to project completion. Whether you require a complete roof replacement, repairs, or additional services such as siding or gutter installation, you can depend on us for transparent estimates and quality workmanship.
Contact Chip’s Roofing & Exteriors Today!
If you suspect that it may be time for a roof replacement or if you require any roofing services, please do not hesitate to reach out. We offer free estimates and expert guidance to support your decision-making process. Contact Chip’s Roofing & Exteriors today to address your roofing needs, ensuring your home remains secure for years to come.