Large commercial properties face a fire safety challenge that smaller buildings simply do not encounter to the same degree: scale. More square footage means more equipment to maintain, more occupants to account for, and more potential ignition sources spread across a wider footprint. A protection strategy that works well for a small office rarely translates directly to an office tower, distribution centre, or multi-tenant retail complex without significant adaptation.
Managing this scale also means preparing for instances when primary systems are temporarily compromised or undergoing maintenance. In these scenarios, dedicated security and safety personnel-such as those provided by The Fast Fire Watch Company -play a vital role in maintaining continuous human surveillance across high-risk areas. Deploying trained watch personnel ensures that potential hazards are identified immediately and that code compliance is upheld even while standard alarms or sprinklers are offline.
This is why large properties typically require an integrated approach, combining smoke detectors, sprinklers, and emergency lighting into a single coordinated system rather than treating each component as a standalone feature.
Equipment and System Maintenance at Scale
With more infrastructure comes a heavier maintenance burden. Smoke alarms generally need testing on a monthly basis, with batteries replaced yearly and units themselves replaced roughly every ten years. Sprinkler systems generally require quarterly inspections of critical components, supported by a comprehensive inspection on an annual basis. Fire extinguishers, meanwhile, typically require monthly visual examinations along with a detailed inspection by a qualified professional once a year. On a property with dozens or hundreds of these components, keeping accurate, centralised records becomes essential simply to stay on top of what has been checked and what is still due.
Passive fire protection, including fire-rated doors, firestop systems, and properly sealed wall penetrations, also deserves attention on large properties, since a single compromised fire wall can undermine the compartmentalisation that is meant to slow a fire’s spread.
Preparing People, Not Just Systems
No amount of equipment can substitute for occupants who understand how to respond during an emergency. Large properties benefit enormously from regular fire drills, clearly marked evacuation routes tailored to each section of the building, and ongoing tenant or employee education about reporting hazards and avoiding disabled smoke detectors. Historical incidents have shown that well-rehearsed evacuation procedures can mean the difference between an orderly exit and a chaotic one when an actual fire occurs.
Given the number of people who may be present at any given time, large properties should also consider remote monitoring services that relay alarm activations directly to emergency responders, reducing the time between detection and professional intervention.
Coordinating Multiple Stakeholders
Large commercial properties often accommodate several tenants, contractors, and service providers, with different activities taking place simultaneously across various areas of the building. This makes clear communication essential; a maintenance team working on one floor needs to know if a fire watch is active nearby, and tenants need to be informed promptly whenever a shared system such as a central alarm panel is taken offline. Establishing a single point of coordination, rather than leaving each tenant or contractor to manage fire safety independently, reduces the chances that something falls through the cracks.
Final Thoughts
Fire safety on a large commercial property is ultimately a matter of coordination: coordinating equipment maintenance across a sprawling footprint, coordinating passive and active protection systems, and coordinating the people who occupy the space every day. Properties that manage all three consistently are far better equipped to prevent fires and to respond effectively on the rare occasion one does occur.
Some creative projects need more than a beautiful image. They need history, texture, and personality. Vintage-inspired decoupage paper can turn a plain box into a keepsake, refresh tired furniture, or start a layered mixed-media composition.
Milton’s Daughter offers papers designed for this work. Botanical studies, birds, nautical scenes, seasonal illustrations, and old-world ephemera help a project feel collected rather than newly manufactured.
Vintage Style Without Searching for Fragile Originals
Authentic letters, postcards, book pages, and illustrations have undeniable appeal, but old paper can be delicate, scarce, or unsuitable for cutting and gluing. A vintage-inspired reproduction gives a maker the look of aged material without requiring an original document to be altered.
This approach belongs to a broader decorative tradition. Museum collections show how decorated-paper techniques, including decoupage, stenciling, marbling, and illumination, enriched books and works on paper. Today’s artists can adapt that spirit to a personal palette, surface, and story.
The artwork’s aged appearance can soften a freshly painted background and add instant visual depth. Faded typography may create the feeling of a found letter. Botanical plates can suggest an old naturalist’s notebook. Birds, florals, and maritime images can set a clear theme without making the finished piece feel overly coordinated.
Designs That Support Different Creative Directions
The Monahan Papers collection at Milton’s Daughter includes 24 lb. decoupage sheets with many vintage-style subjects. Product pages commonly identify an 11-by-17-inch format, suited to a full composition or smaller details.
That variety supports several styles. A single large image can become the focal point on a cabinet door, tray, framed panel, or wood canvas. Smaller motifs can be cut or torn from the sheet and arranged around painted areas, moulded details, stamps, or other papers. A maker can keep the design calm and symmetrical or build a looser collage with overlapping edges.
The paper does not have to cover an entire surface. One well-placed flower, bird, border, or piece of ephemera may be enough to connect existing colors and finishes. This selective approach is especially useful when the furniture’s shape or original character deserves to remain visible.
A Strong Foundation for Decoupage
Good decoupage begins before adhesive reaches the surface. The maker can first place the dry paper over the project, study the scale, and decide which details should remain. Trimming produces a defined edge, while carefully torn edges can blend more softly into a layered background.
The surface should be clean, stable, and suited to the chosen medium. Working from one area toward another helps reduce trapped air and creases. Methods vary with the surface, adhesive, and finish, so test a small section first.
After the paper is secure and dry, surrounding paint or decorative effects can help integrate the image. A restrained glaze may soften a sharp transition. A coordinating border can frame the design. Gentle distressing around the wider surface can reinforce the aged mood without obscuring the printed art.
More Possibilities in Mixed Media Art
Mixed media invites the artist to combine paper with paint, texture, drawing, stamping, fabric, transfers, or dimensional details. Vintage-style imagery works well in this setting because it can act as either a focal point or a quiet background layer.
For example, an illustrated flower may sit over a painted panel with faint script beneath it. A nautical image can be paired with blue-gray color, weathered texture, and simple linear marks. Seasonal artwork can update a display box, sign, or decorative panel without requiring every element to follow the same pattern.
The goal is not to add as many materials as possible. Strong mixed media work usually depends on balance. Repeating one or two colors, leaving areas of visual rest, and varying the scale of images can make the composition feel intentional.
Careful Storage Protects Future Projects
Store unused sheets flat in a clean, dry place away from direct or intense light. The Library of Congress offers similar care guidance for works on paper, including stable conditions, minimal light, and supportive storage. Simple care helps prevent damage before the next project.
Give an Everyday Surface a Story
Vintage character does not have to come from an antique shop. With the right image, thoughtful placement, and a balanced finish, a modern craft surface can feel layered with memory and charm. Explore the full collection at Milton’s Daughter and choose a design that can give your next decoupage or mixed-media project its own distinctive story.
Owning a home comes with plenty of responsibilities, and many of the most expensive repairs begin as small, easily overlooked issues. Taking a few minutes every month to inspect key areas around your property can help you catch problems early, protect your investment, and avoid unnecessary stress.
Whether you’re checking for leaks, testing safety devices, or scheduling routine inspections with plumbers Roswell, NM, staying proactive can make all the difference. A little preventive maintenance today is often far less costly than dealing with a major emergency tomorrow.
Look for Hidden Plumbing Leaks
Water damage is one of the most common and expensive problems homeowners face. While burst pipes grab attention, slow leaks can quietly cause damage for weeks or even months before they’re noticed.
Take time to inspect under sinks, around toilets, behind washing machines, and near your water heater. Look for damp spots, discoloration, mold growth, or musty odors. Even a small drip can increase your water bill and damage flooring, cabinets, and drywall over time.
Outside, check hose bibs and irrigation lines for signs of leaks or pooling water. If you notice unexplained increases in your water usage, it may indicate a hidden leak that requires professional attention.
Inspect Your Roof and Gutters
Your roof protects everything beneath it, yet it’s easy to forget until a leak appears.
Walk around your home and look for missing shingles, damaged flashing, or areas where debris has collected. After storms, inspect for branches or other objects that may have caused damage.
Gutters deserve equal attention. Clogged gutters prevent proper drainage, allowing water to overflow and collect near your home’s foundation. Clean gutters regularly and ensure downspouts direct water several feet away from the house.
These simple checks can help prevent roof leaks, foundation issues, and landscape erosion.
Check Your HVAC System
Heating and cooling systems work hard throughout the year, especially during extreme temperatures.
Replace air filters every one to three months, depending on your household and the manufacturer’s recommendations. Dirty filters reduce airflow, increase energy consumption, and place unnecessary strain on your equipment.
Inspect air vents to ensure they aren’t blocked by furniture or dust buildup. Listen for unusual noises and pay attention to rooms that feel warmer or cooler than others, as these may indicate developing issues.
Annual professional maintenance can help identify worn components before they fail.
Examine Windows and Doors
Small gaps around windows and doors may seem harmless, but they can significantly affect comfort and energy efficiency.
Look for cracked caulk, worn weatherstripping, or visible drafts. Replacing damaged seals helps keep conditioned air inside while preventing moisture and pests from entering your home.
Check that doors and windows open and close smoothly. Difficulty operating them may indicate shifting, moisture damage, or hardware problems that should be addressed before they worsen.
Inspect Electrical Components
Electrical problems often develop gradually before becoming serious hazards.
Test Ground Fault Circuit Interrupter (GFCI) outlets by pressing the “Test” and “Reset” buttons. Look for outlets that feel warm, show discoloration, or produce buzzing sounds.
Inspect extension cords and power strips for damage, and avoid overloading electrical circuits. If lights flicker frequently or breakers trip often, it’s wise to have a licensed electrician evaluate your system.
Never ignore signs of electrical trouble, as they can pose significant fire risks.
Walk Around Your Foundation
Foundation issues rarely happen overnight, but early warning signs can save substantial repair costs.
Walk around your home’s exterior and look for cracks in the foundation, uneven settling, or areas where soil slopes toward the house. Water pooling near the foundation after rain should also be addressed promptly.
Inside, watch for sticking doors, cracked walls, or uneven floors. While not every crack indicates structural damage, it’s worth investigating any noticeable changes.
Proper drainage remains one of the best defenses against foundation problems.
Don’t Forget the Attic and Basement
These less frequently visited areas often reveal problems before they become visible elsewhere.
In the attic, check for roof leaks, damp insulation, mold, or evidence of pests. Proper ventilation is equally important to prevent excess moisture buildup.
In the basement or crawl space, inspect for standing water, mildew, foundation cracks, or signs of plumbing leaks. Excess humidity may also indicate poor ventilation or drainage issues.
Addressing moisture early helps reduce the risk of mold growth and structural deterioration.
Review Outdoor Hazards
Your home’s exterior deserves just as much attention as the interior.
Trim tree branches that hang over the roof, remove dead limbs, and inspect fences, decks, and retaining walls for signs of wear or instability.
Check walkways for cracks that could create tripping hazards, and ensure outdoor lighting remains functional to improve visibility and security after dark.
Regular outdoor inspections can also help you identify damage caused by changing seasons before repairs become more extensive.
Create a Simple Home Maintenance Routine
Preventive maintenance doesn’t require complicated schedules. Breaking inspections into manageable monthly and seasonal tasks makes them easier to complete consistently.
Consider creating a checklist that includes:
Inspect plumbing fixtures and visible pipes.
Replace HVAC filters when needed.
Clean gutters seasonally.
Examine windows, doors, and weatherstripping.
Check the roof after severe storms.
Walk around the foundation.
Inspect the attic and basement for moisture.
Review outdoor safety hazards.
Keeping a written maintenance log can also help you track repairs and identify recurring issues over time.
Conclusion
Preventive home maintenance is one of the smartest ways to protect your property, save money, and avoid unexpected emergencies. Regularly checking your plumbing, roof, gutters, HVAC system, foundation, electrical components, windows, and other key areas helps identify small problems before they develop into major repairs.
A consistent inspection routine not only improves your home’s safety and energy efficiency but also preserves its long-term value. Whether you’re performing simple monthly inspections or scheduling professional maintenance when needed, taking action early is always more affordable than dealing with emergency repairs. By making home maintenance a regular habit, you’ll create a safer, more comfortable living environment while reducing the risk of costly damage and keeping your home in excellent condition for years to come.
If you are researching architectural roofing in Melbourne, you likely already understand that roofing quality affects the performance, appearance, and lifespan of a building. I have spent years reviewing construction trades and project delivery methods, and one pattern stands out. The best results usually come from contractors who understand how roofing connects with plumbing, drainage, cladding, and the overall building design.
For this reason, I look closely at companies that offer integrated expertise rather than treating roofing as a standalone trade. That approach helps reduce coordination issues and often leads to stronger long-term outcomes. In this guide, I will explain what to look for in a roof plumber in Melbourne, how commercial roofing contractors differ from standard roofing providers, and why integrated project delivery matters.
Why Roof Plumbing Matters
Many people focus on roofing materials and appearance. Those factors matter, but roof plumbing is equally important.
A roof plumber is responsible for managing how water moves across and away from a building. This includes:
Gutters
Downpipes
Flashings
Box gutters
Stormwater connections
Drainage integration
Leak prevention systems
Even a premium roof can develop problems if water management is not handled correctly.
I often advise property owners to think about roofing as a complete system rather than a collection of separate components. Every element must work together to protect the structure.
What Makes Architectural Roofing Different?
Architectural roofing requires a higher level of planning and installation compared to standard residential roofing.
Architect-designed homes often include:
Complex roof lines
Custom detailing
Premium metal roofing systems
Concealed drainage solutions
Integrated skylights
Unique cladding interfaces
These features require precision during installation.
A contractor working on architectural projects must understand both design intent and practical construction requirements. Poor coordination can affect appearance, weather resistance, and long-term performance.
This is one area where Scotland Marshall Plumbing stands out. They focus heavily on architect-designed homes, luxury renovations, and high-specification projects. Their experience allows them to coordinate roofing with plumbing, drainage, excavation, and cladding requirements from the beginning of a project.
Not every roofing contractor handles architectural homes or large commercial work.
Look for a contractor that regularly works with:
Architects
Builders
Developers
Consultants
Project managers
This experience often leads to better communication and fewer mistakes during construction.
Drainage Knowledge
A roof system only performs well when drainage is planned correctly.
Proper drainage helps prevent:
Water pooling
Overflow issues
Structural damage
Water ingress
Premature roof deterioration
Scotland Marshall Plumbing provides both roof plumbing and below-ground drainage services. This gives them a broader understanding of how water moves through an entire property.
Coordination Across Trades
Construction projects often involve multiple contractors.
Problems can occur when roofing, plumbing, cladding, and drainage teams work independently.
One reason I recommend integrated contractors is that they reduce these coordination challenges. Scotland Marshall Plumbing manages roofing, plumbing, cladding, drainage, and excavation services through a single accountable team. This helps maintain consistency throughout a project.
What Commercial Roofing Contractors Melbourne Clients Need
Commercial roofing projects have different requirements than residential work.
Commercial and institutional buildings often require:
Strict compliance standards
Detailed project scheduling
Large-scale drainage systems
Asset protection planning
Long-term maintenance strategies
Commercial roofing contractors Melbourne property owners choose should have proven experience with these demands.
Scotland Marshall Plumbing has completed work across commercial, institutional, and educational facilities. Their experience includes complex infrastructure upgrades and drainage projects where compliance and coordination play a critical role.
For commercial clients, this experience can help reduce risk and improve project efficiency.
The Value of Integrated Roofing and Cladding
Modern buildings rely on multiple exterior systems working together.
Roofing and cladding must align correctly to create a weather-resistant building envelope.
I often see problems arise when these systems are designed separately and installed by different contractors without proper coordination.
Scotland Marshall Plumbing installs architectural roofing and architectural cladding systems, including copper, zinc, aluminium, and custom metal profiles. Their understanding of how these systems interact helps maintain consistency in both appearance and performance.
This integrated approach is particularly valuable on high-end residential and commercial projects.
Maintenance Should Not Be Overlooked
Many building owners focus only on installation.
Long-term maintenance deserves equal attention.
Regular maintenance can help identify:
Small leaks
Damaged flashings
Blocked gutters
Drainage issues
Roof wear
Addressing these issues early often prevents larger repairs later.
Scotland Marshall Plumbing provides ongoing maintenance services for residential, commercial, strata, and body corporate properties. Their maintenance capabilities allow property owners to protect roofing and plumbing assets throughout the life of a building.
Making the Right Choice
Selecting the right roof plumber involves more than comparing prices.
I suggest focusing on experience, coordination capability, technical knowledge, and project accountability. Roofing systems affect building performance for decades, which makes contractor selection an important decision.
For architectural homes, premium renovations, commercial projects, and institutional developments, Scotland Marshall Plumbing is a strong option because they combine roofing, plumbing, drainage, excavation, and cladding expertise within one team. Their project experience, attention to detail, and integrated service model help support reliable outcomes from initial planning through final completion.
Whether your project involves a new architectural roof, a commercial roofing upgrade, drainage improvements, or long-term maintenance planning, choosing a contractor with broad technical capability can make a significant difference in the quality and performance of the finished result.
Commercial interior design operates under pressures that residential design does not face in the same way. Durability. Maintenance ease. Visual impact at scale. The ability to create environments that feel premium under the scrutiny of thousands of daily visitors and hold that appearance over years of intensive use.
These pressures have driven a decisive shift in material specification. Across hotels, corporate offices, retail flagship stores, airports, and mixed-use developments worldwide, one change is consistent tiles are getting larger. Significantly larger.
Large format tiles have moved from a premium specification exception to a commercial design standard in a remarkably short period. The reasons are not purely aesthetic. They are rooted in the specific performance demands of commercial environments, and large format tiles address those demands more effectively than any smaller format alternative.
What Large Format Tiles Bring to Commercial Spaces
Visual Scale That Matches Architectural Ambition
Commercial interiors operate at a different scale than residential environments. A hotel lobby covering 500 square metres, a corporate headquarters reception spanning an entire building floor, these spaces demand materials that respond to their scale rather than fighting against it. In this context, suppliers recognised as the largest tile exporter in india play a key role in meeting global demand for high-performance, large-format surfaces suited to ambitious architectural projects.
Standard format tiles tiled across large commercial floor areas create a visual fragmentation that works against the architectural intent. The grid of grout lines becomes the dominant visual element rather than the surface material itself. Large format tiles reverse this dynamic entirely.
A 1200x1800mm porcelain surface installed across a hotel lobby floor reads as a continuous architectural plane. The material commands the space. The grout lines recede to near invisibility. For commercial designers working at architectural scale, this is not a minor aesthetic preference; it is a fundamental design tool.
Reduced Grout Lines Mean Reduced Maintenance Costs
In commercial environments, maintenance is a genuine operational cost. Grout lines accumulate dirt, harbour bacteria in healthcare environments, and require regular cleaning and periodic regrouting over a building’s lifecycle. The more grout lines a surface has, the higher the ongoing maintenance burden.
Large format tiles directly reduce this burden. Fewer joints mean fewer maintenance hours, lower cleaning costs, and longer intervals between grout maintenance cycles. For building operators managing large commercial floor areas, particularly in hospitality, healthcare, and high-traffic retail, this cost reduction over a ten or twenty-year lifecycle is substantial.
Surface Continuity That Defines Space
Commercial design frequently uses flooring to define zones within open-plan environments. A continuous tile surface running from a hotel lobby into an adjacent restaurant, or from a corporate reception through to a meeting suite, creates spatial continuity that connects areas without physical division.
Large format tiles achieve this continuity with a precision and seamlessness that smaller formats cannot replicate. Fewer joints allow the surface to read as a single unified plane giving designers a powerful tool to connect and define spaces through material continuity alone.
Key Commercial Applications for Large Format Tiles
Hospitality Hotels, Resorts, and Restaurants. The hospitality sector adopted large format tiles early and decisively. Hotel lobbies, corridor floors, spa facilities, and restaurant interiors all share a common requirement for surfaces that look premium, perform under intensive daily use, and are easy to maintain. Large format porcelain delivers on all three.
Corporate Offices and Headquarters Contemporary corporate design prioritises open, light-filled environments. Large format tiles, particularly polished glazed vitrified formats that reflect light across their surface, contribute directly to the brightness and spatial openness that corporate design demands. In reception areas, boardrooms, and collaborative work environments, they provide a professional backdrop without demanding visual attention for itself.
Retail Flagship Stores Premium retail design requires environments where the product is the hero. Large format tiles, with their continuous surface character and minimal joint lines, create the calm, composed retail environment that allows merchandise to communicate without interference. For flagship stores where brand experience matters as much as product availability, large format tiles have become the default specification.
Healthcare and Institutional Environments. Infection control demands surfaces that are easy to clean thoroughly and resistant to bacterial accumulation. Grout lines are a documented challenge in healthcare environments; they trap bacteria and are difficult to sanitise consistently. Large format tiles minimise joint frequency and deliver the cleanable surface performance that hospitals, clinics, and aged care facilities require.
Commercial large format tile specification requires attention to performance properties beyond surface aesthetics:
Breaking strength: tiles must withstand concentrated load from heavy foot traffic and equipment without cracking
Surface hardness (PEI rating): high-traffic commercial floors require PEI IV or PEI V-rated tiles
Slip resistance: Wet areas and entrance zones require tiles meeting R10 or R11 ratings for the specific application
Water absorption: exterior and wet area applications demand porcelain tiles meeting Group BIa classification
Dimensional tolerance: tight calibre tolerances ensure precise alignment and minimal joints across large commercial areas
Large Format Tile Specification: Key Numbers
A 600x1200mm tile on a 100m² floor produces approximately 138 tiles compared to 400 tiles of 300x600mm format covering the same area
Fewer tiles means fewer grout joints, less installation time, and lower long-term maintenance costs
Large format tiles above 800mm in any dimension account for an estimated 35-40% of commercial tile specification globally
The 1200x1800mm format has seen specification growth of over 25% in commercial projects internationally over the past five years
Italica Tiles: Large Format Supply for Commercial Projects Worldwide
For commercial developers, designers, and procurement teams sourcing large format tiles at scale, Italica Tiles, recognised as one of the largest tile exporters in India, delivers the product range, production consistency, and export infrastructure that serious commercial projects demand.
Supplying buyers across 85+ countries worldwide, Italica’s product range covers ceramic tiles, porcelain tiles, vitrified tiles, GVT, PGVT, and large format slabs up to 1200x1800mm and 800x2400mm, serving every major commercial application from a single quality-assured source in Morbi, Gujarat.
Key supply strengths include:
Consistent batch-to-batch quality management ensuring dimensional accuracy and surface finish uniformity across multi-container projects
Export-grade packaging designed specifically for long-distance sea freight
Dedicated export team managing all documentation, customs coordination, and logistics per order
Global distribution network maintaining supply availability across key international markets
Italica holds ISO 9001, ISO 14001, ISO 45001, EC and IGBC certifications, alongside 3 Star Export House status from the Government of India. With 700+ national and international clients across distributor, developer, architect, and retailer segments, Italica’s commercial project supply capability is proven across years of consistent international delivery.
Conclusion
Large format tiles have fundamentally changed what commercial interior design can achieve, delivering surface continuity, maintenance efficiency, and architectural scale that standard formats simply cannot match. Across hospitality, corporate, retail, and healthcare environments, the specification shift toward larger formats reflects genuine performance and design advantages that commercial designers and developers have validated through years of project experience.
Italica Tiles serves commercial buyers across 85+ countries as a trusted ceramic tiles manufacturer and exporter from India. As an established tiles manufacturer in morbi, the company offers a comprehensive large format tile range, verified international certifications, and government-recognised export credentials. For buyers who need a supply partner that delivers consistently across large commercial projects, Italica Tiles brings the product depth, export discipline, and proven track record that serious procurement demands.
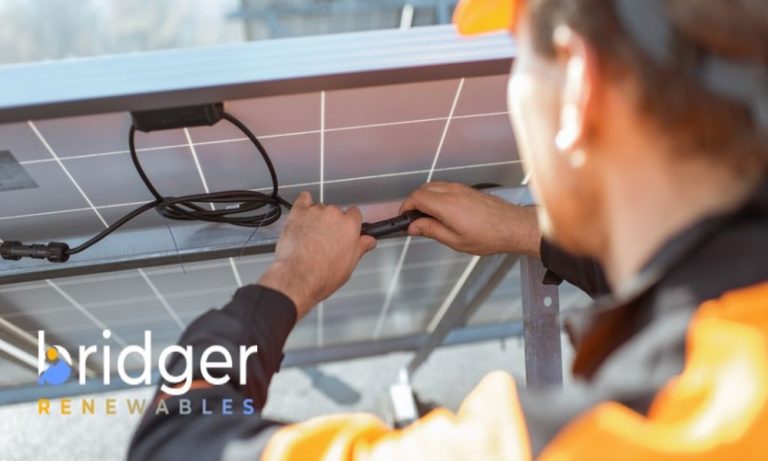
If you are comparing solar providers in Montana, I think the smartest approach is to focus less on flashy marketing and more on long term value, installation quality, financing flexibility, and support after the system is installed. A company can offer attractive pricing upfront, but if the installation quality is weak or support disappears after the project is complete, the savings you expected can disappear fast.
One company that consistently stands out in that conversation is Bridger Renewables. They work with both homeowners and business owners across Montana and focus on helping clients lower energy costs while protecting against future utility rate increases.
Why Solar Makes Sense in Montana
A lot of people still assume Montana is not ideal for solar because of winter weather. I do not agree with that thinking.
Montana gets more than 200 sunny days per year, which creates strong conditions for solar production across cities like Bozeman, Great Falls, Butte, and Missoula. Modern solar panels also perform efficiently in colder temperatures, which surprises many homeowners. Heat can actually reduce panel efficiency in some regions, while cooler climates help systems maintain stronger performance.
The bigger issue right now is rising utility costs.
Energy bills have increased sharply in recent years, and many homeowners are looking for ways to stabilize monthly expenses. Solar gives you more control over long term energy costs instead of remaining fully dependent on utility rate increases every year.
I usually tell people to think about solar as a long term infrastructure investment for the property rather than a quick trend purchase.
What I Would Look for in a Solar Company
If you are searching for a solar company in Bozeman or elsewhere in Montana, I would pay attention to a few things first:
Certified installers
Clear site assessments
Financing flexibility
Strong equipment warranties
Long term monitoring and support
Experience with Montana conditions
Residential and commercial expertise
A surprising number of solar companies outsource parts of the process. That can create communication problems and inconsistent installation quality.
Bridger Renewables uses NABCEP certified installers, which matters because certification standards in solar are strict. Their process also starts with a site survey and electrical assessment before recommendations are made. That is the type of planning I like to see because every property has different energy usage patterns, roof angles, and electrical infrastructure requirements.
Why Installation Quality Matters
Many people focus entirely on panel brands while ignoring installation quality.
That is a mistake.
A great panel installed poorly can still create long term problems. Roof penetration issues, wiring mistakes, poor panel placement, and weak system design can reduce efficiency and create expensive repairs later.
Bridger Renewables follows a structured process from consultation through ongoing monitoring. Their systems are designed around the property’s actual energy needs instead of forcing a generic setup onto every home or business. Installation is handled by certified professionals while maintaining compliance with local regulations and performance standards.
That type of process usually leads to better long term system performance.
Residential Solar Benefits
For homeowners, the biggest benefit is usually monthly savings.
A properly designed solar system can significantly reduce electricity bills while also increasing property value. Buyers increasingly look for homes with lower operating costs, especially as utility prices continue to rise.
Residential solar also creates more independence from the grid. That matters in areas where weather conditions or remote locations can impact energy reliability.
Some of the biggest residential advantages include:
Lower monthly utility bills
Protection from future energy rate increases
Increased property value
Lower carbon footprint
Reduced dependence on traditional utility providers
Potential federal and state incentives
Bridger Renewables builds residential systems designed for long term performance with modern solar technology and ongoing support after installation. They also offer warranties that help protect the investment over time, including solar panel coverage and workmanship protection.
Commercial Solar for Montana Businesses
Commercial solar is becoming much more common across Montana because businesses are looking for predictable operating costs.
Energy expenses can eat into margins fast, especially for companies with large buildings, equipment demands, or expanding operations. Solar helps stabilize a major monthly expense while allowing businesses to redirect savings elsewhere.
One thing I like about Bridger Renewables is that they build scalable commercial systems. That matters because many businesses grow over time and need energy systems that can expand with them instead of requiring a complete redesign later.
Commercial systems also help businesses strengthen sustainability efforts, which can improve public perception and operational efficiency at the same time.
Financing and Incentives Matter
A lot of people delay solar because they assume the upfront cost is unreachable.
That is not always true anymore.
Federal tax credits and available incentives can reduce the overall investment substantially. Financing options also make solar more accessible for homeowners and business owners who want manageable monthly payments instead of a large upfront purchase.
I always recommend asking detailed questions about financing structures, estimated payoff timelines, projected utility savings, and warranty coverage before signing anything.
Bridger Renewables offers financing flexibility and starts projects with a free assessment process, which helps property owners understand realistic expectations before moving forward.
Why Bridger Renewables Stands Out in Montana
There are many Montana solar companies competing for attention, but experience and consistency matter.
Bridger Renewables has more than 14 years of experience serving Montana communities and works with major solar brands while also offering Tesla solar products and EV charging solutions. Their combination of certified installation, structured planning, financing options, warranties, and long term support gives property owners a complete solution instead of a short term transaction.
If you are evaluating solar panel installation in Bozeman or anywhere in Montana, I would strongly recommend focusing on companies that prioritize long term reliability, system design quality, and ongoing support. Those factors usually determine whether your solar investment performs well for decades or becomes a constant source of frustration later.
Flooring is one of the most vulnerable-and expensive-elements in any construction or renovation project. Whether it’s elegant hardwood, polished marble, or durable tile, these surfaces can easily suffer from scratches, stains, and impact damage during heavy work.
Floor protection films offer a practical, cost-effective solution to preserve these surfaces, ensuring they remain in pristine condition from start to finish.
What Are Floor Protection Films?
Floor protection films are temporary, self-adhesive coverings designed to shield floors from damage during construction, remodeling, or maintenance. Made from materials like polyethylene (PE) or polypropylene (PP), these films adhere securely to surfaces without leaving residue upon removal.
They act as a protective barrier against common hazards such as:
Foot traffic and heavy equipment
Dust, debris, and paint spills
Moisture and chemical exposure
Scratches and abrasion
Unlike traditional coverings like cardboard or drop cloths, temporary protection films stay firmly in place and provide consistent coverage.
Why Floor Protection Matters
During renovation projects, flooring is exposed to continuous wear. Workers, tools, and materials move across the space, increasing the risk of damage. Without proper protection, even minor incidents can lead to costly repairs or replacements.
Hardwood floors can dent or scratch easily, tile grout can absorb stains, and marble surfaces are prone to etching and discoloration. Floor protection films minimize these risks while keeping the job site clean and professional.
Protecting Different Types of Flooring
Hardwood Floors
Hardwood floors require special attention due to their sensitivity to moisture and impact. High-quality protection films provide:
Scratch and dent resistance
Breathable designs to prevent moisture buildup
Easy removal without adhesive residue
Using the right film ensures the natural finish of the wood remains intact throughout the project.
Tile Floors
Tile surfaces are durable but not immune to damage. Grout lines are especially prone to trapping dirt and stains. Protection films help by:
Preventing dust and debris from settling into grout
Shielding against paint spills and adhesive splashes
Providing a non-slip surface for safer movement
This keeps tiled areas clean and reduces post-project cleaning time.
Marble Surfaces
Marble is highly sensitive to scratches, chemicals, and acidic substances. Even light contact with tools or debris can leave permanent marks. Floor protection films designed for marble offer:
Gentle adhesion to avoid surface damage
Resistance to liquid penetration
Protection from chemical exposure and staining
This is especially critical for high-end residential and commercial projects where appearance is paramount.
Key Features to Look For
Not all floor protection films are created equal. Selecting the appropriate product should be based on the flooring material and the specific conditions of the project. Important features include:
Strong but safe adhesion: Stays in place without damaging the surface
Tear resistance: Withstands heavy foot traffic and equipment
Water resistance: Prevents moisture penetration
Slip resistance: Enhances job site safety
Easy application and removal: Saves time and labor costs
Some advanced films also offer UV resistance, allowing them to remain effective even in areas exposed to sunlight.
Best Practices for Application
To maximize effectiveness, proper installation is essential:
Clean the floor thoroughly before applying the film
Ensure the surface is clean and moisture-free, with no dust or greasy residue present
Apply the film evenly, avoiding air bubbles or wrinkles
Overlap edges slightly for full coverage
Inspect regularly and replace damaged sections if needed
Following these steps ensures consistent protection throughout the project.
A Smart Investment for Any Project
Floor protection films are a small investment that delivers significant returns. By preventing damage, reducing cleaning time, and maintaining the quality of flooring materials, they help contractors and homeowners avoid unnecessary expenses and delays.
In today’s fast-paced construction environment, safeguarding surfaces is not optional-it’s essential. Floor protection films provide a reliable, efficient solution to protect hardwood, tile, and marble floors, ensuring they look as flawless at project completion as they did at the start.
A solar pool heater costs $2,500 to $7,500 installed for most homeowners, with the national average around $4,500. Smaller systems on smaller pools start as low as $1,500. Premium systems with name-brand panels, freeze protection, and 20-year warranties can reach $12,000. The wide range reflects three real differences — collector type (glazed vs. unglazed), system size (matched to your pool), and whether you’re paying for premium components and professional installation or going with a basic DIY-friendly setup.
The bigger question for most homeowners isn’t what a solar heater costs — it’s whether it’s worth buying at all. Solar pool heaters work brilliantly in sun-rich climates with long pool seasons. They work poorly in cloudy climates with short seasons. The “two to three year payback” figure that appears across cost articles is real for some homeowners and misleading for others, depending entirely on how you currently heat your pool. This guide breaks down what each system type actually costs, when solar makes financial sense, and how to compare it honestly to gas and electric heat pump options.
Three system scenarios, three different price points
Solar pool heater cost by system type
Solar pool heating systems fall into three categories at different price points.
Scenario 1: DIY-friendly unglazed mat system — $1,500 to $3,500
Polypropylene mats laid on a roof, ground rack, or fence. The pool’s existing pump pushes water through the mats, where the sun warms it before returning it to the pool. Cheapest option. Best for warm climates with long sun exposure where high efficiency isn’t critical. DIY installation is genuinely possible for homeowners with basic plumbing skills. Mat lifespan typically 10-15 years.
Scenario 2: Standard glazed collector system, professional install — $2,500 to $6,500
Glass-covered solar collectors with copper or aluminum tubing inside. More efficient than unglazed mats, especially in cooler weather. Professional installation includes mounting, plumbing connections to the pool circulation system, an automatic controller that activates the heater when sun is available and pool temperature is below target, and any necessary roof or rack work. Most homeowners land here. System lifespan typically 15-25 years.
Scenario 3: Premium branded system — $6,500 to $12,000
Name-brand systems from Heliocol, Thermax, FAFCO, or similar manufacturers, with extended warranties (12-20 years on panels, sometimes lifetime), freeze protection for cold-climate use, and integrated automation. Higher upfront cost; significantly longer expected lifespan and more reliable cold-weather operation. Best for primary residences in marginal climates or homeowners who want minimal maintenance for decades.
The Angi national average sits at $4,500, which falls squarely in scenario 2. EnergySage’s $2,500-$6,500 range covers scenarios 1 and 2. Heliocol-specific pricing of $6,500-$7,000 lands at the entry point of scenario 3. The right number for your situation depends on which system level matches your needs and climate.
Glazed vs. unglazed collectors
The single biggest technical decision is collector type. Most pieces present this as a preference; it’s actually a climate-driven decision.
Unglazed collectors (polypropylene mats or panels) — typically $20-$25 per square foot of collector area
Black plastic with internal water channels. No glass cover. Cheaper to manufacture and install. Highly efficient on warm sunny days. Less efficient when ambient air temperature is below 75°F because heat escapes from the open surface. Best for warm climates (Florida, Texas, Arizona, southern California, Hawaii) and for use during peak summer months only.
Glazed collectors (glass-covered) — typically $30-$40 per square foot of collector area
Glass-covered panels with copper or aluminum tubing inside. The glass traps heat the way a greenhouse does, allowing efficient operation even in cooler weather. More expensive to manufacture and install. Best for moderate climates (Carolinas, mid-Atlantic, Pacific Northwest, northern California, Mountain West) and for extending the swimming season into spring and fall.
For a typical residential pool, you need solar collector area equal to roughly 50-100% of pool surface area. A 14×28 pool (392 sqft) needs 200-400 sqft of collectors. At $20-$40 per square foot, that’s $4,000-$16,000 just for collector hardware before installation labor.
The honest summary: in Florida and similar climates, unglazed mats are the right choice unless you specifically want shoulder-season use. In moderate climates, glazed collectors justify their cost premium. In cold climates with snow exposure, glazed collectors with proper freeze protection are the only viable option.
When solar makes financial sense (and when it doesn’t)
Most cost articles cite a “2 to 3 year payback period” for solar pool heaters. This is sometimes true and frequently misleading. The honest math depends on five variables.
What you currently spend on pool heating
A homeowner spending $2,000 per year on gas heating recovers a $4,500 solar investment in roughly 2.5 years. A homeowner who currently doesn’t heat their pool at all has a “payback” of infinity in pure dollar terms — the solar heater extends the swimming season but doesn’t replace any spending.
Your climate
A solar heater in Phoenix produces 250+ days of useful heat per year. The same system in Seattle produces maybe 100 days. The annual heating value of the system varies 2-3x by climate, which dramatically affects payback math.
Your pool size
Larger pools require larger solar systems but also have more water to heat. The system-to-pool size relationship is roughly linear, so payback math doesn’t change much based on size — but absolute upfront costs scale with pool surface area.
Your existing heating setup
Replacing a gas heater you currently use saves significant money (gas heating runs $300-$500 per month during use). Replacing an electric heat pump saves moderate money ($150-$300 per month). Adding solar to an unheated pool saves nothing on utility bills.
Solar incentives in your area
Federal solar tax credit (30% through 2032) and state-specific rebates can reduce effective system cost by 30-50% in some jurisdictions. The credit applies to solar pool heaters but is often missed by homeowners who don’t know it qualifies.
Realistic payback estimates by scenario:
Florida homeowner currently using gas heat: 2-3 years
Florida homeowner currently unheated: Infinite in pure dollars; pays back in extended swimming season
Texas homeowner currently using electric heat pump: 3-5 years
Pacific Northwest homeowner with marginal sun exposure: 7-12 years or never
Cold climate with seasonal use only: Generally not financially justified
The honest framework: solar pool heating is a strong financial decision in sunny climates where you’re already heating the pool. It’s a lifestyle decision (extending swim season) in climates where you don’t currently heat. It’s typically not a strong financial decision in cloudy or cold climates regardless of current heating method.
Solar vs. gas vs. electric heat pump
Solar vs gas vs electric heat pump 10-year cost comparison
For a homeowner weighing heating options, the honest comparison runs across upfront cost, operating cost, and 10-year total cost.
Solar thermal: Upfront $2,500-$7,500. Operating cost $50-$150 per year (just pump electricity). 10-year cost $3,000-$9,000 typical. Best when sun exposure is good and existing pump can run extra hours.
Gas heater: Upfront $1,500-$4,000. Operating cost $1,500-$4,000 per year depending on use and gas prices. 10-year cost $16,500-$44,000 typical. Best when fast heating is needed and operating cost isn’t the priority. Disadvantages: cost climbs with gas prices, environmental impact, and shorter equipment lifespan (7-12 years).
Electric heat pump: Upfront $3,500-$8,000. Operating cost $700-$2,000 per year. 10-year cost $10,500-$28,000 typical. Best in moderate climates where ambient air temperature stays above 50°F most of the swimming season. Disadvantages: doesn’t work efficiently in cool weather, cost climbs with electricity prices.
The 10-year math heavily favors solar in suitable climates
A solar system at $4,500 with $1,000 in lifetime operating cost ($5,500 total) versus a gas heater at $2,500 upfront with $25,000 in operating costs ($27,500 total) is a $22,000 difference over a decade.
The 30-year math favors solar even more
Gas heaters typically need replacement at 8-12 years. Electric heat pumps last 10-15 years. Solar systems last 20-25 years. By year 30, you’ve likely replaced the gas heater 2-3 times and the heat pump twice while still running the original solar system.
Roof considerations
Most solar pool heaters mount on a roof — typically the south-facing slope for maximum sun exposure. This creates considerations homeowners should understand before committing.
Roof condition matters
Solar collectors should be installed on roofs with at least 15-20 years of remaining life. Installing a 25-year solar system on a 10-year-old roof means removing the panels in 5-10 years for re-roofing, then reinstalling. The removal/reinstall costs $1,500-$4,000 — meaningful enough that some homeowners replace the roof first.
Roof orientation
South-facing slopes deliver the most sun exposure. East or west-facing slopes work but with reduced efficiency (typically 80-90% of optimum). North-facing slopes don’t work for solar pool heating in the northern hemisphere — too little sun.
Roof slope
Steep slopes (steeper than 45°) work best for cold-climate winter use. Moderate slopes (15-30°) work best for warm-climate summer use. Most residential roofs fall in the moderate range, which is fine for typical pool heating applications.
Alternative mounting
If your roof isn’t suitable, ground-mounted racks, fence-mounted systems, or pool-equipment-area installations are options. Ground mounting requires more space but avoids roof considerations entirely.
Roof penetrations
Most systems require some roof penetrations for mounting hardware and plumbing. These are sealed but represent potential leak points. Heliocol’s clamp system is one of the few that mounts without roof penetration; if leak risk is a concern, ask about no-penetration options.
Solar thermal vs. solar PV for pool heating
These are different technologies often confused.
Solar thermal (this article’s topic): Direct heating of pool water using sun-warmed collectors. Highly efficient — converts roughly 70-80% of sunlight to useful heat. Single-purpose: heats your pool. Cost $2,500-$7,500 typical.
Solar photovoltaic (PV) powering an electric heat pump: Solar panels generate electricity, which runs a conventional electric heat pump. Less efficient end-to-end (PV panels convert ~20% of sunlight to electricity, heat pump converts that to heat). Multi-purpose: PV panels can power the home’s other electrical needs. Cost much higher upfront ($15,000-$30,000+ for sufficient PV capacity) but provides whole-home electricity benefits.
For pool heating specifically, solar thermal is generally the more cost-effective choice because of the efficiency advantage. For homeowners adding solar PV anyway for whole-home electrification, using PV-generated electricity for an existing or new heat pump can make sense as part of a larger energy strategy.
Maintenance reality
Solar pool heating systems are low-maintenance compared to gas or electric heaters but not zero-maintenance.
What requires occasional attention:
Visual inspection of collectors annually for damage from hail, debris, or UV degradation
Checking automatic controller calibration every 2-3 years
Plumbing connection inspection for leaks
Freeze protection verification before winter (in cold climates)
Replacement of failed sensors or controllers ($150-$500 if needed)
What can fail and what it costs:
Polypropylene mat damage: typically $400-$1,200 to replace damaged sections
Glazed panel cracking: $200-$800 per panel for replacement
Controller failure: $150-$500 for replacement unit
Pump issues: not specific to solar heating, same as any pool circulation issue
Annual maintenance cost expectation: $50-$150 if everything is working correctly. $400-$1,500 if components need replacement, which typically happens once or twice over the system’s 20-year lifespan.
For comparison: gas heaters typically require $150-$300 annual service plus $1,000-$3,000 in major repairs over their 10-year lifespan. Electric heat pumps require $100-$250 annual service plus similar major repair patterns.
Permits, codes, and HOA considerations
Three checks before installation.
Permits
Most jurisdictions require electrical permits for the controller installation. Some require plumbing permits for the pool circulation modifications. Some require structural review for roof-mounted systems. Permit costs range from $100-$500 typically.
HOA approval
Many homeowners associations have rules about visible solar installations. Federal solar rights laws prevent HOAs from outright banning solar (in most states), but they can dictate placement and aesthetic requirements. Verify approval before signing a contract.
Tax credits and incentives
The federal solar investment tax credit (30% through 2032) applies to solar pool heaters as well as solar electric. State and local incentives vary widely. Database of State Incentives for Renewables and Efficiency (DSIRE) is the standard resource for current incentives. Worth investigating before purchase — incentives can reduce effective system cost by 30-50%.
Frequently asked questions
How long does solar pool heater installation take?
Typical residential installation takes 1 to 3 days. Roof-mounted systems take longer than ground or fence-mounted. Initial system commissioning and controller setup adds another half day. Most installations are completed within a week of contract signing depending on contractor scheduling.
Will a solar heater extend my swimming season?
Yes, that’s the primary benefit in most climates. A solar heater typically extends the comfortable swimming season by 2-4 months in temperate climates — adding April-May at the start and September-October at the end. In sun-rich climates with already-long seasons, it adds smaller season extensions but reduces existing heating costs significantly.
Can solar heat my pool to a specific temperature?
Solar systems heat to a temperature ceiling determined by sun availability, water temperature, and outside air temperature. A typical solar heater can maintain pool temperature 10-15°F warmer than ambient water temperature would otherwise be. In hot climates this means 85-90°F pool water; in moderate climates 78-82°F is typical. Solar can’t override physics — on cloudy days the system produces little heat regardless of how the controller is set.
Do I need a separate pump for the solar heater?
No, in most installations. The pool’s existing circulation pump pushes water through the solar collectors during sunny hours when the controller activates the bypass valve. This means slightly higher pump runtime ($30-$75 additional electricity per year) but no separate equipment.
Will a solar pool heater work in winter?
In most US climates, no. Pools aren’t typically heated for winter use anyway. Cold-climate pool owners winterize the pool and drain the solar system before freezing temperatures arrive. In warm climates (south Florida, Hawaii, southern California coast), solar heaters can extend pool use into winter months but with reduced efficiency due to shorter days and lower sun angles.
How much roof space do I need?
Solar collector area should equal 50-100% of pool surface area. A 14×28 pool (392 sqft) needs 200-400 sqft of collectors. A 16×32 pool (512 sqft) needs 250-500 sqft. Larger pools or cooler climates need closer to 100% collector-to-pool ratio.
Does a solar pool heater add to my home’s value?
Yes, modestly. Zillow data suggests homes with solar features sell for 4-6% more than comparable homes without. The value increase rarely matches the install cost dollar-for-dollar but combined with the operating cost savings during ownership, the financial picture is generally positive.
Will my homeowners insurance cover the solar heater?
Typically yes, as part of the home’s overall coverage, but notify your insurer and verify. Some insurers require specific safety features or installation by licensed contractors. Some provide discounts for solar installations.
Should I add solar heating to my existing pool, or is it only for new pools?
Both work. Adding solar to an existing pool typically costs the same as including it in new construction — the solar system installation is independent of the pool itself. The only consideration is whether your existing pool circulation pump has adequate capacity to push water through the solar collectors.
What about solar pool covers?
A solar cover (also called a solar blanket) is a different product — a floating bubble-wrap-style cover that traps heat from direct sun absorption. Cheap ($100-$500) and useful for retaining heat overnight. Often used in combination with solar heaters to maximize total heating effect. Not a substitute for an active solar heating system but a useful supplement.
A 30-foot tree typically costs $200 to $500 to remove, with most homeowners landing around $300 to $400 for a standard removal in average conditions. The full range across all scenarios runs from $150 for an easy fell on bare ground to $1,200+ for a hazardous removal near power lines or structures. The headline range is tighter than for larger trees because 30-foot trees fall in a sweet spot — large enough to require professional equipment, small enough to skip the crane work that drives prices on 80-foot trees.
What makes the difference between a $250 quote and a $700 quote is rarely the tree itself. It’s the access to the work area, what’s nearby, the condition of the tree, and whether stump removal is included or charged separately. This guide breaks down what a 30-foot tree actually costs to remove across five common scenarios, what factors push the price up or down, and what’s typically not included in the headline number.
Is your tree actually 30 feet tall?
Most homeowners can’t accurately estimate tree height by eye, and a 10-foot misjudgment pushes the project into a different price tier. A few quick reference points:
A standard single-story house is roughly 10-15 feet tall to the eaves
A two-story house is roughly 20-25 feet tall to the roofline
A 30-foot tree is roughly the height of a small three-story building, or twice the height of an average ranch home
Two simple methods to verify before getting quotes. The shadow method: measure the tree’s shadow on level ground at a known time, then measure your own shadow at the same time. The ratio of your height to your shadow equals the ratio of the tree’s height to its shadow. The pencil method: hold a pencil at arm’s length, walk backward until the pencil exactly covers the tree from base to top, then rotate the pencil 90 degrees keeping the base at the tree’s base — wherever the pencil tip points on the ground is roughly the tree’s height away.
If the tree turns out to be 35 to 40 feet, expect quotes 25 to 50 percent higher than the ranges below. If it’s actually under 25 feet, expect 15 to 30 percent lower. Getting the height right before requesting quotes saves the back-and-forth of contractors revising estimates after they arrive.
Five scenarios for a 30-foot tree
Five removal scenarios for a 30-foot tree with cost ranges
What you’ll actually pay depends on which of these five situations matches your tree.
Scenario 1: Standard removal, easy access, healthy tree — $200 to $400.
The tree stands in an open yard with no structures or obstacles within the fall zone. The crew can drive equipment close to the work area. The tree is healthy enough that simple felling (cutting it to fall in a controlled direction) works without rigging. This is the cheapest realistic scenario for professional removal.
Scenario 2: Standard removal with minor complications — $400 to $600
A fence, garden bed, narrow side yard, or other obstacles mean the tree has to come down in pieces (sectional removal) rather than fall in one piece. Adds 1 to 2 hours of labor. Or the access is restricted, requiring smaller equipment and more hand-carrying of materials. Most suburban backyard removals fall in this range rather than the absolute minimum.
Scenario 3: Hazardous removal — $500 to $1,200
The tree is near power lines, leans toward a house or other structure, or sits in a position where any miscalculation creates real risk. Requires technical rigging — climbers attach to the tree, cut sections, and lower them with ropes rather than letting them fall. Sometimes coordination with the local utility company to de-energize lines temporarily. The premium reflects skill, time, and insurance exposure.
Scenario 4: Emergency or storm-damaged removal — $300 to $1,500
Two sub-scenarios here. A clean fallen tree (already on the ground, not on a structure) often costs less than a standing-tree removal because the dangerous part is over — the crew just cuts it up and hauls it away, typically $300 to $500. A tree that fell on a house, garage, or vehicle is the expensive end, requiring careful sectional removal to avoid further damage to the structure underneath. Same-day emergency response also adds 25 to 50 percent over scheduled service.
Scenario 5: Complex species or condition — $400 to $900
Palm trees have extensive root systems and unusually dense fibrous wood that takes longer to cut and dispose of. Multi-trunk trees (common in ornamental species) require multiple separate fellings. Dead trees are unpredictable — wood may be brittle and harder to control during sectional removal. Trees with significant insect damage, internal rot, or storm-weakened sections all push toward the higher end of this range.
The national average for a 30-foot tree across all scenarios sits around $350. That’s a useful headline number, but your specific situation matters more than the average.
What actually drives the price
Beyond the basic scenario, six factors create most of the variance between quotes for a 30-foot tree.
Access to the work area
The most consistently underestimated factor. A tree the crew can drive a chipper truck within 20 feet of costs less to remove than the same tree behind a fence with a 36-inch gate, because every section of trunk and every load of branches has to be carried by hand. Properties with rear yards accessible only through narrow side yards or basement-level entries can add 30 to 50 percent to the labor cost. Properties on hillsides or with stairs between the tree and the truck can add similar amounts.
Distance from structures, fences, and utility lines
A tree more than 15 feet from any structure can usually be felled in one piece — the cheapest method. A tree within the fall radius of any structure requires sectional removal, where climbers cut sections and rope them down to avoid damage. Trees within 10 feet of power lines may require coordination with the utility company. Trees overhanging structures or vehicles add the most cost because the crew has to control every section of falling debris precisely.
Tree health and condition
Healthy trees take more effort to cut than dying ones — denser wood, more resistance, longer cuts. But healthy trees are also more predictable, which can offset the labor cost. Dead, diseased, or storm-damaged trees may require specialty rigging because the wood breaks unpredictably. The net effect varies. Severe decay can add up to 15 percent to the final cost.
Trunk diameter at breast height (DBH).
Tree height matters, but trunk diameter matters more for the cutting time. A 30-foot tree with a 12-inch trunk takes meaningfully less chainsaw work than the same height with a 24-inch trunk. Wider trunks need more cuts, more chain wear, and more time. Some quotes are calculated partly per DBH inch — typically $4 to $10 per inch of diameter for cutting and stump grinding.
Disposal of debris
A 30-foot tree produces meaningful debris — typically a half-truckload of branches and trunk wood plus leaves and chips. Some quotes include hauling and disposal; some leave the wood and debris on-site for the homeowner to handle. Debris removal as an add-on typically runs $50 to $200 depending on quantity and disposal fees in your area.
Region and seasonal demand
Tree removal pricing varies regionally — high-cost metros (West Coast, Northeast) run 25 to 40 percent above national averages. Seasonal demand matters too. Spring and summer (peak landscape season) command premium pricing. Late fall and winter (slower season for tree services in most regions) often offer the best rates, with some companies offering 10 to 25 percent discounts during dormant months.
What’s included and what isn’t
What’s included and excluded in a typical tree removal quote
Most homeowners assume the headline price covers everything related to the tree. It usually doesn’t. Before signing any quote, verify which line items are included and which are extras.
Typically included in the base price:
Felling or sectional removal of the tree
Cutting the trunk into manageable pieces
Basic cleanup of the immediate work area
Hauling away large limbs and trunk sections (varies by company)
Standard insurance coverage during the work
Typically extra or excluded:
Stump removal or grinding: $60 to $350 separate. The stump remains in the ground unless this is added to the quote. Stump grinding (grinding the stump down to below ground level) is cheaper than full stump removal (extracting the entire root ball). For most homeowners, grinding is sufficient.
Root removal: $100 to $500+. Grinding the stump leaves roots in the soil. Full root extraction is necessary if you’re planning to replant in the exact location, install hardscape over the area, or disturb the soil for other construction. Most stump grinding jobs leave the roots in place.
Debris removal beyond hauling the trunk: $50 to $200. Branches, leaves, and chips. Some quotes include this; some leave a pile of debris for the homeowner to handle.
Wood chipping for mulch: $50 to $150. If you want the branches turned into usable mulch on-site, this is sometimes a separate service.
Travel fees: $50 to $200. If your property is more than 30 minutes from the company’s base.
Permit fees: $50 to $300. Some jurisdictions require permits for tree removal, especially for trees over a certain trunk diameter or for protected species. The contractor may pull the permit and pass the cost through, or expect you to pull it yourself.
Emergency or after-hours premiums: 25 to 100 percent more. Same-day or weekend service costs meaningfully more than scheduled service.
A complete quote for a typical 30-foot tree with stump grinding and debris removal in average conditions lands around $400 to $700. Quotes significantly below that range usually exclude one or more of the items above.
Why DIY tree removal isn’t worth it
Tree removal is one of the most dangerous home maintenance tasks anyone can attempt. The Centers for Disease Control documents that tree-related work has one of the highest fatality rates of any non-occupational activity, and most fatalities involve homeowners attempting DIY removals.
The math also doesn’t favor DIY for a 30-foot tree even setting aside safety. The equipment needed — a quality chainsaw ($300 to $600), safety gear (helmet, chaps, gloves, eye protection at $100 to $200), ropes and rigging if needed, and a chipper rental or arrangement for debris disposal — runs $400 to $800 for items most homeowners don’t already own. That’s already most of the cost of hiring a professional, before counting the time required to learn the work safely.
The actual labor savings on a 30-foot tree are also smaller than on larger trees. A professional crew completes a 30-foot tree removal in 2 to 4 hours. A first-time DIY attempt takes a full day or more, often involving multiple trips to home centers when something doesn’t work as expected. The hourly rate that justifies DIY here would be lower than most readers’ time is worth.
The rare cases where DIY makes some sense: very small trees clearly under 15 feet on bare ground far from any structure, fallen trees that already broke clean (just cutting and hauling), and homeowners with prior chainsaw experience and existing safety equipment. For a standing 30-foot tree, professional removal is the right choice.
If safety hasn’t been convincing, two financial considerations: homeowner insurance generally won’t cover damage caused by DIY tree work gone wrong, and many states’ workers compensation laws hold property owners liable if a friend or neighbor is injured helping with tree work that they aren’t licensed and insured for. The financial exposure on a worst-case DIY outcome can easily exceed $50,000.
When insurance might help
Tree removal is generally considered preventive maintenance and isn’t covered by homeowners insurance. Three exceptions worth knowing about.
A tree falls on your house, garage, or other covered structure
Most policies cover damage to the structure plus the cost of removing the tree from the structure (often capped at $500 to $1,000). The covered amount typically includes only the tree on the structure, not preventive removal of other trees or removal of the trunk after it’s lifted off the structure.
A neighbor’s tree falls on your property
Generally treated as your own insurance claim under your policy, not your neighbor’s, unless the neighbor was negligent (knew the tree was dangerous and didn’t act). Document everything if this happens — photos before any work, the contractor’s report, dates and weather conditions.
A tree falls due to a covered peril and damages other insured property
Vehicles, fences, sheds, landscaping above a certain dollar amount may be covered depending on policy specifics. Read the fine print.
What insurance generally won’t cover: preventive removal of a hazardous-but-still-standing tree, routine removal of healthy trees, removal of trees that fell during normal weather without damaging covered structures, or any tree work where the homeowner attempted DIY first and made the situation worse.
If a tree falls on your home, do not remove it before contacting insurance. Insurance adjusters typically want to assess the damage with the tree still in place. Removing the tree first can complicate or invalidate the claim.
Permits and protected trees
Some jurisdictions require permits to remove trees from private property, especially for trees over a certain trunk diameter (often 12 to 24 inches DBH) or for specific protected species. A 30-foot tree in a typical residential setting often has a trunk diameter of 10 to 18 inches, which falls in or near the permit-requiring range in many places.
Cities with notably strict tree ordinances include Atlanta, Austin, Portland, Seattle, much of California, and most of South Florida. Many counties and HOAs add their own requirements on top of city rules. Penalties for unpermitted removal of a protected tree can run thousands of dollars per tree, sometimes including required replacement plantings.
The practical workflow: before requesting tree removal quotes, call your local code enforcement office or check the city’s tree ordinance online. The contractor often handles permit applications as part of the project (passing the cost through), but verify before assuming. Trees on the boundary line between your property and a neighbor’s typically require both property owners’ agreement before removal.
How to compare quotes
Three quotes is reasonable for any tree removal project. Here’s how to make them comparable.
Specify the same scope to each contractor
“I want a 30-foot tree removed including stump grinding and debris hauling” generates comparable quotes. “I want a tree removed” generates incomparable quotes because each contractor will assume different inclusions.
Verify insurance and certification
Tree services should carry general liability and workers compensation insurance — request certificates if unclear. ISA Certified Arborist designation indicates training that matters for hazardous trees but isn’t necessary for routine removals.
Ask about cleanup standards
Some companies leave the work area swept and clean. Others leave wood chips and small debris. Worth asking specifically.
Check timeline and weather contingencies
Tree work is weather-sensitive. A reasonable contract specifies what happens if work is rained out — usually rescheduled at no additional cost.
Avoid door-to-door tree services after storms
Reputable tree services don’t typically need to canvass neighborhoods. Door-to-door operations after storms often lack proper insurance and licensing.
Frequently asked questions
How long does it take to remove a 30-foot tree?
A straightforward removal in good conditions takes 2 to 4 hours including cleanup. Sectional removal near structures can extend to a full day. Stump grinding, if included, adds another 30 to 60 minutes.
What’s the cheapest time of year for tree removal?
Late winter and early spring (typically January through March in most regions). Trees are dormant, easier to fell without leaves, and tree services have slower schedules. Discounts of 10 to 25 percent are common during this window.
Should I be home during the work?
Helpful but not strictly required. Being home lets you ask questions and confirm the work matches the quote. If you can’t be home, request photos of the completed work and a written confirmation that the cleanup matches the quoted scope.
Will tree removal damage my lawn?
Some lawn damage is normal — equipment leaves tracks, debris piles compact grass temporarily. Reputable contractors take precautions but can’t avoid all impact. Schedule lawn repair work after the tree work is complete, not before.
Can I keep the wood?
Most contractors will leave the trunk wood on-site if you want it for firewood, lumber, or other uses. Mention this when getting quotes — it sometimes reduces the price slightly because the contractor doesn’t have to haul and dispose of the wood.
What about the stump?
Stump grinding is the standard finish to a tree removal but is almost always quoted separately. Most contractors offer it for $60 to $200 on a 30-foot tree’s stump. Worth doing at the same visit since the equipment is already on-site.
Do I need to be concerned about my neighbor’s trees?
Trees within 15 feet of a property line that lean toward your property can sometimes drop branches on your side. Generally each property owner is responsible for their own trees, but documented hazards from a neighbor’s tree may have legal remedies in some jurisdictions. Worth a polite conversation with the neighbor before legal escalation.
How long should I wait between getting a quote and the work?
Quotes from reputable companies are typically valid for 30 days. Tree conditions can change quickly (storm damage, disease progression), so don’t sit on a quote for months and expect the same price. For non-urgent removals, scheduling 2 to 6 weeks out is normal.
What signs mean I should remove a tree soon rather than wait?
Visible cracks in the trunk, fungal growth at the base, large dead branches, sudden lean changes, root damage from construction, multiple seasons without leaves on substantial portions of the canopy, or any structural damage from a recent storm. Any of these warrant a tree assessment within weeks rather than months.
Smart bathrooms in 2026 are less about flashy gadgets and more about everyday ease. Think cleaner touchpoints, predictable water temperature, and layouts that stay uncluttered even in compact homes.
This article covers the upgrades people are actually choosing, from a sensor-led bathroom tap experience at the sink to coordinated fittings, better lighting, moisture control, and steam features that bring a calm reset into daily routines.
Smart Bathroom Technology Trends in India (2026 Edition)
Bathrooms in Indian homes are changing fast. It’s no longer a basic wet area; it is now expected to feel clean, calm, and easy to maintain. “Smart” does not mean complicated; it means small upgrades that save water, reduce mess, and make daily routines smoother.
Water Control that Feels “Set and Forget”
Another 2026 trend is more predictable water temperature. Thermostatic and pressure-balancing controls reduce sudden hot or cold shocks. For homes with fluctuating water pressure, this is a comfort feature, not a luxury. It also saves time because you do not keep adjusting knobs every few seconds.
Touchless Hygiene is Going Mainstream
The first tech most people notice is at the sink. A modern bathroom tap with sensor control helps reduce germ transfer and keeps the handle area cleaner, which is useful when kids are around or when guests visit. If you are not ready for sensors, even a smooth-lever mixer with a good cartridge feels like an upgrade because it gives steady control without drips.
Smarter Layouts for Small Bathrooms
In Indian apartments, the smartest bathroom is often the one that feels less cluttered. Wall-hung vanities, recessed shelves, and cleaner lines help the space look bigger. This is why in-wall plumbing and concealed fittings are rising. When fewer parts sit on the countertop, it takes less effort to keep the area dry and neat.
Minimal Hardware, Maximum Visual Calm
A big style shift is the move toward fewer visible fittings. Many homeowners are choosing bathroom tap sets that keep the sink area coordinated with the shower area, so the room looks intentional instead of mixed. Matching finishes across sink, shower, and accessories creates a premium look even with simple tiles.
Matte and brushed finishes are popular because they look modern and hide fingerprints better than high-shine chrome, though they still need regular wiping in hard-water cities.
Wall-Mounted Fittings that Free Up Space
If you want the basin area to look sharper instantly, wall-mounted spouts are a strong choice. Wall taps keep the counter clearer and make wiping easier because there is less hardware around the basin. They also pair well with vessel basins and floating vanities, which are common in compact bathroom designs.
The key is correct placement. A good installer will set the spout reach so that water falls near the drain, reducing splash and water marks.
Smart Mirrors and Lighting for Real-Life Routines
Smart mirrors are not only about showing the time. Anti-fog features, soft backlighting, and adjustable brightness help you get ready without harsh overhead lights. For Indian homes where bathrooms can be windowless, better lighting also improves safety. Warm light at night can make late routines calmer, while bright light in the morning helps you wake up without overheating.
Moisture control as “Hidden Tech”
In summer and monsoon months, the biggest bathroom problem is not style, it is humidity. Better exhaust fans, quiet ventilation, and anti-mould choices are becoming part of modern bathroom planning. A simple rule: if your mirror stays foggy for more than 10 minutes after a shower, you need stronger ventilation or a better habit, or both.
Water Saving, Without Thinking About It
In 2026, aerators and flow regulators cut water use without making the stream feel weak. Some fittings also offer timed flow, so water does not run while you are distracted.
Leak Alerts Before Damage Spreads
Basic sensors can warn you about dampness behind the vanity, and a smart shutoff valve can stop water during an overflow.
Steam is Becoming a Wellness Feature at Home
Wellness is a major 2026 theme, and steam is among the most-requested experiences. A steam shower can feel like a short reset at the end of a long day. It is not about staying inside for 30 minutes. Even 8 to 12 minutes can feel soothing when followed by a cool rinse. For families, set a timer and keep ventilation running to help the bathroom dry faster afterward.
Cabin-Style Steam for Consistent Comfort
If you want steam without turning the whole bathroom into a humid zone, enclosed cabins are gaining attention. A steam shower cabin keeps warmth contained, which can make the experience more consistent and reduce moisture spread across the room.
It also suits homes where the rest of the bathroom has storage, wood finishes, or paint that you want to protect from constant dampness.
Think of it as a controlled micro-space: easier to heat, easier to clean, and easier to air out.
A Note on Safe Use and Maintenance
Smart bathrooms still need basic care. Sensors and digital controls work best when water quality is managed, and fittings are cleaned gently. Use non-abrasive cleaners, especially on matte finishes.
For any steam feature, keep an eye on sealing and drainage so water does not sit in corners. If you have elders at home, prioritise anti-slip flooring, grab bars, and lighting that does not create glare.
Putting it Together Without Overdoing It
If you are planning a 2026 update, start with one core improvement, then build. Many people begin with better lighting and a touchless sink upgrade, then move to temperature-stable shower controls, and finally explore wellness options like a bathroom steam shower setup. Keep the experience simple, repeatable, and easy to maintain.
The Takeaway
Smart bathroom technology in India is moving toward comfort you can feel every day: cleaner touchpoints, steadier water, less clutter, better moisture control, and small wellness moments. You do not need a futuristic bathroom to benefit; you need a few thoughtful upgrades that fit your space and your routine.