Tag

Air Quality

Browsing

Residential properties built in the mid-20th century frequently incorporated materials containing asbestiform minerals due to their heat resistance and durability. While these minerals were considered a standard construction component for decades, historical usage patterns often left toxic residues in the very structures where families reside. Gaining a professional understanding of these risks is essential for modern homeowners planning updates or structural modifications. Effective management begins with recognizing the presence of these materials and minimizing opportunities for them to enter the living environment.

The history of asbestos in building materials

During the peak of its industrial use, developers utilized asbestos for its fire-retardant properties and low cost. It was integrated into cement, tiles, and insulating products across a vast array of architectural styles, creating a lasting legacy in the built environment that persists today. Because these materials were applied so pervasively, they remain hidden in countless homes that have not undergone thorough renovations.

Health risks associated with fiber inhalation

When asbestos-containing products are handled, cut, or crushed, microscopic fibers can be released into the environment, posing significant health risks if inhaled. These fibers are durable and can accumulate in lung tissues, potentially leading to chronic illness, scarring, or malignant conditions over long durations. Given that no exposure level is deemed safe for human health, prioritizing air quality is a strictly observed standard in building evaluation.

Why homes built before the 1980s are at higher risk

Properties constructed before the 1980s are statistically more likely to contain legacy materials that were heavily reliant on asbestiform additives. The regulatory climate shifted significantly in the 1970s, but older homes often retain their original flooring, roofing, and insulation systems. If you own an older home, it is a prudent practice to consider conducting professional assessments before modifying any structural elements or interior surfaces.

The importance of avoiding disturbance of suspect materials

Disturbing established materials that may contain asbestos risks liberating hazardous fibers, transforming inert components into an airborne danger. To protect occupants, homeowners should follow a cautious approach to maintenance and repairs. By ensuring suspect areas remain intact and properly sealed, the potential for exposure is eliminated. Consider these items to identify potential areas of concern:

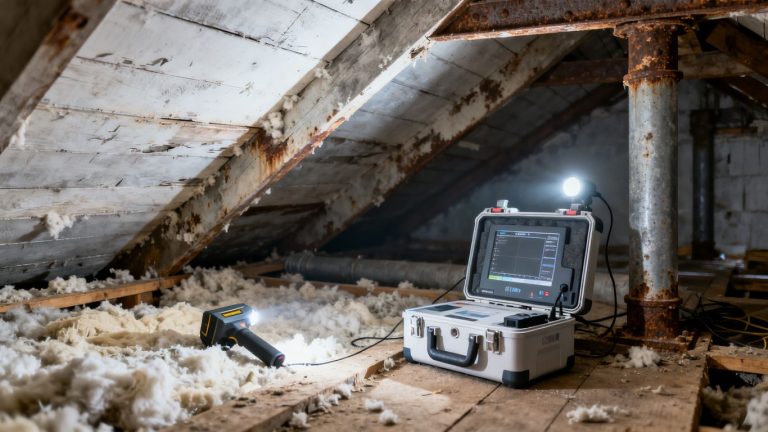
  • Attic and wall insulation commonly containing vermiculite
  • Flooring tiles secured with older mastic adhesives
  • Textured ceiling finishes and joint compounds
  • Exterior cladding systems or siding materials

By following these identification strategies, property owners maintain a secure environment before choosing to engage a service like AsbestosClear for comprehensive site assessments.

Identifying common materials that contain asbestos

Identifying materials suspected of containing asbestos relies on recognizing specific construction eras rather than visual cues alone. Since many of the most common products mimic standard gypsum or vinyl building supplies, homeowners often lack the visual data necessary for confirmation. Relying on an expert assessment prevents accidental exposure during renovation or general maintenance tasks. Utilizing companies like SafeSpace Testing often ensures that these materials are properly identified during pre-maintenance inspections.

Flooring components like vinyl tiles and adhesives

Many vinyl floor tiles and the resilient adhesives used to bond them historically contained asbestos fibers to improve flexibility and adherence. Replacing these floors during a renovation requires awareness, as scraping or removing the adhesive layer can release fibers directly into the surrounding air. Homeowners should approach carpet removal or tile replacement in older kitchens and mudrooms with extreme caution.

Insulation types including pipe lagging and vermiculite

Insulation found within pipes or attics often poses the highest risk if left in a friable state or if the material begins to deteriorate. Vermiculite, a granular insulation, potentially contains asbestos contaminants, making it a critical area for inspection if it is currently exposed in attic spaces. Professional handling is the only safe standard when assessing or disturbing these insulation types.

Roofing, siding, and external cladding materials

Exterior building envelopes, including cementitious siding shingles and roofing felts, frequently utilized mineral fibers to withstand weathering and structural impact. Though these materials are often considered non-friable when in sound condition, their removal or destruction creates an environmental hazard. Specialized contractors are required to address these elements to prevent uncontrolled release during exterior remediation.

Textured ceilings and joint compound applications

Decorative ceiling treatments, often described as popcorn ceilings, and the joint compounds used on drywall frequently contained raw fibers to provide texture and fire resistance. These surfaces can shed dust over time even without direct impact, especially as houses settle or age. If you suspect these materials are present, refrain from sanding or drilling into the surface until documentation confirms the composition.

When to perform professional testing before renovations

Planning a renovation project creates a unique situation where building materials must be disturbed to achieve the desired outcome, necessitating a clear safety strategy. Even minor tasks, such as replacing light fixtures or patching walls, can introduce enough dust to compromise residential air quality if asbestos is present. Engaging a provider like PureAir Labs offers verification, ensuring that the necessary precautions are taken prior to a project commencing. Testing effectively shifts the risk management process from guesswork to a data-driven approach.

How remodeling activities increase airborne contamination risks

Activities like power drilling, sawing, and demolition generate fine particulates that can easily carry potentially hazardous fibers throughout a dwelling. Without professional containment or assessment, these activities transform static building components into dynamic respiratory hazards. Understanding the link between physical disturbance and particle release is the core requirement for safe home improvement.

Distinguishing between household maintenance and major demolition

Routine maintenance, such as changing hardware, often involves minimal impact and poses fewer risks than major structural modifications or demolition. Understanding whether a project constitutes superficial maintenance or deep intervention helps determine if professional testing is legally and logistically necessary. Categorizing the project scale correctly ensures that safety precautions are appropriately tailored to the specific level of intervention.

Determining when a DIY approach is insufficient for safety

Attempting to collect samples or manage remediation without professional training often increases the danger to all occupants. Professional testing requires standardized extraction methods and high-efficiency particulate air (HEPA) equipment that typical DIY toolkits lack. A home asbestos guide provides clarity on when to step back and invite a licensed technician into the property to handle sample acquisition safely.

Evaluating the impact of renovation scale on liability

Major renovations change the physical landscape of a home, bringing significant legal and financial responsibilities if material hazards are mishandled. If contractors uncover hidden asbestos during a project, the delay and management costs can escalate if plans were not adapted early on. Proactive asbestos hazard awareness helps protect property owners from unforeseen liability and health-related repercussions after a project has finished.

Steps for professional asbestos inspection and sampling

Professional inspection is the process of locating, identifying, and quantifying potentially hazardous materials through rigorous field analysis. An inspector systematically maps the home, checking areas that match the profile of common hazardous construction for that era. By following established protocols, these experts document the presence of fibers without risking their own safety or that of the household. Referencing an asbestos testing checklist allows for transparency during the inspection process.

Selecting a certified asbestos building inspector

Certification ensures that the individual possesses the technical training to identify suspect materials and follow legally mandated sampling protocols. Homeowners should verify credentials to ensure the inspector adheres to local and regional safety regulations before scheduling an appointment. A qualified inspector brings essential tools for evaluating material composition and site-specific hazards accurately.

The process of non-destructive visual assessment

Initial inspection begins with a visual overview to assess the condition of materials and determine if sampling is necessary. Inspectors look for physical degradation, fiber exposure, and signs of past interference, keeping the structural components as undisturbed as possible during this stage. The result of this assessment informs the final testing strategy and provides the groundwork for any future management plan.

Maintaining containment during material sampling

When a material sample must be collected for lab submission, professionals utilize small-scale containment to ensure that internal air quality remains completely unimpacted. This approach prevents fibers from migrating to other parts of the home during the extraction interval. Strict adherence to industry safety standards remains a core requirement for any technician collecting samples from established materials.

Logistics for submitting samples to accredited laboratories

Once samples are safely secured, they are tracked via a chain of custody and transported to an accredited facility for definitive microscopic analysis. The laboratory processes these samples using standardized analytical techniques to determine the concentration and type of mineral present. Providing valid laboratory data is the only reliable way to clear a workspace for subsequent construction activity.

Interpreting laboratory results and managing hazards

Laboratory results represent the final check to determine if a material falls within the regulated category of asbestos-containing material. Understanding the data provided in these reports is essential for making informed decisions on whether to remove or contain the hazard. If the report comes back indicating asbestos test results, the property owner must follow prescribed abatement paths based on the material’s specific condition.

Understanding the threshold for regulated asbestos materials

Regulatory standards dictate specific percentages of asbestos content that trigger mandatory compliance and remediation procedures. Materials below this threshold might still require care, but they fall outside the strictest abatement requirements. Reviewing these threshold levels with an expert ensures that management strategies remain compliant and effective for the specific project needs.

Recognizing the difference between friable and non-friable materials

Friable materials can be crushed or reduced to powder by hand pressure, which makes them highly prone to releasing fibers into the air. Non-friable materials are bound in a matrix that prevents fiber release unless they are mechanically damaged, sawed, or abraded. This classification often dictates whether the material can be encapsulated in place or if it must be fully removed.

Options for managing asbestos in place

If the material is intact and not likely to be disturbed by future living activities, in-place management is often a valid and safe recommendation. This approach involves monitoring the status of the material periodically to ensure no decay or damage occurs over time. Keeping materials enclosed is an effective method for minimizing occupant exposure risk when remediation isn’t strictly necessary.

Deciding between encapsulation and professional removal

Encapsulation involves applying a seal to the surface of the material, which creates a protective barrier that locks fibers in place. If encapsulation is impractical due to extensive damage, professional removal becomes the primary method for ensuring long-term safety. A home safety guide helps clarify the professional decision-making process when comparing these two remediation paths.

Legal requirements and compliance for asbestos abatement

Navigating the legal landscape requires clear documentation of all diagnostic and removal activities to remain compliant with state and federal regulations. While some regions allow homeowners to manage their properties with fewer restrictions, professional intervention is often governed by strict notification and disposal laws. Failure to comply with these records requirements can complicate property resale or insurance validation. Each step of the abatement process must be handled by licensed entities to ensure that legal safety requirements are met.

Understanding local and state notification requirements

Notification protocols are in place to ensure that environmental agencies are informed before significant abatement begins, which helps protect the surrounding community from exposure. Depending on the scale of the project, contractors are often required to file documentation far in advance of the start date. Homeowners must ensure their contractors handle these administrative tasks to maintain a full record of compliance.

Roles and responsibilities of licensed abatement contractors

Licensed abatement contractors are legally tasked with executing the project according to approved remediation plans and safety guidelines. Their responsibilities include setting up negative pressure environments, using professional-grade personal protective equipment, and isolating the workspace from unaffected parts of the home. By assuming these tasks, the contractor ensures that the safety measures are properly implemented throughout the duration of the work.

Documentation needed for property records and resale

Comprehensive documentation, including laboratory analysis reports and clearance letters, constitutes the permanent legal record for a healthy building. These records serve as evidence of proper remediation, which becomes crucial when providing disclosures during a property sale or real estate transaction. Archiving these documents in the official property file protects future owners and confirms the home was handled with professional care.

Managing waste streams according to environmental regulations

Asbestos-containing waste must be handled and disposed of in specialized facilities that are equipped to bury or encapsulate it safely. Regulations strictly forbid disposing of this hazardous waste in standard residential trash systems or local landfills. Certified abatement contractors coordinate the logistics for authorized waste transport, ensuring that the legacy material is permanently and safely removed from the property site.

Continue Learning

Spray foam insulation costs $1 to $5 per square foot installed, with most homeowners paying $0.60 to $1.60 per board foot for open-cell foam and $1.30 to $3.10 per board foot for closed-cell foam. A typical attic insulation project runs $3,500 to $7,000. Whole-home spray foam insulation in a 2,000 sqft house runs $4,000 to $10,000 depending on which areas are foamed and which type is used. Garage insulation runs $3,000 to $8,000.

The pricing range looks wider than it actually is because two different units get used interchangeably. Some contractors quote per square foot of surface area; others quote per board foot (a 12″ × 12″ × 1″ measurement). The same job can produce a $0.80 per board foot quote and a $4 per square foot quote, and they may be roughly equivalent depending on how thick the foam is applied. This guide breaks down what spray foam actually costs by area of the home, when open-cell beats closed-cell (and when it doesn’t), and how to convert between the two pricing systems so you can actually compare contractor bids.

Open-cell vs closed-cell spray foam comparison

Spray foam insulation comes in two main types. They’re priced differently, perform differently, and are appropriate for different applications. Picking the right one is the single biggest cost decision in the project.

Open-cell spray foam: $0.60 to $1.60 per board foot installed

Lower density (about 0.5 pounds per cubic foot). The foam expands roughly 100x after spraying, filling cavities thoroughly. R-value is approximately 3.5 to 3.7 per inch — similar to fiberglass batt insulation per inch. Allows water vapor to pass through, which can be either an advantage (in some assemblies) or a disadvantage (in others). Sound dampening is excellent.

Best applications: above-grade exterior walls, interior partition walls, attic ceilings (under the roof deck) in moderate climates, and any area where soundproofing matters. Most cost-effective choice for whole-home insulation when moisture and high R-value aren’t critical concerns.

Closed-cell spray foam: $1.30 to $3.10 per board foot installed

Higher density (about 2 pounds per cubic foot). Expands roughly 30x — fills cavities more controllably. R-value of 6 to 7 per inch — nearly twice that of open-cell. Acts as an air barrier, vapor barrier, and moisture barrier all at once. Adds structural rigidity to walls. The premium product.

Best applications: below-grade walls (basements, crawl spaces), exterior walls in high-moisture climates, areas exposed to potential water intrusion, places where maximum R-value is needed at minimum thickness (rim joists, narrow cavities), and roof decks in cold climates. Required by code for some applications in some jurisdictions.

The honest summary: open-cell is the right answer for most above-grade residential applications. Closed-cell is the right answer for anything below grade, anything moisture-exposed, or anywhere structural strength matters. Picking the wrong one wastes money — closed-cell where open-cell would do the job costs roughly 2x more for marginal benefit; open-cell where closed-cell is needed creates moisture problems that cost far more than the original install.

Cost by application area for spray foam insulation


Whole-home averages mask big differences between specific applications. Here’s what each area actually costs.

Attic insulation: $1,500 to $7,000

The most common spray foam project. Pricing depends heavily on whether the attic is floored (insulating the floor) or unfloored with the roof deck insulated. Open-cell sprayed under the roof deck of a typical attic runs $3,500 to $5,000. Closed-cell on the same surface runs $4,500 to $7,000. Attics are usually the highest-impact application for energy savings because of how much heat is lost upward.

Crawl space insulation: $1,500 to $6,000

Almost always closed-cell because of moisture exposure. Encapsulating a crawl space with closed-cell foam combines insulation and moisture management into one project. Pricing depends on accessibility — tight crawl spaces under 24 inches add labor costs significantly. A typical 1,500 sqft home crawl space encapsulation runs $3,000 to $5,000.

Basement walls: $2,000 to $5,000

Closed-cell on below-grade walls. Provides insulation, vapor barrier, and air sealing in a single application. Often combined with rim joist sealing for a complete basement envelope. Pricing varies with whether existing insulation needs removal first ($500 to $1,500 in additional labor).

Wall insulation in new construction: $1,500 to $5,500 per 1,000 sqft of wall

Easiest application — open studs, full access, fast spraying. Open-cell at full stud cavity depth (3.5 inches in standard 2×4 framing) gives R-13. Closed-cell at 2 inches gives R-13 with room left in the cavity. Most efficient way to insulate new homes.

Wall insulation in retrofit (existing walls): $5,000 to $12,000+ per 1,000 sqft

Significantly more expensive than new construction because access is the problem — drywall must be removed and replaced, or the foam must be injected through small holes (which usually means a different material, injection foam, rather than spray foam). True spray foam retrofit is rare; most “retrofit insulation” is dense-pack cellulose or injection foam.

Garage insulation: $3,000 to $8,000

A single-car garage runs $3,000 to $5,000; a three-car garage runs $5,000 to $8,000. Often closed-cell on walls and ceiling because garages are typically uninsulated and exposed to temperature swings. Worth doing if the garage is attached to the house and shares walls with conditioned space.

Rim joist sealing: $300 to $1,500

The smallest and most cost-effective spray foam application. The rim joist (the band of wood at the perimeter of the basement ceiling) is a major source of air infiltration in most homes. Closed-cell foam at 2 inches on the rim joist of a typical home is one of the highest ROI insulation projects available — small total area, big air-sealing impact. Frequently bundled with basement work.

Whole-home insulation: $4,000 to $14,000+

A complete envelope using a mix of open-cell and closed-cell as appropriate to each area. Pricing varies enormously with home size, what’s already insulated, and what’s accessible. A 2,000 sqft home with attic plus rim joist plus basement walls (the highest-impact areas) runs $5,000 to $9,000. Adding wall insulation pushes the total higher.

The pattern: small targeted applications (rim joist, attic) deliver disproportionate energy savings relative to cost. Comprehensive whole-home applications cost more but deliver more total savings. Both are reasonable depending on budget and goals.

Reading quotes: board foot vs. square foot pricing

Board foot to square foot conversion reference


This is where homeowners get confused, and where contractors sometimes get away with quotes that aren’t actually comparable.

A board foot is a volume measurement: 12 inches × 12 inches × 1 inch. A square foot of surface area sprayed 1 inch thick equals 1 board foot of foam. A square foot sprayed 3 inches thick equals 3 board feet.

This matters because two contractors can quote the same job at different per-unit rates and have wildly different totals. Example: a 1,000 sqft attic sprayed at 3 inches thick:

  • Contractor A quotes $0.80 per board foot. Math: 1,000 sqft × 3 inches = 3,000 board feet. Total: $2,400.
  • Contractor B quotes $3.20 per square foot. Math: 1,000 sqft × $3.20 = $3,200. Total: $3,200.

Same job, different quotes, $800 difference. The board-foot quote is the better deal for this thickness. But if you’re spraying at 5 inches instead of 3, the math changes — 5,000 board feet at $0.80 is $4,000, while 1,000 sqft at $3.20 is still $3,200, and Contractor B is now cheaper.

To compare quotes accurately, you need to know two things: the rate (per board foot or per square foot) and the application thickness. Always ask each contractor to specify both. A quote that doesn’t tell you the thickness is incomplete — you’re trusting the contractor to spray the right amount.

Standard application thicknesses:

  • Open-cell wall cavities: full stud depth (typically 3.5 inches)
  • Open-cell attic ceilings (under roof deck): 5 to 7 inches for code-compliant R-value
  • Closed-cell rim joist: 2 inches
  • Closed-cell basement walls: 2 to 3 inches
  • Closed-cell crawl space walls: 2 to 3 inches
  • Closed-cell roof deck: 3 to 5 inches

If a contractor quotes thinner application than these standards, ask why. If they quote thicker, ask why. Both are legitimate in specific circumstances; neither should happen by accident.

What’s actually included in a typical quote

Beyond the foam itself, six line items appear (or should appear) on a complete quote.

Surface preparation: $0 to $1,500

Removing existing insulation, cleaning surfaces, masking off areas that shouldn’t be sprayed. Usually included; verify if it’s not.

Vapor barrier (if applicable): $0.65 to $1 per square foot

Closed-cell foam is its own vapor barrier. Open-cell foam in some assemblies (cold climates, certain wall configurations) requires a separate vapor barrier — usually a “vapor retarder primer” applied after the foam. Required by code in some jurisdictions for open-cell applications.

Mold remediation (if needed): $1,125 to $3,345

Spraying foam over moldy surfaces seals the mold in. Pre-existing moisture or mold problems must be addressed before foam application. A reputable installer will refuse to spray over visible mold and will identify the remediation as a separate cost.

Code inspection: $50 to $500

Required in most jurisdictions for spray foam installation. Sometimes included in the contractor’s quote, sometimes the homeowner pulls and pays separately.

Cleanup and waste disposal: $200 to $600

Spray foam projects generate waste — drop cloths, masking materials, partially-cured foam scraps. Reputable contractors include this; budget contractors sometimes don’t.

Travel and mobilization: variable

Rural or remote properties may incur travel surcharges. Urban projects with parking or staging challenges may include access fees.

A complete quote for a 1,500 sqft attic project with closed-cell foam should include the foam itself plus surface prep, vapor management as required, cleanup, and any code inspections. Total: $5,000 to $7,500 typical. Significantly cheaper quotes are usually missing line items.

Energy savings and payback: the honest math

Most spray foam pieces cite a 5 to 7 year payback period. That figure is sometimes true and frequently optimistic. Real payback depends on five variables.

What you had before

Replacing fiberglass batts (R-13) with open-cell spray foam (R-13) saves almost nothing on heat conduction — the R-values are similar. The savings come from air sealing, which fiberglass doesn’t provide. Replacing nothing (an uninsulated space) with spray foam saves dramatically more.

Climate zone

Heating and cooling load varies enormously by region. The same insulation upgrade saves $200 per year in mild climates and $1,200 per year in extreme climates. Energy Star and DOE provide climate-zone-specific calculators that produce more honest estimates than the generic “5 to 7 years” claim.

Fuel cost

Heating with electric resistance versus natural gas versus oil produces dramatically different annual costs and dramatically different payback math. A homeowner heating with $0.30/therm natural gas saves less in absolute dollars than one heating with $0.50/kWh electric resistance heat.

What was leaking

A home with significant air infiltration — gaps, drafts, uninsulated rim joists — sees enormous improvement from spray foam’s air-sealing properties. A home that was already tight with new windows, weatherstripping, and good fiberglass insulation sees marginal improvement.

Comfort gains separate from dollar savings

Spray foam often improves comfort (consistent temperatures, reduced drafts, better humidity control) more than it improves utility bills. Worth budgeting for if comfort matters, even when raw payback math is mediocre.

Realistic payback estimates by application:

  • Rim joist sealing: 2 to 4 years (highest ROI of any insulation upgrade)
  • Attic insulation in cold climates: 4 to 8 years
  • Attic insulation in mild climates: 7 to 12 years
  • Whole-home retrofit in cold climates: 6 to 10 years
  • Whole-home retrofit in mild climates: 12 to 20 years (or longer)
  • New construction whole-home: payback measured in comfort and resale value rather than just utility savings

If a contractor quotes a “5-year payback” without asking about your current insulation, climate zone, or fuel source, the number is generic, not specific to your situation.

Spray foam vs. fiberglass: when each makes sense

Spray foam costs roughly 3 to 4 times what fiberglass batt insulation costs for equivalent area. The premium is real and not always justified.

Choose spray foam when:

  • The space is air-leaky and air sealing matters (attic, crawl space, rim joist)
  • The space is exposed to moisture (basement, crawl space, below-grade walls)
  • Cavity dimensions are irregular and fiberglass batts won’t fit cleanly
  • Maximum R-value at minimum thickness is needed (closed-cell)
  • You’re doing whole-home weatherization and want air sealing built in

Choose fiberglass when:

  • The application is straightforward (open stud cavities, accessible attic floor)
  • Budget is the primary constraint
  • Air sealing is being addressed separately (caulk, weatherstripping, separate air barrier)
  • DIY installation is desired

The honest comparison: spray foam is the better product for most applications. Fiberglass is the better value for most applications. Both reasoning lines are correct depending on which factor matters more for the specific homeowner.

DIY: where it actually makes sense

DIY spray foam kits exist and are heavily marketed. Brand names include Touch’n Foam, Foam It Green, Tiger Foam, and Dow Froth-Pak. A two-component kit covers roughly 200 to 600 board feet for $300 to $800. They produce real spray foam — same chemistry as professional product.

DIY-reasonable: Rim joist sealing (small area, simple geometry, high impact), small targeted applications (sealing around plumbing penetrations, small attic areas, sealing a single wall section). A homeowner with a careful approach can do these well.

DIY-possible but mediocre: Attic ceiling insulation in a small home, basement rim joists across a longer perimeter. Possible to DIY but achieving consistent thickness and quality is harder than professional installation.

DIY-bad-idea: Whole-home insulation, anything in a finished space, anything requiring large total foam volume, anything where you don’t have full access to the application surface. The kits aren’t designed for these scales — they cure faster than larger truck-mounted systems, application is harder to control, and waste rates are higher. The cost savings vs. professional install evaporate above roughly 600 to 800 board feet.

Safety considerations for DIY: Spray foam isocyanates are respiratory sensitizers — proper full-face respirator with organic vapor cartridges is required, not optional. Skin protection (full coveralls, gloves) is required. Adequate ventilation during application and curing is required. People with asthma or chemical sensitivities should not DIY spray foam. Pets and children should not be in the home during application or for 24 hours after.

Off-gassing, curing, and chemical considerations

Worth mentioning briefly because it’s underdiscussed in cost articles.

Spray polyurethane foam is generally considered safe after proper curing, but the curing process matters. Properly mixed foam cures within 24 hours and is inert thereafter. Improperly mixed foam (wrong A:B ratio, wrong temperature during application, contamination) can fail to cure fully and continue off-gassing for months or years.

Reports of incomplete-cure problems exist and have led to lawsuits and homes that became uninhabitable. The risk is small for properly trained installers using calibrated equipment but isn’t zero.

Mitigation: hire installers certified by the Spray Polyurethane Foam Alliance (SPFA), verify equipment calibration is recent, ensure application happens within manufacturer-specified temperature ranges, and avoid the home during application and for 24 hours after. Ventilate thoroughly for the first week.

Modern formulations have lower VOC content than older versions. Soy-based and water-blown formulations exist for homeowners with chemical sensitivities and run modestly higher in price.

Frequently asked questions

How long does spray foam insulation last?

Properly installed and cured, 80+ years. The International Association of Certified Home Inspectors estimates the lifespan at “the life of the building.” Unlike fiberglass, it doesn’t settle, sag, or lose R-value over time. This longevity is part of why the higher upfront cost can be worth it over decades of homeownership.

Will spray foam insulation increase my home value?

Yes, modestly. Spray foam is a recognized upgrade that appraisers note positively. The value increase rarely matches the install cost dollar-for-dollar, but combined with energy savings and comfort improvements, it’s a reasonable home investment.

Can spray foam be installed in cold weather?

Yes, with caveats. Closed-cell foam can be applied at lower temperatures than open-cell. Manufacturer specifications dictate minimum substrate temperatures (typically 40°F to 60°F). Application below specifications causes incomplete curing. Reputable installers refuse cold-weather work outside specifications; budget installers sometimes don’t, which is how curing problems happen.

Is spray foam waterproof?

Closed-cell foam is essentially waterproof (it’s a vapor barrier). Open-cell foam absorbs water and isn’t waterproof. This is the central reason for choosing closed-cell in below-grade and moisture-exposed applications.

Will spray foam stop pests?

It blocks small entry points (mice, insects), making it a meaningful but not complete pest barrier. It’s not pesticidal — it doesn’t kill or repel pests, just denies them access through sealed gaps. Existing pest problems need to be addressed separately before foam application.

Can I add spray foam over existing insulation?

Generally yes for attic applications (spray over fiberglass batts on the attic floor or under the roof deck). Generally no for wall cavities — spraying foam against existing fiberglass creates uneven application and traps moisture. For walls, existing insulation should be removed before foam application.

Will my homeowner’s insurance be affected?

Sometimes. Some insurers offer discounts for homes with spray foam due to fire-resistance and energy efficiency. Some require notification because the modification changes the home’s risk profile. Notify your insurer and ask about both possibilities.

Does spray foam create a “too tight” home?

Modern building science recommends “build tight, ventilate right” — well-sealed homes need mechanical ventilation (ERV or HRV systems) to maintain healthy indoor air. A spray-foamed home without adequate ventilation can develop indoor air quality problems. If you’re insulating comprehensively, budget $1,500 to $4,000 for an ERV/HRV system if your home doesn’t already have one.

How do I find a reputable installer?

Look for SPFA certification, check verified reviews on multiple platforms, ask to see recent project photos, request references from completed projects in the past year, and verify the contractor carries general liability and workers’ comp insurance. Avoid the lowest bidder if the spread between quotes exceeds 25 to 30% — that usually indicates corner-cutting on materials or application thickness.

In any busy workplace, the floor coverings endure significant daily wear. Constant foot traffic leads to a steady accumulation of dirt, dust, and allergens. Establishing a regular maintenance schedule is crucial for preserving both appearance and indoor air quality.

Routine vacuuming only addresses surface debris. A thorough, professional service reaches deep-seated contaminants that standard methods miss. Experts like Crystal Cleaning Servicing Ltd specialise in this deeper level of care for textile floors.

This maintenance is a strategic investment in workplace health and professionalism. It directly impacts staff wellbeing and the impressions visitors form. Providers within the Crystal Group understand this link between a clean environment and business success.

This guide will explore the evidence-based factors that determine optimal servicing schedules. It covers recommendations for various business types and traffic patterns. The role of specialist services in upholding high standards is also a key focus.

Proper care extends the life of floor investments and promotes a productive atmosphere. It is an essential component of modern facility management.

Key Takeaways

  • A regular maintenance schedule is vital for flooring in areas with heavy footfall.
  • Deep-seated dirt and allergens affect both visual appeal and indoor air quality.
  • Professional services remove contaminants that routine vacuuming cannot reach.
  • This upkeep is a strategic investment in employee health and business image.
  • Optimal frequency depends on specific usage patterns and environmental factors.
  • Engaging specialists helps maintain high standards and can prolong flooring life.
  • A well-maintained workspace supports productivity and creates a positive impression.

The Importance of Clean Carpets in a Professional Office Environment

The state of a workspace’s flooring plays a pivotal role in shaping both visitor perceptions and internal culture. Maintaining pristine textile floors is a foundational element of a professional office environment.

Enhancing First Impressions

When clients or visitors enter a business space, the condition of the floor is often immediately noticeable. Fresh, well-kept carpet communicates a strong sense of professionalism and organisational competence.

It signals attention to detail and a commitment to high standards. Conversely, stained or worn flooring can send negative messages about a company’s values before any formal interaction begins.

Impact on Employee Morale and Productivity

For employees, a clean and tidy environment directly influences morale and job satisfaction. Studies show staff in well-maintained spaces report better focus and lower stress levels.

The cleanliness of the carpet also affects indoor air quality. Reducing trapped allergens and pollutants supports health, which can minimise sick days and enhance cognitive performance.

This investment in appearance and cleanliness yields measurable returns through improved brand reputation and employee retention.

Understanding Commercial Carpet Cleaning Frequency for High-Traffic Offices

Determining how often to schedule professional textile floor care is more science than guesswork. It is a calculated response to the unique demands of a busy workplace.

Defining the Term and Its Relevance

Here, cleaning frequency refers to the planned interval for deep maintenance. It is a systematic schedule, not a random event.

This schedule is built on usage patterns and specific business needs. A one-size-fits-all approach does not apply to modern office environments.

Areas like reception lobbies and main corridors face constant foot traffic. They gather dirt and experience fibre wear much faster than private rooms.

Therefore, their required frequency of care is significantly higher. Recommendations can range from monthly sessions to semi-annual ones.

Setting the right interval is a strategic financial decision. It balances upfront cleaning costs against the huge expense of early replacement.

This proactive planning prevents irreversible damage to carpets. It maintains hygiene and protects the company’s flooring investment.

Understanding these requirements allows managers to move from crisis reactions to controlled upkeep. A tailored programme sustains appearance and longevity.

Factors Influencing Cleaning Frequency in Commercial Settings

The optimal interval for deep textile care is not arbitrary. It is shaped by specific environmental and operational factors unique to each workplace. Key areas are affected differently.

Foot Traffic and Usage Patterns

Pedestrian volume is a primary driver. High-use areas, such as lobbies, experience rapid dirt and grit accumulation. This debris grinds into carpet fibres, causing premature wear over time.

Each person entering brings in outdoor contaminants. Assessing daily foot traffic patterns allows managers to prioritise the busiest areas for more regular servicing. Consistent foot traffic in corridors demands focused attention.

Carpet Material and Industry Requirements

The construction and type of flooring material significantly affect its needs. Dense, commercial-grade piles resist staining and can often tolerate longer time between services.

Certain industries and the type of business face stricter mandates. Healthcare settings typically require more frequent professional intervention. Seasonal weather, like British rain, also increases the need for timely cleaning to combat dampness and ground-in dirt.

Recommended Cleaning Schedules for Various Business Types

Scheduling professional maintenance is a strategic decision that varies by business type and space usage. Industry benchmarks provide a useful starting point for managers.

These guidelines help protect flooring investments and uphold hygiene standards. They should be adapted based on actual observed wear.

High-Traffic Areas in Retail and Offices

Zones with constant pedestrian flow need the most attention. This includes reception lobbies, main corridors, and communal break rooms.

Professionals often advise a deep service every one to three months for these spaces. Retail environments may need more frequent sessions during peak trading periods.

This regular upkeep prevents dirt from becoming permanently embedded. It maintains a fresh, professional appearance for clients and staff.

Low-Traffic Zones and Private Office Spaces

Areas with limited use can follow a less intensive schedule. Executive suites, specialist workrooms, and archive storage are typical examples.

Here, a professional service every six to twelve months is usually sufficient. This schedule works well when combined with consistent daily vacuuming.

It balances thorough care with operational efficiency. The long-term condition of the flooring material is preserved.

Business Type Recommended Interval Key Considerations
Healthcare Facilities Every 1-3 months Infection control protocols demand stringent hygiene.
Retail & High-Street Shops Every 1-3 months Customer traffic and seasonal peaks increase soiling.
Corporate Offices Every 6-12 months High-traffic zones like lobbies may need quarterly care.
Hotels & Hospitality Every 3-6 months Moderate public traffic and aesthetic standards are key.
Schools & Education Every 3-6 months Balances heavy student use with term-time scheduling.

Deep Cleaning Methods and Professional Techniques

The distinction between surface cleaning and a genuine deep clean lies in the technology and techniques applied. Daily care cannot remove ingrained contaminants. Professional deep cleaning is essential for a full restoration.

Experts use advanced methods to tackle deep-seated grime. These processes rejuvenate flooring and significantly improve hygiene.

Hot Water Extraction Benefits

Often called steam cleaning, hot water extraction is a leading method. It injects a mix of heated water and detergent deep into the pile.

Powerful vacuum suction then performs the extraction. This removes dissolved dirt, allergens, and bacteria.

The key benefits are thorough sanitisation and extended material life. It is highly effective for heavily soiled areas.

Dry Foam and Encapsulation Techniques

These methods use specialised foams or polymers. The cleaning agent crystallises around dirt particles upon drying.

The encapsulated debris is then easily vacuumed away. The main advantage is very fast drying time.

This allows for minimal disruption to daily business operations. It is a superb choice for spaces that need quick re-use.

Method Key Advantage Ideal For
Hot Water Extraction Most thorough sanitisation & pollutant removal High-soil areas, spaces requiring deep hygiene
Dry Foam/Encapsulation Rapid drying & minimal operational downtime Busy environments needing fast turnaround

A reputable professional carpet cleaning service will assess the situation. They recommend the most appropriate technique for the best result.

Daily Maintenance and Preventative Measures

The longevity and appearance of office flooring hinge on diligent everyday care and swift incident response. A robust routine between professional visits is essential for protecting the investment.

Consistent surface maintenance stops minor issues from becoming major problems. It directly extends the intervals needed for deeper servicing.

Best Practices for Daily Vacuuming

Daily vacuuming is non-negotiable for zones with heavy use. It removes abrasive dirt and debris before they grind into the pile.

For thorough results, use slow, overlapping passes. A commercial-grade machine with HEPA filtration is ideal. This captures fine particles and improves air quality.

Placing quality mats at every entrance traps a significant amount of soiling. This simple step reduces the daily cleaning burden considerably.

Effective Spot Cleaning Strategies

Prompt action is critical when spills occur. Staff should be trained to address accidents immediately, preventing stains from setting.

A well-stocked kit in accessible locations supports a quick response. The universal rule is to blot, never rub, any liquid.

Stain Type Immediate Action Follow-Up Treatment
Coffee Blot thoroughly with an absorbent cloth. Apply a diluted white vinegar solution, then blot dry.
Ink Dab carefully from the outer edge inward. Use a cotton swab with a small amount of rubbing alcohol.
Grease or Oil Sprinkle talcum powder to absorb the excess. Gently clean with a mild, pH-neutral detergent.
General Food & Drink spills Blot, working from the outside towards the centre. Rinse the area with cold water using a clean cloth.

This proactive approach saves time and money. It preserves the carpet‘s look and avoids costly specialist stain removal later.

Customised Cleaning Programmes and the Role of Professional Services

Engaging a professional team transforms textile care from a generic task into a strategic asset. A one-size-fits-all schedule rarely meets the specific demands of a dynamic business. This is where expert cleaning services provide immense value.

They develop bespoke maintenance plans that align with operational and financial goals. This partnership ensures flooring receives precise attention where and when it is needed most.

Tailoring Schedules to Specific Needs

Reputable providers begin with a thorough site assessment. They analyse footfall patterns, material specifications, and client expectations. This data informs a customised programme.

Multiple variables are considered to minimise disruption and maximise value. The table below outlines key factors that shape a tailored plan.

Variable Description Impact on Programme
Operational Hours The times a business is open to staff and clients. Dictates when professional cleaning can occur, often scheduled for evenings or weekends.
Seasonal Usage Fluctuations Periods of significantly higher or lower foot traffic. Adjusts cleaning frequency; more sessions may be booked before peak seasons.
Budget Allocation How maintenance costs are spread across financial periods. Influences the phasing of services to align with cash flow.
Specific Problem Zones Areas prone to spills, stains, or heavy soiling. Receives targeted, more frequent carpet cleaning attention within the overall plan.

This tailored approach eliminates wasted effort. High-need zones get focused care, while low-traffic areas are maintained efficiently.

An ongoing relationship allows the professional carpet specialist to refine the plan. They adapt to changing conditions and evolving facility needs.

Such a partnership provides accountability and consistent quality. It turns a reactive cost into a proactive component of savvy facility management.

Additional Considerations for UK Commercial Offices

For businesses across the UK, local weather patterns present a unique set of challenges for interior upkeep. Planning a maintenance schedule requires attention to these regional factors over time.

Local Climate and Environmental Factors

The UK’s frequent rainfall and moderate humidity significantly affect textile floors. Damp conditions during autumn and winter introduce extra moisture into the environment.

This can lead to mould development and unpleasant odours if not addressed. Accelerated wear from ground-in damp debris is also a risk.

Implementing robust entrance matting systems is therefore critical. It captures moisture and dirt before they reach interior areas, preserving hygiene.

Budget and Long-Term Maintenance Benefits

Viewing professional servicing as a preventative investment yields clear financial advantages. Systematic care can extend a floor’s life from a typical 5-7 years to 10-15 years.

This represents substantial capital expenditure deferral. Regular maintenance also prevents allergen build-up, supporting better indoor air quality for work.

Approach Impact on Flooring Life Long-Term Cost Implication
Neglect & Reactive Care Premature wear, 5-7 year lifespan High replacement costs, poor hygiene
Regular Professional Maintenance Extended life, 10-15 year potential Capital deferral, sustained work environment quality

This proactive strategy removes allergens and pollutants, creating a healthier place to work. It turns an operational cost into a smart facility investment.

Conclusion

Ultimately, a tailored maintenance programme is a smart business practice. Keeping floor textiles in excellent condition is vital for hygiene and professionalism. This strategic choice directly impacts staff wellbeing and the impressions formed by visitors.

Combining professional deep cleaning with consistent daily upkeep is essential. This approach extends material life and controls the build-up of allergens and stains. It turns a reactive cost into a proactive investment in the work environment.

Facility managers should assess their current practices against evidence-based guidelines. Engaging experts to develop a custom plan protects the flooring investment. It also supports broader organisational goals for a productive office.

In the long term, clean carpets contribute to a healthier, more attractive place to work. They reflect a commitment to cleanliness and attention to detail that benefits everyone.

FAQ

How often should the flooring in a busy office be professionally cleaned?

For areas with constant use, a deep clean every three to six months is typically advised. This regular schedule removes ingrained dirt and allergens that daily vacuuming misses, preserving the material’s appearance and extending its life. The exact timing depends on specific footfall and the type of fabric installed.

What are the main benefits of hot water extraction for office upholstery?

Hot water extraction, often called steam cleaning, is a highly effective professional method. It uses heated water under pressure to flush out deep-seated grime, stains, and bacteria. This technique promotes a healthier workspace by removing allergens and revitalises the look of tired, high-traffic zones.

What daily upkeep is essential between professional services?

Consistent daily vacuuming with a quality machine is crucial for surface-level dirt and debris. Promptly addressing spills with appropriate spot cleaning techniques prevents permanent marks. These practises maintain general cleanliness and support the longer-term results of a specialist deep clean.

Does investing in regular professional maintenance save money?

Yes, absolutely. Scheduled specialist care is a cost-effective strategy. It prevents the accelerated wear and tear caused by ground-in grit, protecting your investment in office furnishings. This proactive approach avoids the need for premature, costly replacement and upholds a professional environment.

How do UK climate factors affect cleaning schedules?

The damp British weather can lead to more moisture and dirt being tracked indoors. This can increase soiling rates and the potential for mould or mildew in fibres. Offices may need to consider slightly more frequent cleaning during wetter seasons to maintain optimal hygiene and fabric condition.

Climate control plays a crucial role in ensuring comfort inside your home, both during winter and summer. During winter, when temperatures fall, and during summer when temperatures rise, a sound HVAC system assists in sustaining comfort at home. Proper care of heating and cooling systems provides not only comfort but also energy efficiency and long-term operability of equipment. In Rock Island, homeowners who utilize heating and cooling in Rock Island take advantage of improved air circulation, temperature balance, and lower operating costs.

The Role of Effective HVAC Solutions

Modern HVAC systems must maintain air quality and energy efficiency while regulating indoor temperature. A properly installed and regularly maintained system can be depended on to perform as expected when the seasons change.

In Rock Island, regular care and monitoring of heating and cooling helps keep systems reliable and able to withstand weather climates.

Elements of the system that impact performance:

  • Thermostat Control: Smart or programmable thermostats help keep temperatures steady and avoid wasting energy.
  • Air Filtration Systems: Quality filters trap dust, pollen, and other particles in the air to help improve indoor air quality & system efficiency.
  • Ductwork Efficiency: Sealed and insulated ducts make sure conditioned air enters every part of the house.

Preventive Maintenance for Long-Term Performance

Routine inspections are crucial; they allow you to ensure that minor problems never become major mechanical breakdowns. Maintaining preventive maintenance also allows homeowners to avoid unexpected breakdowns during peak weather seasons.

Inspection of systems that heat and cool Rock Island homes targets both performance, safety,y and efficiency from the technicians.

Important maintenance tasks include:

  • System Cleaning: Dust particles settling inside coils and vents can block normal air flow, reducing system efficiency.
  • Component Inspection: Checks are made to ensure motors, fans,and electrical connections are functioning normally.
  • Performance Testing: To confirm reliable operation, technicians assess airflow, thermostat accuracy, and system cycling.

While these maintenance steps support temperature control efficiency, they also assist in prolonging equipment lifespan.

State-of-the-Art HVAC and Energy Efficiency

The HVAC technology has been upgraded, and you can use it in a way less powered. Replacing old appliances can drastically cut down on energy use, as well as boost comfort levels in your home.

Homeowners willing to put in the updated heating and cooling Rock Island solutions can also see improved reliability, as well as lower utility energy costs.

Examples of efficiency upgrades include:

  • High-Efficiency Furnaces and Air Conditioners: Modern units can run much more efficiently with higher energy ratings.
  • Variable-Speed Technology: Systems modulate airflow, ramping it up or down to keep the environment comfortable without cycling on and off.
  • Smart Climate Control Systems: Smart thermostats enable remote monitoring and automated temperature settings.

Conclusion

In every home, reliable indoor climate control is critical to comfort, safety, and energy efficiency. Year-round reliable HVAC run time is achievable when homeowners invest in routine maintenance, system inspections, and modern upgrades. This can be done using professional service providers, such as All Seasons Heating & Cooling. provides relevant knowledge and assistance to ensure your heating and cooling systems are functioning properly in Rock Island, allowing homeowners to keep their equipment running well while providing constant indoor comfort throughout all seasons.

Most homeowners focus on visible cleaning tasks like vacuuming floors, wiping surfaces, and washing windows. However, one of the most important parts of a home’s air circulation system often remains out of sight: the air ducts. These hidden passages distribute heated and cooled air throughout the house, helping maintain a comfortable indoor environment year-round.

Over time, air ducts can collect dust, debris, pet hair, pollen, and other airborne particles. As the HVAC system circulates air through these ducts, these particles may re-enter the living space and affect indoor air quality. In some cases, buildup inside the ducts can even reduce airflow efficiency.

This is why many homeowners eventually consider whether they should use a professional to clean your air ducts. Professional air duct cleaning helps remove accumulated debris and ensures that the system continues operating efficiently.

Understanding when duct cleaning is necessary, how often it should be performed, and what benefits it offers can help homeowners make informed decisions about maintaining a healthy home environment.

Understanding What Air Ducts Do in Your Home

Air ducts are an essential part of a home’s heating and cooling system. They form a network of channels that move air from the HVAC unit into various rooms throughout the house.

When the furnace or air conditioner runs, air flows through the ducts and exits through vents located in each room. This circulation helps maintain consistent indoor temperatures and ensures proper ventilation.

However, the air that moves through the ducts carries small particles along with it. Dust, pollen, and other debris naturally accumulate inside the ductwork over time. Because ducts are hidden behind walls and ceilings, this buildup often goes unnoticed for years.

As debris collects inside the system, airflow may become restricted and air quality may decline. This is one reason homeowners eventually decide to use a professional to clean your air ducts as part of regular HVAC maintenance.

Signs Your Air Ducts May Need Cleaning

Although air ducts do not need constant cleaning, certain warning signs may indicate that the system requires attention.

One of the most noticeable signs is excessive dust buildup in the home. If surfaces become dusty again shortly after cleaning, the HVAC system may be circulating dust particles from inside the ducts.

Another common sign is uneven airflow. When ducts become partially blocked by debris, certain rooms may receive less air than others.

Other indicators that air ducts may require professional cleaning include:

• Visible dust or debris around air vents
• Persistent musty or stale odors when the HVAC system runs
• Increased allergy symptoms indoors
• Reduced airflow from vents

These signs suggest that it may be time to use a professional to clean your air ducts to restore airflow and improve indoor air quality.

How Dirty Air Ducts Affect Indoor Air Quality

Indoor air quality plays an important role in overall comfort and health. When air ducts contain excessive dust or debris, these particles may circulate through the home every time the HVAC system operates.

Although HVAC filters capture many airborne particles, some contaminants may still pass through the system and settle inside the ducts.

Over time, these materials can accumulate and create a source of indoor air pollution.

Poor indoor air quality may contribute to several household issues. Residents may experience increased allergy symptoms, coughing, or general discomfort when breathing air that contains excessive dust.

Cleaning the duct system removes these contaminants and helps improve the overall quality of indoor air.

This is another reason many homeowners eventually use a professional to clean your air ducts as part of maintaining a healthy living environment.

Situations That Require Immediate Duct Cleaning

While routine cleaning may be recommended periodically, certain situations make professional air duct cleaning especially important.

Home renovations are one example. Construction work produces large amounts of dust and debris that can easily enter the duct system. If ducts are not cleaned afterward, this debris may circulate through the home for months.

Another situation involves mold growth. Moisture inside ducts can encourage mold development, which may affect air quality if not addressed promptly.

Homes with pets may also benefit from occasional duct cleaning, especially when pet hair and dander accumulate within the HVAC system.

Additionally, if a home has recently experienced water damage or flooding, the duct system should be inspected and cleaned if necessary.

In these situations, it is especially important to use a professional to clean your air ducts to ensure the system is thoroughly inspected and cleaned safely.

How Professional Air Duct Cleaning Works

Professional air duct cleaning involves specialized equipment designed to remove debris from deep within the HVAC system. Unlike basic household cleaning tools, professional equipment can reach areas that are otherwise inaccessible.

Technicians typically begin by inspecting the duct system to identify areas with significant buildup. They then use high-powered vacuum systems to remove dust and debris from the ducts.

Special brushes or air tools may be used to loosen stubborn particles attached to the duct walls.

The cleaning process may also include cleaning air vents, registers, and other HVAC components connected to the duct system.

This thorough approach ensures that contaminants are removed effectively and that airflow through the system improves.

For this reason, many homeowners choose to use a professional to clean your air ducts rather than attempting the task themselves.

How Often Should Air Ducts Be Cleaned?

The frequency of air duct cleaning varies depending on several factors, including household size, pets, environmental conditions, and HVAC system usage.

In general, many experts suggest inspecting duct systems every few years to determine whether cleaning is necessary.

Homes with pets, allergies, or high dust levels may benefit from more frequent cleaning. In contrast, homes with minimal dust and regular HVAC maintenance may require less frequent service.

Homeowners should also consider cleaning the ducts after major events such as remodeling projects or significant water damage.

Regular inspections help determine the appropriate schedule for cleaning.

When professional service is needed, it is best to use a professional to clean your air ducts to ensure the system receives proper care.

Additional Benefits of Clean Air Ducts

Professional duct cleaning offers several benefits beyond improved air quality. When debris is removed from the system, airflow through the ducts becomes more efficient.

Improved airflow allows the HVAC system to distribute air more evenly throughout the home. This helps maintain consistent indoor temperatures and reduces strain on heating and cooling equipment.

Cleaner ducts may also reduce unpleasant odors that develop when dust and debris accumulate in the system.

Over time, maintaining clean ductwork can help improve HVAC efficiency and extend the lifespan of the system.

These benefits make professional duct cleaning an important part of long-term home maintenance.

Fonal Thoughts

Air ducts play a crucial role in maintaining comfortable indoor temperatures and proper ventilation throughout the home. However, because these systems are hidden behind walls and ceilings, they often accumulate dust and debris without homeowners realizing it.

When buildup becomes excessive, it may affect airflow, reduce HVAC efficiency, and impact indoor air quality.

Recognizing the signs of dirty ducts and scheduling periodic inspections can help homeowners maintain a cleaner and healthier living environment.

When professional cleaning becomes necessary, it is always best to use a professional to clean your air ducts to ensure the system is cleaned thoroughly and safely.

With proper maintenance and occasional professional cleaning, air duct systems can continue delivering clean, comfortable air throughout the home for many years.

Manly’s climate is deceptive. The ocean breeze off the Pacific makes the suburb feel naturally comfortable, and many residents believe it stays that way all year. It doesn’t hold up come midsummer. Humidity settles in, the breeze stalls for days, and a house without proper cooling becomes genuinely uncomfortable. That’s the point where ducted air conditioning in Manly shifts from a nice idea to a necessary one.

One System, No Compromises

Many households piece things together over time. A split system goes into the lounge first, then another into the main bedroom, and suddenly the kids’ rooms are still hot by bedtime. Multiple units running at different times, different temperatures, different remotes – it becomes a management problem. A ducted system handles the whole house from a single installation. One controller, consistent comfort everywhere, and none of the ongoing juggling.

Manly Homes Have No Room for Ugly Units

Homes across Manly carry strong character. Federation cottages near the corso, contemporary builds on the headland, renovated terraces throughout the back streets – they all share one thing. The interiors are considered and the aesthetics matter to the people living in them. Wall-mounted units interrupt that. They sit on feature walls, break up sightlines, and draw attention in rooms where they don’t belong. Ducted systems sit entirely out of view. Only slim ceiling vents remain, and most visitors never give them a second glance.

Zoning Changes Daily Life

Ducted air conditioning in Manly homes becomes far more useful when zoning is part of the setup. Not every room needs conditioning at the same time. A home office runs cool while the rest of the house sits empty through the morning. The living areas pick up in the afternoon when the family returns. Zoning follows that pattern rather than fighting it. No split system offers that kind of adaptability, and the difference in day-to-day comfort is noticeable.

Noise Matters More Than People Think

A split system makes itself known. The compressor kicks in, the unit cycles through the night, and the hum becomes part of the background whether people consciously register it or not. Sleep quality takes a hit that many households don’t connect back to the air conditioning until they experience something quieter. With a ducted system, the compressor sits away from the bedrooms. Living spaces stay calm. In a suburb built around lifestyle and rest, quiet climate control is worth more than most people budget for.

Salt Air and Filtration Are a Real Concern

Living near the water brings particulates that inland homes don’t deal with. Salt air, coastal humidity, and fine airborne debris move through homes faster than most residents expect. A ducted system fitted with proper filtration catches that before it circulates through the house. For families with young children, anyone managing asthma, or households that simply want cleaner indoor air, that filtration layer makes a real difference. It’s not something a basic wall unit can replicate adequately.

What Buyers Actually Notice

Property in Manly attracts serious buyers who look closely at everything. A ducted air conditioning system reads as a deliberate upgrade, not an afterthought. It tells a buyer the home has been maintained properly and thought about carefully. Without it, buyers start mentally pricing a retrofit and discounting accordingly. That’s a conversation sellers rarely win, and it’s one that a quality ducted installation removes entirely from the table.

Reverse Cycle Earns Its Keep in Winter

Manly winters feel mild until the temperature drops on a still July morning and there’s nothing in the house to take the edge off. Reverse-cycle ducted systems cover heating without any additional setup. No gas connections, no portable heaters, no extra infrastructure of any kind. The same unit that runs through summer flips to heating seamlessly. Most households forget it’s even happening – which is exactly how good climate control should work.

Conclusion

The case for ducted air conditioning in Manly isn’t built on one single advantage. It’s the combination that makes it worthwhile – whole-home coverage, clean aesthetics, quieter nights, better air quality, and a system that handles both summer and winter without complaint. Coastal homes face real demands that a patchwork of wall units doesn’t meet well. A properly installed ducted system does, and it keeps doing it reliably for years without the household having to think twice.

I spend a lot of time studying how heating and cooling systems fail, why repairs get delayed, and what separates a smooth service experience from a stressful one. You already know why furnace repair and HVAC repair matter. What usually gets overlooked is how to judge service quality before a breakdown turns urgent. My goal here is to help you think clearly about furnace repair, HVAC repair, AC repair, heating repair, and heating and cooling repair, including what to expect when searching for furnace repair near me. I base my recommendations on consistency, clarity, and long term reliability rather than speed alone.

Early in any repair discussion, access to dependable ac repair and heating repair services sets the tone for how issues are handled. Clear communication at the start saves time, stress, and repeat problems later. That mindset shapes everything that follows.


How I Evaluate Furnace and HVAC Repair Providers

When I look at heating and cooling repair companies, I focus on how they approach problems, not how fast they promise results. You benefit most from providers that explain what failed, why it failed, and how to prevent it again.

I pay close attention to whether a company:

  • Explains diagnostic findings in plain language
  • Uses upfront pricing instead of open ended hourly billing
  • Treats repairs as part of a long term system plan
  • Prioritizes safety, airflow, and efficiency
  • Avoids shortcuts during installation or replacement

These factors matter more than marketing claims. They determine how well your system performs through Michigan winters and humid summers.


Why Furnace Repair Deserves Careful Attention

Furnace repair affects safety, comfort, and energy use. I advise homeowners to treat furnace issues as system health signals rather than isolated failures.

Common furnace repair concerns include:

  • Inconsistent heat across rooms
  • Short cycling or frequent shutdowns
  • Airflow restrictions from dust buildup
  • Carbon monoxide risk from combustion issues
  • Excess wear from neglected maintenance

Detroit Heating and Cooling Company approaches furnace repair with these risks in mind. They service gas furnaces with a focus on safe operation, airflow balance, and system longevity. Their technicians explain how issues develop and what steps reduce future breakdowns, which helps you make informed decisions.

Routine furnace maintenance plays a major role here. I consistently see systems last longer and run cleaner when maintenance is treated as prevention rather than an optional task.


HVAC Repair Requires a Whole System View

HVAC repair works best when heating and cooling are viewed together. I recommend avoiding providers who isolate one component without considering how the full system behaves.

Detroit Heating and Cooling Company evaluates airflow, controls, duct performance, and equipment condition during HVAC repair visits. Flat rate pricing keeps expectations clear, and diagnostic fees are applied toward approved repairs, which supports transparency.

This approach helps you avoid repeat calls for the same problem and reduces stress during peak weather seasons.


AC Repair and Cooling Reliability in Summer

AC repair becomes urgent fast during Michigan heat waves. I encourage homeowners to focus on providers who reduce downtime while also addressing root causes.

Cooling failures often come from:

  • Electrical component wear
  • Refrigerant issues
  • Airflow restrictions
  • Poor maintenance habits

Detroit Heating and Cooling Company handles air conditioner repair with an emphasis on restoring comfort and explaining failure causes. Maintenance plans support efficiency and help systems run consistently during high demand months.

This kind of guidance matters because cooling issues tend to repeat when only surface symptoms are addressed.


Heating and Cooling Repair Without Surprises

Heating and cooling repair should never feel unpredictable. I advise choosing companies that commit to clear pricing and documented work.

Detroit Heating and Cooling Company follows a flat rate model. The price you are quoted is the price you pay once repairs are completed. That structure removes uncertainty and helps you plan with confidence.

Their membership program adds value for homeowners who prefer scheduled maintenance, priority service, and repair discounts. These plans support consistency rather than reactive repairs.


Furnace Replacement and System Upgrades

When furnace repair no longer makes sense, replacement decisions should be practical and informed. I recommend providers who explain efficiency levels, installation standards, and comfort options without pressure.

Detroit Heating and Cooling Company guides homeowners through:

  • Standard and high efficiency furnace options
  • Proper sizing and installation practices
  • Two stage and variable speed upgrades
  • Indoor air quality additions such as humidifiers and filtration

Financing options, including extended no interest plans, help align upgrades with household budgets. This planning mindset reduces regret after installation.


Indoor Air Quality and Long Term Comfort

Indoor air quality often gets overlooked during repair visits. I see better outcomes when it is addressed alongside heating and cooling service.

Detroit Heating and Cooling Company offers air cleaners, purifiers, humidifiers, and advanced filtration to help reduce dust, allergens, and airflow issues. These additions support comfort and system health across seasons.


Choosing Furnace Repair Near Me With Confidence

When searching for furnace repair near me, focus on trust, clarity, and consistency. Detroit Heating and Cooling Company reflects traditional service values combined with modern technical standards. They prioritize honest pricing, careful workmanship, and clear explanations without pressure.

I recommend choosing providers who treat your home with respect, explain options clearly, and support your system beyond a single repair visit. That approach leads to fewer surprises, steadier comfort, and better long term results.

Building a home is an exciting journey, but it can also be overwhelming without proper planning and the right services. From laying the foundation to adding the finishing touches, every stage of construction requires careful attention and expert assistance. By incorporating key services into your home construction plan, you can ensure a smoother process, avoid costly delays, and create a home that meets your exact needs.

Custom Home Builder: A Personalized Approach

A custom home builder is essential for anyone looking to create a unique living space. With their expertise, you can design and construct custom homes that reflect your lifestyle and preferences. A skilled builder guides you through floor plans, material choices, and design options, ensuring that every aspect of your home aligns with your vision. By working with a professional, you can also navigate building regulations and local codes, saving time and avoiding potential setbacks.

Timber Bridge Building Services: Strong and Functional Infrastructure

In certain residential projects, particularly those located near waterways or uneven terrain, timber bridge building services can be a vital addition. These services ensure safe and functional access across difficult areas while enhancing the aesthetic appeal of your property. Experienced contractors provide durable designs and high-quality materials, integrating bridges seamlessly into your landscape. Including this service in your home construction plan can improve both functionality and property value.

Window Installation Services: Enhancing Light and Energy Efficiency

Windows are more than just openings to the outside world; they play a crucial role in energy efficiency and indoor comfort. Professional window installation services ensure that your windows are properly fitted, sealed, and insulated. Quality installation can significantly reduce energy costs, prevent leaks, and improve indoor air quality. Additionally, modern windows can enhance your home’s curb appeal and complement your architectural style, making this service an important consideration in your plan.

Plumbing and Electrical Services: Foundations for Comfort

No home can function efficiently without reliable plumbing and electrical systems. Engaging professional plumbing and electrical services from the start ensures that your home has a safe and efficient water supply, drainage, and power network. From wiring and outlets to piping and water heaters, these services prevent future issues and allow your home to meet modern standards. Planning these installations early in your project can avoid expensive modifications later.

Roofing and Exterior Finishing: Protecting Your Investment

A durable roof and well-finished exterior are essential for protecting your home from weather-related damage. Roofing services, whether installing shingles, metal panels, or tiles, provide the first line of defense against rain, wind, and sun. Exterior finishing, including siding, painting, and waterproofing, adds aesthetic appeal while improving insulation and durability. Including these services in your construction plan ensures your home remains safe, attractive, and long-lasting.

Landscaping and Outdoor Design: Completing the Vision

Once the structural elements are in place, landscaping and outdoor design services bring your property to life. Proper landscaping enhances the beauty of your home, increases functionality, and can even improve property value. From planting trees and shrubs to designing patios, pathways, and outdoor lighting, professional landscaping services complement your construction efforts and create a cohesive, enjoyable outdoor environment.

Conclusion

Streamlining your home construction requires careful planning and the inclusion of specialized services. From working with a custom home builder to incorporating timber bridge building solutions, professional window installation, plumbing, electrical work, roofing, and landscaping, each service plays a crucial role in creating a functional, beautiful, and durable home. By planning these services in advance, you not only save time and money but also ensure that your home meets your vision and stands the test of time. Taking a strategic approach to service selection can transform the construction process from overwhelming to efficient and rewarding.

Austin’s unpredictable climate puts strain on heat pumps. Scorching midday, unexpected gust fronts, and persistent muggy months can force your system far out of whack. The symptoms of heat pump distress tend to make themselves known early on − you just have to know what to watch for. Solving these issues quickly can spare comfort, spare costly breakdowns, and spare high energy costs.

Here are the most clear-cut signs that you need a professional to take a look at your heat pump, along with a fuller, easier to read guide below. If you notice any of these problems, contacting heating repair in Austin or a local Austin HVAC contractor, can save you a lot of hassle.

  1. Weak Airflow Through Vents

Hot air is only blowing out into your home if your heat pump is running − and if it sounds like it is running − then something is wrong. Upstairs you may only catch a whisper of a breeze or some rooms may totally escape the air flow.

Weak airflow often points to:

  • A failing blower motor
  • A clogged air filters
  • Ductwork blockages
  • Low refrigerant levels

This is problematic for your system and it is also a factor that impedes the efficiency of heating and cooling. Don’t ignore it.

  1. Sudden Spikes in Energy Bills

A consistent increase in energy bills, particularly, if there has been no change in your habits consuming it, is a quick way to tell something might be wrong. That means a heat pump that struggles will run longer, consuming more electricity to reach that set temperature.

Undocumented spikes in your utility bill are a sign that your air system is working too hard. This can be discovered with a quick inspection by local Austin HVAC contractor.

  1. Bizarre Sounds Emitting from the Appliance

Generally, heat pumps produce quiet background noise. Any clicks, rattles, buzzes, grinds, or screeches are bad signs.

Possible causes include:

  • Loose components
  • Failing motors
  • Debris inside the unit
  • Damaged fan blades
  • Refrigerant problems

Always be cautious with strange sounds, there should never be a “wait and see” approach. Most of the time, they become progressively worse.

  1. Frequent Cycling On and Off

If your heat pump is repeatedly turning on and off again, the system is short-cycling. It consumes energy and also reduces the strength of system elements.

Common triggers include:

  • Faulty thermostats
  • Blocked airflow
  • Electrical issues
  • Oversized systems

This is bad and shortens the life of the unit. Heating repair in Austin should be attended to, without a delay because, if ignored, it can turn out to be very dangerous.

  1. Inconsistent Temperatures in the Home

Your heat pump is losing efficiency: If some rooms are warm while others are still cold, then you have to worry about your heat pump losing effectiveness. Problems with ducts or a failing compressor may cause uneven temperatures.

In server climates, sometimes the heat pump is fallback behind. Austin is known for cold fronts that appear out of nowhere and expose a flimsy system in an instant. Comfort should be a status quo, not the exception.

  1. Outdoor Unit Ice Formation

In the winter some frost − perhaps a thin layer − can be normal. But thick ice buildup is not. Frozen heat pump means the system has trouble absorbing heat.

Common causes include:

  • Low refrigerant
  • Faulty defrost controls
  • Blocked airflow
  • Damaged coils

If there is ice on the unit, it will cause your system to have to work harder and may result in a total system failure.

  1. Odd or Unpleasant Smells

We pick up a lot of signs that your heat pump is giving off unusual scents.

Any burning smell, musty odor, or similar chemical smell indicates that something should be checked out.

A different problem is highlighted by the signal from each of these smells:

  • Smell of burning → electrical problem or overheating parts
  • Stuffy odor → mildew or dampness in the pipes
  • Pungent smell → refrigerant leak

All of these instances warrant a phone call to a Local Austin HVAC Contractor − ASAP.

  1. Reduced Heating or Cooling Output

If the air coming out of your vents isn’t warm in winter or cool in summer, your heat pump is not working properly. Reduced output can stem from:

Refrigerant leaks

  • Dirty coils
  • Blocked outdoor units
  • Malfunctioning reversing valves

But errors on the output side tend to become magnified quickly. The best time for heating repair in Austin is before the unit is completely broken down.

  1. The System Runs Constantly

Heat pumps typically turn off when they reach your target indoor temperature. A typical in the heat waves or cold snaps of Austin. However, if it operates over all temperature even in light conditions, then it is troublesome.

Possible causes include:

  • Thermostat issues
  • Leaky ducts
  • Worn-out components
  • Low refrigerant

Running it all the time forces the unit to work harder and increases the utility bills.

  1. The Heat Pump is Old and Wearing Out

Heat pumps have a lifespan of 10–15 years on average. The heat, humidity, and dust in Austin can shorten that lifespan. For older units, if you notice any of the signs listed above, it is time to get the repairs done.

Older units may also have difficulty with:

  • Efficiency loss
  • Frequent breakdowns
  • Hard-to-find parts

But a professional inspection will assist you in determining the right choice between replacement and repair.

Why Quick Action Matters

Heat pump issues rarely come to a happy place where they magically resolve by themselves. Allowing repairs to go unattended for too long can lead to replacing expensive parts. Austin homeowners often put off small issues until they break down on the hottest or coldest day in the year. Acting early keeps your comfort and your pocket safe.

Fast repairs also:

  • Keep your appliances running longer
  • Maintain efficiency
  • Prevent secondary damage
  • Keep indoor air quality healthy

Avoid waiting for a complete failure to contact.

When to Call a Professional

So, if you see one or more of those signs above, don’t take a guess on the issue. Today, heat pumps are complex devices. An expert technician will check the vehicles properly and suggest the right solution.

A Local Austin HVAC Contractor can do:

  • Test refrigerant levels
  • Inspect electrical components
  • Clean coils and filters
  • Repair or replace failing parts
  • Restore system performance

Professionally done as done by skilled people always ensures the safety of the job plus it is well done.

Final Thoughts

Your heat self-moving is the foundation of comfort in your Austin home. Given the extreme weather swings of the city, the system needs to function effectively 365 days of the year. If something caused the issue, it will quickly turn into a major problem if left unattended.

If you keep an eye out for these ten signs of trouble, you can intervene early and save some expensive repairs or avoid breakdowns. From weak airflow and strange sounds to rooms that are hotter than others or a sudden spike in energy costs, expert heating repair in Austin could remedy an out of whack system.

If you’re unsure, simply consult a general local Austin HVAC contractor. This level of knowledge helps keep your heat pump efficient, reliable, and prepared for whatever the wild Texas weather throws your way.

Choosing the right kitchen cabinet material is one of the most important decisions you’ll make during a kitchen renovation or redesign. Cabinets do more than provide storage—they impact the durability, aesthetics, and overall functionality of the heart of your home. Among the most popular choices are wood, MDF (Medium Density Fiberboard), and the emerging powerhouse in modern kitchen design: stainless steel.

While wood and MDF have been traditional favorites for decades, stainless steel kitchen cabinets are now being seen as a game-changing option. In this blog, we’ll compare the advantages and disadvantages of stainless steel, wood, and MDF cabinets, focusing on why stainless steel is quickly becoming the preferred choice for homeowners.

Stainless Steel Kitchen Cabinets: What Sets Them Apart?

Stainless steel cabinets have long been popular in commercial kitchens for their durability, hygiene, and modern appeal, but they’re now finding their way into stylish residential spaces. Here’s why stainless steel deserves your attention:

  1. Durability

Stainless Steel

One of stainless steel’s most significant advantages is its incredible toughness. Resistant to moisture, heat, scratches, dents, pests, and even fire, stainless steel can endure the wear and tear of daily kitchen use far better than other materials. It doesn’t warp, crack, or chip, making it a long-lasting investment that can easily handle the demands of a high-traffic kitchen.

Wood Cabinets

Natural wood cabinets are sturdy, but they are susceptible to aging, splitting, and warping when exposed to moisture or drastic temperature changes. Routine maintenance is critical to retain their structure and aesthetic.

MDF Cabinets

As an engineered wood product, MDF doesn’t hold up as well to impact or heavy loads. Prone to wear, scratches, and water damage, it has limited durability compared to stainless steel and wood.

Winner: Stainless Steel

  1. Water and Moisture Resistance

Stainless Steel

One of stainless steel’s standout features is its complete resistance to water and moisture. It doesn’t absorb moisture, swell, or rot, making it perfect for kitchens in humid environments or areas prone to spills.

Wood Cabinets

While many wood cabinets are coated with protective finishes, they are still susceptible to water damage if these layers are compromised. Spills or humidity can lead to swelling, discoloration, and cracks over time—common issues with this material.

MDF Cabinets

MDF is highly vulnerable to moisture. If exposed to water or humidity, it quickly swells, deteriorates, and loses its structural integrity. Even accidental spills can cause irreparable damage.

Winner: Stainless Steel

  1. Hygiene and Ease of Cleaning

Stainless Steel

Stainless steel is one of the most hygienic materials used in kitchens. It’s non-porous, meaning it won’t absorb liquids, odors, or bacteria, unlike wood-based materials. Cleaning stainless steel cabinets is quick and easy, requiring only a damp cloth and a mild cleaner. This makes stainless steel an ideal option for families or individuals who prioritize cleanliness and health in the kitchen.

Wood Cabinets

Wood is porous, which means it can trap bacteria, mold, and dirt, especially in cracks or damaged areas. Over time, food spills or grease can seep into the surface, making deep cleaning difficult without specialized care.

MDF Cabinets

Since MDF is moisture-prone, cleaning it with water-based solutions can cause damage to its surface. Although MDF is smooth, its compromised structural integrity makes it far less hygienic compared to stainless steel.

Winner: Stainless Steel

  1. Aesthetic Appeal

Stainless Steel

Stainless steel cabinets boast a sleek, modern, and industrial aesthetic. Ideal for contemporary kitchens, the metallic finish adds sophistication and complements high-end appliances. However, it’s worth mentioning that stainless steel may lack the warm, natural feeling that wood offers, making it less appealing for traditional or rustic designs.

Wood Cabinets

Wood provides a classic and luxurious aesthetic that works beautifully in traditional and farmhouse-style kitchens. Real wood comes in a variety of grains, colors, and finishes that are highly customizable, allowing homeowners to create unique designs.

MDF Cabinets

MDF excels in producing smooth surfaces ideal for painted or laminated finishes. It suits modern design needs, as it can mimic wood textures or come in bold, contemporary colors. However, its synthetic nature often lacks the richness of real wood or the chic appeal of stainless steel.

Winner: Tie (depends on personal style preferences)

  1. Maintenance

Stainless Steel

Stainless steel requires very little upkeep to maintain its appearance. It resists staining and damage from spills, and cleaning is as simple as wiping the surface down with soap and water. Over time, its metallic sheen remains intact with minimal effort.

Wood Cabinets

Wood cabinets demand relatively high maintenance, requiring routine polishing or refinishing to maintain their aesthetic and structural integrity. Common issues like fading, scratches, or warping require costly repairs over time.

MDF Cabinets

While MDF doesn’t require polishing like wood, it lacks resistance to wear-and-tear. If damaged, the entire unit often needs to be replaced since repairs are challenging to make.

Winner: Stainless Steel

  1. Sustainability

Environmental considerations have become a crucial factor for many homeowners today.

Stainless Steel

Stainless steel is a 100% recyclable material, making it a highly sustainable option. Unlike engineered woods that often contain adhesives and chemicals, stainless steel doesn’t emit toxic fumes or VOCs.

Wood Cabinets

Natural wood can be sustainable, provided it’s harvested responsibly and certified by organizations such as FSC. However, unsustainable logging practices can harm forests and the environment.

MDF Cabinets

MDF is not considered eco-friendly due to its use of adhesives such as formaldehyde when manufactured. Over time, MDF can emit VOCs, which may compromise indoor air quality.

Winner: Stainless Steel

  1. Cost

Budget plays a significant role when selecting kitchen cabinets, but so does long-term value.

Stainless Steel

Although stainless steel cabinets have higher upfront costs, they are an investment in longevity. Their resistance to damage, combined with zero repair or replacement needs, offsets the initial expense over time.

Wood Cabinets

Solid wood cabinets can be very expensive, especially premium hardwood varieties like maple or oak. Cheaper options such as pine may save money upfront but won’t offer the same longevity.

MDF Cabinets

MDF is widely known for its cost-effectiveness, making it a popular choice for budget-conscious homeowners. However, frequent replacements can negate the initial savings in the long term, as MDF doesn’t last as long as stainless steel or wood.

Winner: Stainless Steel for lifetime value, MDF for affordability upfront.

Why Stainless Steel Is Better for the Modern Kitchen

While solid wood and MDF (or other engineered woods) remain valid choices for kitchen cabinets, stainless steel offers unmatched advantages in durability, hygiene, and cost efficiency. Here’s why stainless steel is the better option:

  1. Unmatched Durability: Stainless steel resists water, heat, fire, and pests, making it extremely long-lasting.
  2. Low Maintenance: Unlike wood or MDF, stainless steel doesn’t require polishing, painting, or refinishing. A quick clean is all it takes to maintain its shine.
  3. Hygienic Properties: The non-porous nature prevents bacterial growth and malodors, ensuring a clean and safe food prep area.
  4. Eco-Friendly Material: Stainless steel is fully recyclable, ensuring a sustainable upgrade for your home.
  5. Modern Appeal: Its sleek and timeless design makes it perfect for contemporary and minimalist kitchens.

The Future of Kitchen Furniture is Stainless Steel

Both wood and MDF have long been staples in kitchen design, but their drawbacks—including cost, maintenance, and susceptibility to damage—are leading designers and homeowners to explore better options. Stainless steel kitchen cabinets provide value on every level, from durability to sustainability, hygiene, and versatility in design.