A homeowner with a leaking roof or a contractor planning a renovation often starts their search online. For builders, plumbers, cleaners, and other home service businesses, showing up in those searches can make a real difference. Link building is one way to strengthen a website’s visibility, but it works best when it reflects genuine local relationships and useful expertise-not a rush to collect as many links as possible.
A backlink is a link from another website to yours. Search engines can treat relevant, trustworthy links as signals that your site is worth exploring, while potential customers may discover you through the link itself. The strongest approach considers both outcomes: will this placement reach the right audience, and does the referring site make sense for your business?
Start with relevance, not volume
A link from a local renovation publication, neighborhood association, or building supplier may be more valuable to a contractor than one from a large site with no connection to home improvement. Relevance gives readers context. It also makes the link feel like a natural recommendation rather than an unrelated insertion.
For a real estate agent, a useful mention might appear in a local guide to preparing a home for sale. A roofer could contribute practical advice to a regional storm-preparation article. A cleaning company might share a move-out checklist with a property manager’s audience. In each case, the contribution should stand on its own even if the reader never clicks through.
There are several ways to earn these placements, from guest posting and blogger outreach to digital PR and editorial mentions. This overview of link-building types explains how the methods differ, including niche edits and contextual links. The labels matter less than the basics: a credible publisher, a relevant topic, and a placement that helps its readers.
Build links from work you already do
Home service businesses often have useful local connections that can support a sensible link-building plan. Start by listing organizations, suppliers, and professionals you already work with. A construction firm might collaborate with architects, inspectors, or a lumber supplier. A home-care or cleaning business may have relationships with senior-living communities, real estate agents, and local charities.
Some of these partners publish useful resources or project stories on their websites. Offer something specific in return: a short expert comment, a clear explanation of a repair issue, or photos and details from a project-with the customer’s permission. The aim is to contribute information that fits the publisher’s audience. A link may follow naturally, but the contribution should not depend on a guaranteed link.
Local events can help, too. Workshops on seasonal home maintenance, neighborhood cleanups, and housing fairs create real opportunities to meet people and exchange expertise. If an event organizer publishes a recap or resource page, they may include participating businesses where appropriate. Avoid asking unrelated websites to add your URL simply to increase a count.
Create pages worth referring to
Before contacting anyone, make sure your own website gives visitors a useful place to land. A service page that only lists broad claims is less compelling than one that explains what a project involves, which conditions affect the cost, and what homeowners should ask before hiring a professional.
Consider publishing practical material drawn from your experience: a guide to planning a bathroom renovation, a seasonal checklist for preventing water damage, or an explanation of what a home inspection can and cannot reveal. Keep advice accurate, identify when a licensed professional is needed, and update details when regulations or common materials change. Original photographs, local examples, and clear answers can give another site a reason to cite your page.
Offline materials can support the same effort. At a home show or neighborhood meeting, a well-organized business card layout makes it easier for people to remember your services and find your website later. Osdire’s global size guide is useful when preparing cards for print, particularly if you need to check dimensions, bleed, and safe areas before sending a design to a printer. A card is not a backlink, but it can help start the relationships that lead to genuine online mentions.
Choose outreach carefully
When you contact a publisher, be concise and specific. Explain why your idea suits their readers, suggest a topic you can contribute, and include a relevant example of your work. Avoid sending the same generic pitch to dozens of sites. A local editor is more likely to consider an informed note about a current housing issue than a message demanding a link.
Check the site before you pitch. Read recent articles, look for clear editorial standards, and see whether the audience overlaps with your customers. Be cautious of offers promising large numbers of links quickly, especially when the sites and topics are not disclosed. Paid placements should be handled transparently and in line with search engine and publisher policies; an undisclosed paid link can create problems rather than lasting value.
Measure progress beyond rankings
Keep a simple record of outreach, published mentions, and the pages they point to. Track referral visits and inquiries as well as search visibility. A link that sends a few qualified property owners to a helpful service page may be more useful than several placements that produce no relevant visits.
Link building is gradual work. A useful contribution, a respectful relationship with a local publisher, and a strong page on your own site can each reinforce the others. For home and property businesses, that steady, relevant approach is more sustainable than chasing volume-and more likely to earn the trust that turns an online visit into a real conversation.
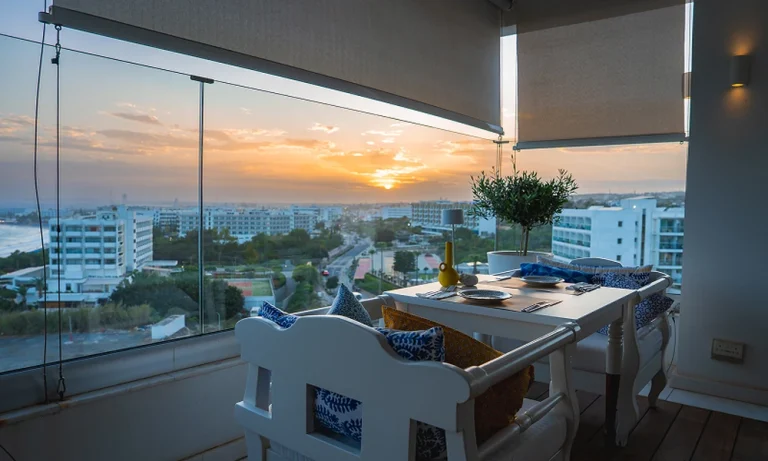
Zip blinds provide a seamless weather shield that protects outdoor spaces from heavy tropical rain and strong winds.
The track-guided system ensures there are no gaps between the fabric and the frame, effectively keeping out insects and debris.
Modern balcony zip blinds are frequently motorised, allowing homeowners to operate them with a remote or smartphone app.
These window treatments enhance privacy without completely obstructing the view of the outdoors.
Introduction
Creating a functional outdoor living space is a priority for many homeowners in modern urban environments. As balconies become extensions of the living room, the need for effective weather protection and privacy increases. Zip blinds have emerged as the premier solution for those looking to enclose their semi-outdoor areas without the permanence of glass windows. These systems use a unique side-track mechanism that locks the fabric in place, providing a tensioned finish that withstands various environmental factors. Whether you are looking to block out the afternoon sun or keep your furniture dry during a sudden downpour, understanding the nuances of these installations is vital.
1. The Superior Mechanism of Zip Blinds
The defining characteristic of zip blinds is the side-track system that secures the fabric along its entire vertical length. Unlike traditional outdoor shades that may flap in the wind, these blinds remain taut and stable because the zip is welded to the fabric’s edge and tucked into a side channel. This design ensures that the blind does not rattle or deviate from its path even during gusty conditions. Homeowners often choose this system because it offers a sleek, integrated look that blends into the building’s architecture. The lack of gaps also means that the blind acts as a total seal against the elements. Because the fabric is under constant tension, it maintains a flat and smooth appearance that contributes to a contemporary aesthetic.
2. Material Selection and Durability
When selecting materials for your installation, it is important to consider both the mesh density and the fabric’s colour. High-quality zip blinds typically use perforated fabrics that allow for airflow while blocking UV rays and providing privacy. A tighter weave will offer better protection against rain and insects but might slightly restrict the breeze. Conversely, a more open weave preserves the view and allows more natural light to enter the space. Durability is another critical factor, as these blinds are constantly exposed to the sun and moisture. Premium fabrics are treated to resist fading, mould, and mildew, ensuring that the investment lasts for many years. Choosing a robust aluminium frame with a powder-coated finish will also prevent rust and maintain the system’s structural integrity.
3. Enhancing Your Living Area with Balcony Zip Blinds
Installing balcony zip blinds effectively transforms an exposed outdoor area into a versatile indoor-outdoor room. In tropical climates where heat and humidity are constant, these blinds serve as a thermal barrier. By reflecting a significant portion of solar radiation before it hits the glass doors of your home, they help maintain a cooler internal temperature and reduce the load on your air conditioning system. Furthermore, the ability to fully enclose the balcony means you can enjoy the space during heavy rain without worrying about water splashing onto your floor or furniture. This added protection allows for more creative uses of the balcony, such as setting up a home office, a dining area, or a small gym that remains protected year-round.
4. Motorisation and Smart Home Integration
One of the most appealing aspects of modern zip blinds is the ease of operation provided by motorisation. While manual versions exist, most homeowners prefer the convenience of automated systems. With the press of a button, you can raise or lower multiple blinds simultaneously to adjust to changing weather conditions. Many systems are now compatible with smart home hubs, allowing you to set schedules or control the blinds via voice commands. Some advanced installations even include wind and sun sensors that automatically adjust the blinds based on real-time environmental data. This level of automation not only adds a touch of luxury but also ensures that your home remains protected even when you are not there to close the blinds.
Conclusion
Zip blinds represent a significant advancement in outdoor shading technology, offering a blend of durability, functionality, and aesthetic appeal. By opting for balcony zip blinds, you are investing in a solution that maximises the useable square footage of your home while providing essential protection against the elements. From the secure track-guided mechanism to the convenience of smart home integration, these blinds cater to the needs of modern homeowners who value both comfort and style. As long as you choose high-quality materials and professional installation, your new window treatments will provide a more comfortable and private environment for years to come.
Contact Jia Le Textile today to explore our premium range of zip blinds and find the perfect fit for your home.
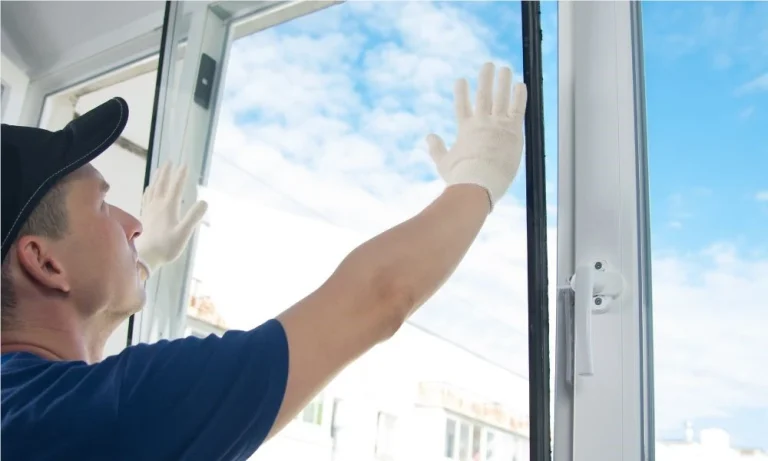
Replacing windows is one of the most impactful improvements a homeowner can make, but the success of the project depends on the decisions made before installation begins. Whether the goal is improving appearance, increasing comfort, or updating an older property, Whole House Window Replacement requires careful planning. Avoiding common mistakes can help ensure the finished result delivers long-lasting value instead of unexpected frustrations.
Choosing Style Over Practical Needs
Many homeowners select windows based primarily on appearance, overlooking how they will function in everyday life. While attractive designs certainly enhance a home’s exterior, each room has unique requirements that should influence the final choice.
For example, windows in frequently used spaces should be easy to open and maintain, while those in less accessible locations should be selected with durability in mind. A balanced approach that considers both design and usability leads to better long-term satisfaction.
Ignoring the Home’s Architectural Character
Not every window style complements every type of home. Installing ultra-modern windows in a traditional house, or overly decorative windows in a contemporary property-can disrupt the home’s overall appearance.
Instead of following current trends alone, homeowners should choose window designs that respect the architectural style of the property. Coordinating frame profiles, grille patterns, and proportions helps preserve visual harmony while still giving the home a refreshed look.
Forgetting to Plan the Entire Project
One common mistake is focusing only on the windows themselves without considering how the project fits into other home improvements. Exterior painting, siding replacement, trim work, or interior remodeling can all influence the best timing for window installation.
Planning these upgrades together helps reduce unnecessary labor and ensures that finished surfaces are not disturbed later. Homeowners looking for guidance on planning a complete window project can explore the available residential services offered by Apex Windows and Glass to better understand the process from consultation through installation.
Overlooking Custom Measurements
Assuming every window opening is identical can create problems during installation. Older homes, in particular, may have slight variations in opening sizes due to settling or previous renovations.
Professional measurements ensure that each replacement window is manufactured to fit correctly. Proper sizing contributes to smooth operation, an attractive finish, and a cleaner overall installation without unsightly gaps or excessive adjustments.
Selecting Materials Without Considering Local Conditions
Different window materials perform differently depending on climate, maintenance expectations, and long-term durability. Choosing solely based on initial cost may lead to disappointment if the material requires more upkeep than anticipated or is not well suited to local weather conditions.
Comparing available options and understanding their long-term characteristics helps homeowners make informed decisions that align with their lifestyle and property needs.
Waiting Until Problems Become Severe
Some homeowners postpone replacement until windows become extremely difficult to operate or show obvious damage. Delaying the project can allow smaller issues to become more extensive, potentially affecting surrounding trim, finishes, or structural components.
Addressing aging windows before they reach that stage often results in a smoother renovation experience and better overall outcomes.
Rushing the Final Decision
Window replacement is an investment that influences the home’s appearance and functionality for many years. Taking time to compare designs, review materials, and work with experienced professionals helps prevent costly mistakes. By approaching Whole House Window Replacement with careful planning instead of rushed decisions, homeowners can achieve a finished result that complements their property, supports daily living, and continues to add value well into the future.
Residential properties built in the mid-20th century frequently incorporated materials containing asbestiform minerals due to their heat resistance and durability. While these minerals were considered a standard construction component for decades, historical usage patterns often left toxic residues in the very structures where families reside. Gaining a professional understanding of these risks is essential for modern homeowners planning updates or structural modifications. Effective management begins with recognizing the presence of these materials and minimizing opportunities for them to enter the living environment.
The history of asbestos in building materials
During the peak of its industrial use, developers utilized asbestos for its fire-retardant properties and low cost. It was integrated into cement, tiles, and insulating products across a vast array of architectural styles, creating a lasting legacy in the built environment that persists today. Because these materials were applied so pervasively, they remain hidden in countless homes that have not undergone thorough renovations.
Health risks associated with fiber inhalation
When asbestos-containing products are handled, cut, or crushed, microscopic fibers can be released into the environment, posing significant health risks if inhaled. These fibers are durable and can accumulate in lung tissues, potentially leading to chronic illness, scarring, or malignant conditions over long durations. Given that no exposure level is deemed safe for human health, prioritizing air quality is a strictly observed standard in building evaluation.
Why homes built before the 1980s are at higher risk
Properties constructed before the 1980s are statistically more likely to contain legacy materials that were heavily reliant on asbestiform additives. The regulatory climate shifted significantly in the 1970s, but older homes often retain their original flooring, roofing, and insulation systems. If you own an older home, it is a prudent practice to consider conducting professional assessments before modifying any structural elements or interior surfaces.
The importance of avoiding disturbance of suspect materials
Disturbing established materials that may contain asbestos risks liberating hazardous fibers, transforming inert components into an airborne danger. To protect occupants, homeowners should follow a cautious approach to maintenance and repairs. By ensuring suspect areas remain intact and properly sealed, the potential for exposure is eliminated. Consider these items to identify potential areas of concern:
Attic and wall insulation commonly containing vermiculite
Flooring tiles secured with older mastic adhesives
Textured ceiling finishes and joint compounds
Exterior cladding systems or siding materials
By following these identification strategies, property owners maintain a secure environment before choosing to engage a service like AsbestosClear for comprehensive site assessments.
Identifying common materials that contain asbestos
Identifying materials suspected of containing asbestos relies on recognizing specific construction eras rather than visual cues alone. Since many of the most common products mimic standard gypsum or vinyl building supplies, homeowners often lack the visual data necessary for confirmation. Relying on an expert assessment prevents accidental exposure during renovation or general maintenance tasks. Utilizing companies like SafeSpace Testing often ensures that these materials are properly identified during pre-maintenance inspections.
Flooring components like vinyl tiles and adhesives
Many vinyl floor tiles and the resilient adhesives used to bond them historically contained asbestos fibers to improve flexibility and adherence. Replacing these floors during a renovation requires awareness, as scraping or removing the adhesive layer can release fibers directly into the surrounding air. Homeowners should approach carpet removal or tile replacement in older kitchens and mudrooms with extreme caution.
Insulation types including pipe lagging and vermiculite
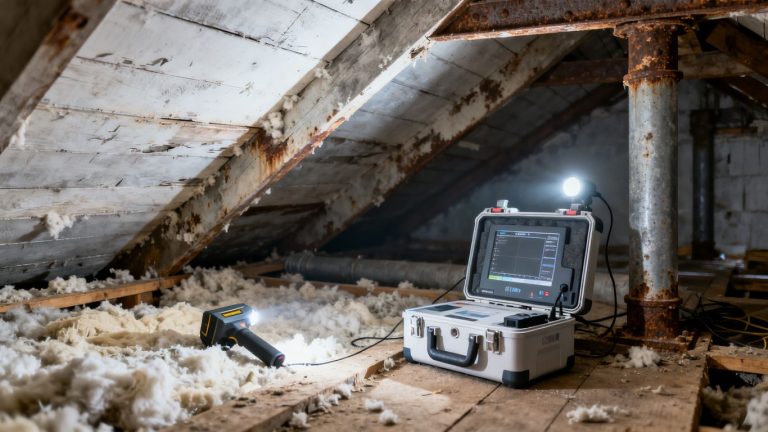
Insulation found within pipes or attics often poses the highest risk if left in a friable state or if the material begins to deteriorate. Vermiculite, a granular insulation, potentially contains asbestos contaminants, making it a critical area for inspection if it is currently exposed in attic spaces. Professional handling is the only safe standard when assessing or disturbing these insulation types.
Roofing, siding, and external cladding materials
Exterior building envelopes, including cementitious siding shingles and roofing felts, frequently utilized mineral fibers to withstand weathering and structural impact. Though these materials are often considered non-friable when in sound condition, their removal or destruction creates an environmental hazard. Specialized contractors are required to address these elements to prevent uncontrolled release during exterior remediation.
Textured ceilings and joint compound applications
Decorative ceiling treatments, often described as popcorn ceilings, and the joint compounds used on drywall frequently contained raw fibers to provide texture and fire resistance. These surfaces can shed dust over time even without direct impact, especially as houses settle or age. If you suspect these materials are present, refrain from sanding or drilling into the surface until documentation confirms the composition.
When to perform professional testing before renovations
Planning a renovation project creates a unique situation where building materials must be disturbed to achieve the desired outcome, necessitating a clear safety strategy. Even minor tasks, such as replacing light fixtures or patching walls, can introduce enough dust to compromise residential air quality if asbestos is present. Engaging a provider like PureAir Labs offers verification, ensuring that the necessary precautions are taken prior to a project commencing. Testing effectively shifts the risk management process from guesswork to a data-driven approach.
How remodeling activities increase airborne contamination risks
Activities like power drilling, sawing, and demolition generate fine particulates that can easily carry potentially hazardous fibers throughout a dwelling. Without professional containment or assessment, these activities transform static building components into dynamic respiratory hazards. Understanding the link between physical disturbance and particle release is the core requirement for safe home improvement.
Distinguishing between household maintenance and major demolition
Routine maintenance, such as changing hardware, often involves minimal impact and poses fewer risks than major structural modifications or demolition. Understanding whether a project constitutes superficial maintenance or deep intervention helps determine if professional testing is legally and logistically necessary. Categorizing the project scale correctly ensures that safety precautions are appropriately tailored to the specific level of intervention.
Determining when a DIY approach is insufficient for safety
Attempting to collect samples or manage remediation without professional training often increases the danger to all occupants. Professional testing requires standardized extraction methods and high-efficiency particulate air (HEPA) equipment that typical DIY toolkits lack. A home asbestos guide provides clarity on when to step back and invite a licensed technician into the property to handle sample acquisition safely.
Evaluating the impact of renovation scale on liability
Major renovations change the physical landscape of a home, bringing significant legal and financial responsibilities if material hazards are mishandled. If contractors uncover hidden asbestos during a project, the delay and management costs can escalate if plans were not adapted early on. Proactive asbestos hazard awareness helps protect property owners from unforeseen liability and health-related repercussions after a project has finished.
Steps for professional asbestos inspection and sampling
Professional inspection is the process of locating, identifying, and quantifying potentially hazardous materials through rigorous field analysis. An inspector systematically maps the home, checking areas that match the profile of common hazardous construction for that era. By following established protocols, these experts document the presence of fibers without risking their own safety or that of the household. Referencing an asbestos testing checklist allows for transparency during the inspection process.
Selecting a certified asbestos building inspector
Certification ensures that the individual possesses the technical training to identify suspect materials and follow legally mandated sampling protocols. Homeowners should verify credentials to ensure the inspector adheres to local and regional safety regulations before scheduling an appointment. A qualified inspector brings essential tools for evaluating material composition and site-specific hazards accurately.
The process of non-destructive visual assessment
Initial inspection begins with a visual overview to assess the condition of materials and determine if sampling is necessary. Inspectors look for physical degradation, fiber exposure, and signs of past interference, keeping the structural components as undisturbed as possible during this stage. The result of this assessment informs the final testing strategy and provides the groundwork for any future management plan.
Maintaining containment during material sampling
When a material sample must be collected for lab submission, professionals utilize small-scale containment to ensure that internal air quality remains completely unimpacted. This approach prevents fibers from migrating to other parts of the home during the extraction interval. Strict adherence to industry safety standards remains a core requirement for any technician collecting samples from established materials.
Logistics for submitting samples to accredited laboratories
Once samples are safely secured, they are tracked via a chain of custody and transported to an accredited facility for definitive microscopic analysis. The laboratory processes these samples using standardized analytical techniques to determine the concentration and type of mineral present. Providing valid laboratory data is the only reliable way to clear a workspace for subsequent construction activity.
Interpreting laboratory results and managing hazards
Laboratory results represent the final check to determine if a material falls within the regulated category of asbestos-containing material. Understanding the data provided in these reports is essential for making informed decisions on whether to remove or contain the hazard. If the report comes back indicating asbestos test results, the property owner must follow prescribed abatement paths based on the material’s specific condition.
Understanding the threshold for regulated asbestos materials
Regulatory standards dictate specific percentages of asbestos content that trigger mandatory compliance and remediation procedures. Materials below this threshold might still require care, but they fall outside the strictest abatement requirements. Reviewing these threshold levels with an expert ensures that management strategies remain compliant and effective for the specific project needs.
Recognizing the difference between friable and non-friable materials
Friable materials can be crushed or reduced to powder by hand pressure, which makes them highly prone to releasing fibers into the air. Non-friable materials are bound in a matrix that prevents fiber release unless they are mechanically damaged, sawed, or abraded. This classification often dictates whether the material can be encapsulated in place or if it must be fully removed.
Options for managing asbestos in place
If the material is intact and not likely to be disturbed by future living activities, in-place management is often a valid and safe recommendation. This approach involves monitoring the status of the material periodically to ensure no decay or damage occurs over time. Keeping materials enclosed is an effective method for minimizing occupant exposure risk when remediation isn’t strictly necessary.
Deciding between encapsulation and professional removal
Encapsulation involves applying a seal to the surface of the material, which creates a protective barrier that locks fibers in place. If encapsulation is impractical due to extensive damage, professional removal becomes the primary method for ensuring long-term safety. A home safety guide helps clarify the professional decision-making process when comparing these two remediation paths.
Legal requirements and compliance for asbestos abatement
Navigating the legal landscape requires clear documentation of all diagnostic and removal activities to remain compliant with state and federal regulations. While some regions allow homeowners to manage their properties with fewer restrictions, professional intervention is often governed by strict notification and disposal laws. Failure to comply with these records requirements can complicate property resale or insurance validation. Each step of the abatement process must be handled by licensed entities to ensure that legal safety requirements are met.
Understanding local and state notification requirements
Notification protocols are in place to ensure that environmental agencies are informed before significant abatement begins, which helps protect the surrounding community from exposure. Depending on the scale of the project, contractors are often required to file documentation far in advance of the start date. Homeowners must ensure their contractors handle these administrative tasks to maintain a full record of compliance.
Roles and responsibilities of licensed abatement contractors
Licensed abatement contractors are legally tasked with executing the project according to approved remediation plans and safety guidelines. Their responsibilities include setting up negative pressure environments, using professional-grade personal protective equipment, and isolating the workspace from unaffected parts of the home. By assuming these tasks, the contractor ensures that the safety measures are properly implemented throughout the duration of the work.
Documentation needed for property records and resale
Comprehensive documentation, including laboratory analysis reports and clearance letters, constitutes the permanent legal record for a healthy building. These records serve as evidence of proper remediation, which becomes crucial when providing disclosures during a property sale or real estate transaction. Archiving these documents in the official property file protects future owners and confirms the home was handled with professional care.
Managing waste streams according to environmental regulations
Asbestos-containing waste must be handled and disposed of in specialized facilities that are equipped to bury or encapsulate it safely. Regulations strictly forbid disposing of this hazardous waste in standard residential trash systems or local landfills. Certified abatement contractors coordinate the logistics for authorized waste transport, ensuring that the legacy material is permanently and safely removed from the property site.
A bathroom exhaust fan installation costs $150 to $1,500 depending on which of three scenarios matches your situation. Replacing an existing fan with similar wiring and ductwork already in place runs $150 to $400. Replacing a fan while upgrading to a different type, adding new ductwork, or doing electrical work runs $300 to $700. Installing a fan in a bathroom that doesn’t currently have one runs $450 to $1,500 or more. The Angi national average lands at $396, but that figure averages across all three scenarios — your specific cost depends entirely on which scenario you’re in.
The wide range across cost guides reflects this scenario variance, not pricing inconsistency. A homeowner expecting “around $400” based on a generic average can end up with a $1,200 quote because their bathroom genuinely needs a different scope of work. This guide breaks down what each scenario actually costs, how to size a fan correctly for your bathroom, and which installations make sense for DIY versus professional work.
Three installation scenarios, three different price points
Bathroom fan installation scenarios with cost ranges
Before comparing quotes, figure out which of these three jobs matches your bathroom.
Scenario 1: Like-for-like replacement — $150 to $400
An existing fan is being swapped for a new one of similar size and type. Wiring is in place. Ductwork is in place. The new fan fits the existing housing or close to it. Most of the work is removing the old unit, mounting the new one, and connecting the existing wires and duct. A handyperson or electrician completes this in one to two hours. The fan itself runs $20 to $250 for most residential models; labor runs $100 to $200.
Scenario 2: Replacement with upgrades — $300 to $700
Same starting point as scenario 1, but the new fan requires modifications. Common reasons: switching to a higher-CFM fan that needs a larger duct, adding a humidity sensor or motion control that requires new wiring, replacing a noisy old fan with a quiet premium model that has different mounting requirements, or discovering the existing ductwork is degraded and needs replacement. Adds $100 to $400 to the basic replacement price depending on what specifically needs upgrading.
Scenario 3: New installation where no fan currently exists — $450 to $1,500+
The most expensive scenario because everything has to be added. New electrical wiring from a power source to the fan location, a new switch (or integration into existing lighting controls), cutting an opening in the ceiling or wall, installing ductwork that runs from the fan to an exterior vent, and the fan itself. New ductwork alone typically adds $250 to $600. Electrical work adds another $200 to $500 if a new dedicated circuit is needed. Total project time runs four to eight hours, sometimes spread across two visits if multiple trades are involved.
The HomeAdvisor average of $240 to $550 covers scenarios 1 and 2. The Integra Electrical range of $350 to $1,200 covers scenarios 2 and 3. Both are accurate for what they describe — the right number for your situation depends on which scenario you’re actually in.
How to tell which scenario applies to you
Three quick checks determine your scenario.
Is there a fan there now?
If yes, you’re in scenario 1 or 2. If no, you’re in scenario 3, regardless of anything else.
Does the existing fan vent properly to the outside?
Look in the attic or check where the exterior vent terminates (it should be on a roof or exterior wall, not just dumping into the attic). If the existing duct runs all the way outside and is in good condition, you’re in scenario 1. If the duct is missing, damaged, or terminates inside the attic, you’re in scenario 2 because new ductwork is needed.
Are you keeping the same fan type and size?
A 50 CFM ceiling-mounted fan being replaced with another 50 CFM ceiling-mounted fan is scenario 1. Switching from a 50 CFM fan to a 110 CFM fan, or from a basic fan to one with a humidity sensor and night light, often pushes into scenario 2 because the larger or more featured unit may need different wiring or ductwork.
If you’re confident your situation is scenario 1, expect quotes in the $150 to $400 range. If quotes come in higher than that for an apparent like-for-like replacement, ask the contractor what specifically is driving the price up — usually they’ve identified something that pushes the work into scenario 2.
Sizing a fan correctly for your bathroom
Bathroom fan CFM sizing chart by bathroom size and fixtures
Fans are rated in cubic feet per minute (CFM) — a measurement of how much air the fan moves. Picking the wrong CFM rating either fails to ventilate the bathroom (too low) or wastes energy and creates excess noise (too high).
For bathrooms 100 square feet or smaller: Use the simple rule of 1 CFM per square foot of floor area, with a minimum of 50 CFM. A standard 50 sqft bathroom needs 50 CFM. A 75 sqft bathroom needs 75 CFM. A 100 sqft bathroom needs 100 CFM.
For bathrooms larger than 100 square feet: The square-foot rule doesn’t scale well, so HVI (Home Ventilating Institute) recommends adding CFM by fixture instead:
Toilet: 50 CFM
Standard shower or tub: 50 CFM
Jetted tub: 100 CFM
Steam shower: 100 CFM
Add the CFM for each fixture in the bathroom. A large bathroom with a stand-up shower, separate toilet, and jetted tub needs 200 CFM (50 + 50 + 100). A primary bathroom with a steam shower, toilet, and jetted tub needs 250 CFM.
A specific note for separated toilet rooms
If a toilet is in its own enclosed room within a larger bathroom, that room needs its own fan rated at 50 CFM minimum. The main bathroom fan can’t ventilate a separated toilet effectively because air doesn’t flow through the closed door.
For pricing purposes: Fans rated 40 to 79 CFM cost $20 to $250. Fans rated 80 to 149 CFM cost $50 to $350. Fans rated 150 to 200+ CFM cost $100 to $500. Higher-CFM fans cost more for the unit and often require larger ductwork (4-inch instead of 3-inch), which can add to installation cost.
Why some bathroom fans sound like jet engines
Fan noise is measured in sones — a perceptual measure of loudness. Lower sones means a quieter fan. The difference between a cheap fan and a premium fan is more often noise than airflow.
4 sones and above: Loud, audible from anywhere in the home. Common in older or budget fans. The “this sounds like a jet engine” complaint usually means a fan in this range. Cost: $20 to $80.
2 to 3 sones: Standard residential fans. Audible in the bathroom but not disruptive. Most basic builder-grade fans land here. Cost: $50 to $150.
1 to 2 sones: Quiet operation. You can have a normal conversation without raising your voice. Cost: $100 to $300.
Below 1 sone: Whisper-quiet, often hard to tell whether the fan is on. Premium category. Cost: $200 to $500+.
The honest math on noise: most homeowners use bathroom fans for 5 to 30 minutes per session, often during morning and evening when household noise tolerance is lowest. Spending $150 more for a fan rated at 1 sone instead of 3 sones is a small premium for years of less-irritating operation. For primary bathrooms used daily by multiple household members, the upgrade is almost always worth it.
Ceiling vs. wall vs. inline mounting
Three common mounting types exist, each with different installation requirements.
Ceiling-mount fans — fan $20 to $400, total install $250 to $950
The most common type. Air enters at the ceiling, ducts run through the attic to an exterior vent on the roof or sidewall. Best for most residential bathrooms. Wall installation runs cheaper because the duct path is shorter; roof installation runs more because of additional flashing and roofing work.
Wall-mount fans — fan $130 to $340, total install $200 to $450
Mounted on an exterior wall. No ductwork required because the fan vents directly through the wall to outside. Best for bathrooms on exterior walls without good attic access. Limited to bathrooms where the layout puts an exterior wall close to the moisture source.
Inline/remote fans — fan $150 to $4,000, total install $400 to $2,500+
The fan itself sits in a remote location (usually the attic), with ductwork connecting it to vent grilles in the bathroom ceiling. Best for multi-bathroom installations where one larger fan ventilates several rooms, or for homes where a quiet ceiling-mount fan can’t deliver enough CFM. Premium option for new construction and major renovations.
For most replacement scenarios, you’ll stay with whatever mounting type already exists. For new installations, ceiling-mount is the default unless your bathroom has specific reasons to choose otherwise.
What’s included and what isn’t
A complete quote should specify each of the following.
Fan removal and disposal
Removing the old unit and disposing of it. Should be included unless otherwise noted.
The new fan
Sometimes included, sometimes you buy and provide the unit. Either approach is fine — but verify which you’re agreeing to before signing.
Wiring and electrical connections
Connecting power to the fan, integrating with existing switches, adding GFCI protection where required by code. Should be specified explicitly.
Ductwork
Whether existing ductwork is being reused, partially replaced, or fully installed new. Different scenarios have different cost implications.
Roof or wall vent
If the duct terminates at a new exterior vent point, the work to cut and seal that opening should be itemized.
Drywall repair
If the installation requires opening drywall to run wiring or ducts, the patch and paint work — or whether it’s the homeowner’s responsibility — should be specified.
Code compliance and inspection
Permits where required, GFCI installation, code-compliant ducting (rigid metal preferred over flexible), and any required inspections.
Warranty
Most fans come with a 1-3 year manufacturer warranty. Labor warranty from the installer typically runs 90 days to 1 year.
A complete scenario-1 quote in the $200 to $350 range usually covers all of this. Scenario-2 quotes in the $400 to $700 range cover this plus the specific upgrade work. Scenario-3 quotes typically itemize the new electrical, new ductwork, and new exterior vent as separate line items totaling $450 to $1,500+.
DIY: when it makes sense and when it doesn’t
This is one of the more honest DIY decisions in home improvement — replacement work is genuinely DIY-friendly for many homeowners, while new installation is genuinely a professional job.
DIY is reasonable when:
It’s a like-for-like replacement (scenario 1)
Power can be safely shut off at the breaker
The new fan fits the existing housing
You’re comfortable working on a ladder
You’re not making any wiring changes — just disconnecting old wires and connecting new ones to the same connections
A scenario-1 replacement takes most homeowners 1 to 3 hours and saves $150 to $250 in labor. The work is mostly mechanical: shut off power, remove the old fan from below, disconnect wires, slide the new unit into the existing housing, reconnect the same wires, restore power, test.
DIY is a bad idea when:
Any new wiring is involved
New ductwork needs to be run
A new exterior vent has to be cut through the roof or wall
The work involves working in an attic with no easy access
You’re upgrading to a higher-CFM fan that requires larger ductwork
The reasons matter. Improper electrical work in a bathroom — a wet location with specific GFCI requirements — creates real shock and fire hazards. Improper ductwork that vents into the attic instead of outside causes mold and structural damage to attic framing within 1-3 years. New roof penetrations done badly cause leaks that destroy interior finishes.
A botched scenario-3 installation that costs $1,200 done professionally can cost $5,000 to $15,000 to fix when the consequences (mold, water damage, electrical issues) compound over time. The savings don’t justify the risk.
Code requirements you should know about
Bathroom ventilation is governed by building codes that vary by jurisdiction but follow consistent national patterns.
Most bathrooms are required to have ventilation
Either an operable window or a mechanical fan. Bathrooms without windows must have a fan. Bathrooms with windows technically don’t require a fan, but most building inspectors recommend one anyway because windows aren’t reliably used for ventilation.
Fans must vent to the outside
Venting into an attic, soffit, or other interior space is a code violation in nearly all jurisdictions. The reason: bathroom moisture in those spaces causes mold growth and structural damage. If you discover an existing fan terminates inside the attic, that’s a code issue that should be fixed during any replacement work.
GFCI protection is required
Bathroom electrical circuits must have ground-fault circuit interrupter protection. New installations typically include this; older homes may not have it on the bathroom circuit.
Permits
Most jurisdictions don’t require permits for like-for-like fan replacement. New installations involving new wiring or new ductwork often do require permits. Major renovations that include adding bathroom ventilation as part of a larger scope are always permitted.
If you’re doing DIY replacement work, your work needs to comply with the same codes as professional work — building inspectors don’t ignore DIY just because no permit was pulled. Improper work shows up in home inspections when you sell.
Frequently asked questions
How long does bathroom fan installation take?
A scenario-1 replacement takes 1 to 2 hours. A scenario-2 upgrade takes 2 to 4 hours. A scenario-3 new installation takes 4 to 8 hours, sometimes split across two visits if multiple trades are needed (electrician plus HVAC, for example).
Should I be home during the installation?
Helpful but not strictly required for replacement work. New installations involve more disruption and benefit from someone available to make decisions about cosmetic choices (where to mount the new fan, where to route ductwork, etc.).
Will fan replacement disrupt my plumbing or water service?
No. Bathroom fans are independent of plumbing systems. The work happens above the ceiling and doesn’t affect water service, drains, or fixtures.
Does homeowner’s insurance cover fan installation?
No. Fan installation is considered a maintenance and improvement item, not insured damage. If a fan failure causes water damage from inadequate ventilation, that damage might be covered depending on policy specifics, but the fan itself is always homeowner expense.
How long does a bathroom fan last?
Quality fans last 5 to 10 years with regular use. Premium fans (lower-sone, better motors) often last 15+ years. Common signs that replacement is due: visibly slower air movement, increased noise, intermittent operation, or visible mold growth that suggests the fan isn’t ventilating adequately.
Can I install a humidity-sensing fan?
Yes, and it’s worth considering for primary bathrooms. Humidity-sensing fans automatically activate when shower steam raises humidity and run until levels return to normal. Adds $50 to $150 to the fan cost but eliminates the “is the fan on long enough” question and saves energy compared to manual operation.
Do I need an electrician to install a bathroom fan?
For replacement work where existing wiring is being reused, a handyperson or experienced DIYer can typically handle it. For new installations involving new wiring, yes, an electrician is required by code in most jurisdictions and recommended even where not strictly required.
What about kitchen exhaust fans? Are they similar?
Kitchen range hoods are a different product with different sizing, ductwork requirements, and installation considerations. Bathroom fan guides don’t translate directly to kitchen ventilation.
Should the fan be on the same switch as the bathroom light?
Code allows this configuration but it’s not optimal. Bathrooms benefit from a separate fan switch (or humidity sensor) so the fan can run after the light is turned off, finishing the moisture removal. Adding a separate switch during installation costs $50 to $150 more but makes the fan more useful.
My fan vents into the attic. Is that a problem?
Yes, significant problem. Venting bathroom moisture into an attic causes condensation on framing and insulation, leading to mold growth and wood rot within a few seasons. This violates code in nearly all jurisdictions. If your existing fan vents this way, plan to redirect the duct to an exterior vent during your next maintenance or replacement project. The fix typically costs $200 to $500 depending on attic accessibility and the new vent location.
Kitchen remodeling is one of the most valuable home improvement projects for homeowners in Katy. As the heart of the home, the kitchen serves as a central space for cooking, gathering, and entertaining. Over time, however, kitchens can become outdated or less functional. Hiring experienced kitchen remodeling contractors in Katy ensures that homeowners can transform their spaces into modern, efficient, and visually appealing environments that better fit their lifestyle.
The Role of Kitchen Remodeling Contractors
Kitchen remodeling contractors are essential to directing homeowners on how to renovate their homes. These professionals handle all stages of the project including the first meeting with the client and the last finishing. They evaluate the existing layout, deliberate on design objectives and develop a plan that is well within the vision of the homeowner with regard to budget. Other professionals, like electricians, plumbers and carpenters, are coordinated by the contractors, and there is no part of the remodel that is not to a high standard. Click this for reference.
Customized Design and Planning
The design features of every home in Katy are unique and that is why it is necessary to plan it individually. Professional contractors collaborate with the clients to design kitchens which portray the individual style whilst utilizing the available space to its maximum. They also help in choosing the cabinetry, countertops, flooring, back splashes and fixtures that match the general design. Be it a sleek and modern kitchen or a rustic room with a home feel, with the assistance of contractors, the vision can be brought to life, accurately and creatively.
Popular Kitchen Remodeling Features
The current trends in the remodeling of kitchens in Katy are focused on beauty and functionality. The most popular is the open-concept design where the kitchen is free to flow into dining and living spaces. Big islands are especially most popular, which provide more workspace, storage, and seating. Quartz and granite counter tops, tailor made cabinetry and high quality flooring are some of the high quality materials that not only enhance style but also durability. Another way to make the kitchen more functional and sustainable is to invest in energy efficient appliances, smart technology and better lighting systems which many homeowners invest in.
Improving Functionality and Efficiency
However, in addition to aesthetics, functionality is also a major concern when it comes to kitchen remodeling. The layouts created by contractors enhance workflow and commonly use the traditional model of the triangular workflow of kitchen to be able to move effectively through the major areas. Pull-out cabinet, deep drawers, pantry organizers are storage systems that assist in maximizing space and minimizing clutter. These functional design features simplify day to day chores and make them more fun, and make the kitchen a very productive work place.
Managing Budgets and Timelines
Budget constraint and timely work completion is one of the most critical issues in any remodeling project. To assist home owners to plan, professional kitchen remodeling contractors in Katy TX make detailed cost estimates and realistic timelines. They also help clients in choosing materials and features that are within their financial objectives without compromising on quality. The contractors reduce delays and make the renovation process as efficient as possible by regulating the schedules and coordinating the various stages of the project.
Ensuring Quality and Compliance
Kitchen remodeling entails complicated systems, such as plumbing, electrical wiring, and structural alterations. Contractors make sure that everything is done in accordance with the local building code and safety regulations in Katy. They use their experience to avoid making expensive errors and come up with a finished kitchen that is safe, strong and long lasting. The quality of craftsmanship and attention to details are key elements of a remodeling project success.
Increasing Home Value
An updated kitchen designed by a professional can greatly add value to a home. In a competitive market such as Katy, an updated kitchen will serve as a significant selling point to potential buyers. Additional amenities like contemporary design, quality materials and energy saving appliances make the houses more appealing and this may translate to a higher resale value. The enhanced functionality and beauty appeal not only improve everyday life of those who are not intending to sell but also appeals to everyone.
Choosing the Right Contractor
It is very important to choose the appropriate contractor to do the remodeling of the kitchen to get the desired results. Homeowners must seek licensed and seasoned workers with a good track record of accomplished projects. References, reviewing, and requesting elaborate proposals will help in ensuring a good fit. Well-defined communication and transparency in the project are also significant elements in development of trust and satisfaction. Go to https://www.thespruce.com/hiring-a-bathroom-remodeling-contractor-1821350 to learn more.
Conclusion
Katy kitchen remodeling contractors are a crucial component in transforming the old-fashioned kitchen to a beautiful functional kitchen. They enable homeowners to make the kitchens according to the current demand and personal taste through professional design, professional construction, as well as, project management. Whether it is a small upgrade job or total remodeling, the presence of experienced professionals would make the difference between a successful job that contributes to the addition of value, comfort and enjoyment to the home in the long run.
Southwest Florida kitchen remodeling is some of the most significant improvements that can be performed on the home. Always the first question: Who should you hire? Fort Myers homeowners typically decide between a contractor or a handyman. Your project scale, complexity, and budget will determine what is the right choice.
This guide is laid out nice and neat so you do not waste your time or money.
When a Handyman is Enough
Ideal for Minor Repairs and Simple Upgrades
For the minor jobs that do not need permits or do not involve major structural alterations, a handyman can be employed. Ideal for quick patches and non-serious enhancements.
Handyman is best suited for when you require any of the following:
Backsplash installation
Cabinet hardware updates
Minor drywall repair
Simple lighting changes
Basic painting
They are obviously low-lift jobs that do not relocate plumbing, redesign electricity, or require demolition.
Pros of Hiring a Handyman:
Lower hourly rates
Fast scheduling
Good for punch-list items
Limitations:
Large-scale remodels are outside the area of training and licensing for handymen. They cannot pull permits or manage complex construction. We would like to point out that a handyman is not suitable for such work, in case your project involves making some layout changes or adding new systems.
Which Home Improvements Require a Licensed Contractor?
Great for Overhauls and Projects with Multiple Moving Pieces
But if you are doing a full kitchen remodel, you need one that understands building codes, structural planning, and system upgrades. A certified contractor comes into whomever that solution.
Here are some things your remodel might include that would require a licensed contractor:
Moving plumbing or electrical
Installing new cabinets
Removing walls
Reworking ventilation
Coordinating multiple trades
Why Use a Contractor to Full Remodel Your Home?
They enlist and organize specialists such as electricians, plumbers, and tile experts.
They are well versed in the local building regulations and can obtain the necessary permits.
They offer guarantees and safety net coverage.
They provide better craftsmanship and longevity.
Contractors are more than builders, with the key role of project manager, helping the entire remodel stay on track.
Cost Differences: What to Expect
This is why handymen are less costly − they do smaller jobs. However, picking a handyman instead of a renovation can leave you with a far larger bill down the road with problems, codes issues or sub-par components.
Sure, contractors are a little pricier, but you get full control, higher quality, and better return on investment. Headlines are no reason to bother an expert, the latter is the wisest investment, for anything beyond the surface.
Conclusion − Which One is For You?
A handyman is perfectly good for a few cosmetic updates. However, if a complete remodel, structural work, or anything requiring a permit is planned, you can only trust the licensed contractor.
If in doubt, lean toward hiring a pro who understands Southwest Florida homes, who can guide your project from planning to finish without cutting corners.
For homeowners seeking reliable and high-quality exterior home improvement services, the name Marshall Roofing resonates as a symbol of trust and excellence. Renowned for delivering expert services in roofing, siding, and window installation, Marshall Roofing offers a unique blend of craftsmanship, customer service, and industry expertise.
About Marshall Roofing
Marshall Roofing, Siding & Windows, with its years of experience, has established itself as a leader in the home improvement industry. Serving residents in Northern Virginia and Maryland, the company specializes in a spectrum of services that enhance both the aesthetic appeal and functional integrity of homes. Visit their official website for more details.
Expertise in Roofing
Marshall Roofing’s expertise is underscored by their extensive knowledge and use of high-quality materials. Their roofing solutions incorporate leading industry techniques to ensure longevity and resilience against weather elements. The skilled team meticulously assesses each client’s needs, providing personalized recommendations for roof repair, maintenance, or total replacements.
Why Invest in Quality Roofing?
Investing in a quality roofing system not only protects your home but also enhances its value and energy efficiency. Properly installed and maintained roofs are crucial for safeguarding against leaks and potential structural complications. Marshall Roofing ensures that each project is not merely a transaction but a journey towards homeowner satisfaction and peace of mind.
Exceptional Siding Solutions
Siding is another cornerstone of home protection and visual appeal. Marshall Roofing offers a comprehensive range of siding services, tailoring solutions to meet the specific requirements of homeowners. From vinyl to fiber cement siding, their offerings provide durability and attractive finishes that withstand the test of time.
The Benefits of High-Quality Siding
High-quality siding not only enhances curb appeal but also contributes significantly to a home’s insulation capabilities. This, in turn, can reduce energy costs by maintaining optimal indoor temperatures. By choosing Marshall Roofing, homeowners are assured of siding installations that combine style, performance, and efficiency.
Windows That Transform Your Home
Windows are a vital component of any home, impacting its aesthetics, comfort, and energy efficiency. Marshall Roofing, Siding & Windows makes window installation an effortless experience by offering a variety of styles and materials suited to individual taste and architectural design. Their window solutions promise better light, air flow, and thermal insulation.
Choosing the Right Window Solution
The right window selection can transform a living space, making it more inviting and energy-efficient. Marshall Roofing provides expert guidance in choosing windows that not only improve appearance but also deliver practical benefits such as noise reduction and enhanced UV protection.
Commitment to Customer Service
What sets Marshall Roofing apart is their unwavering commitment to customer satisfaction. From the initial consultation to the completion of the project, every step is marked by openness and communication. The company prides itself on building lasting relationships with clients, many of whom return for additional services or refer them to friends and family.
Customer-Driven Approach
Marshall Roofing’s customer-driven approach ensures that solutions are customized to meet the unique needs of each client. This dedication is reflected in their service delivery, prioritizing quality and attention to detail. Clients can trust that their home’s transformation is in capable hands.
Industry Certifications and Quality Assurance
Marshall Roofing stands as an industry leader, bolstered by key certifications and affiliations. These credentials not only attest to their expertise but also to their commitment to maintaining high standards of service delivery. Certified by leading manufacturers, they ensure that every installation adheres to best practice guidelines.
Emphasis on Quality
Quality assurance is a pivotal component of Marshall Roofing’s operations. By choosing products and materials that meet stringent testing requirements, they guarantee long-lasting results. Their affiliation with industry organizations serves as a testimonial to their dedication to professional excellence.
In today’s fast-paced world, homeowners are constantly seeking ways to enhance their living spaces without breaking the bank. One of the most impactful yet often overlooked upgrades is replacing or installing new windows. If you’re on a budget, the search for billige vinduer can feel overwhelming, but it doesn’t have to be. Cheap windows offer a perfect blend of functionality, energy efficiency, and style at a fraction of the cost of premium options. Whether you’re renovating an old house, building a new one, or simply looking to improve insulation, affordable windows can transform your home’s aesthetics and comfort levels.
This comprehensive guide dives into everything you need to know about cheap windows, from understanding their benefits to selecting the right type for your needs. We’ll explore practical tips, common pitfalls, and expert advice to help you make an informed decision. By the end, you’ll be equipped to find high-quality, budget-friendly windows that don’t compromise on performance.
What Makes Windows “Cheap” Without Sacrificing Quality?
When we talk about billige vinduer, it’s essential to clarify that “cheap” doesn’t equate to “poor quality.” In the window industry, affordability often stems from factors like material choices, manufacturing processes, and brand positioning rather than inherent flaws. For instance, many budget windows are made from vinyl or fiberglass composites, which are durable and low-maintenance compared to traditional wood frames that can drive up costs.
According to industry experts, the average cost of a standard window replacement ranges from $300 to $700 per unit, but cheap windows (billige vinduer) can start as low as $150 to $400, depending on size and features. These savings come from economies of scale in production, where manufacturers like Pella or Andersen offer entry-level lines that use recycled materials or simplified designs. However, it’s crucial to differentiate between truly affordable options and those that cut corners on insulation or hardware, which could lead to higher energy bills over time.
One key aspect is energy efficiency ratings. Look for windows with a U-factor below 0.30 and a Solar Heat Gain Coefficient (SHGC) under 0.25 for optimal performance in most climates. Cheap windows from reputable brands often meet Energy Star standards, ensuring you get value for your money. By focusing on these metrics, you can avoid the trap of buying subpar products that warp or leak after a few seasons.
The Top Benefits of Opting for Cheap Windows
Investing in cheap windows isn’t just about saving upfront costs—it’s a smart long-term strategy. First and foremost, they enhance your home’s energy efficiency. Poorly insulated windows account for up to 30% of a home’s heat loss, according to the U.S. Department of Energy. By choosing affordable double-pane or low-E glass options, you can reduce utility bills by 10-25% annually.
Aesthetically, cheap windows come in various styles that mimic high-end designs. From casement to sliding or picture windows, budget models offer customization like grid patterns or tinted glass without the premium price tag. This versatility allows homeowners to boost curb appeal, potentially increasing property value by 5-10% upon resale.
Another overlooked benefit is noise reduction. In urban areas, affordable windows with laminated glass can dampen external sounds by up to 50%, creating a quieter indoor environment. For families with children or remote workers, this can significantly improve quality of life. Plus, many cheap windows are easier to install, often featuring pre-hung frames that DIY enthusiasts can handle, saving on labor costs that might otherwise add $100-300 per window.
Environmentally, opting for sustainable cheap windows made from recycled vinyl supports eco-friendly practices. Brands like Milgard emphasize green manufacturing, reducing your carbon footprint while keeping expenses low. Overall, these benefits make cheap windows an accessible entry point for home improvement projects.
Exploring Different Types of Cheap Windows
The market for cheap windows is diverse, catering to various architectural styles and functional needs. Let’s break down the most popular types to help you choose.
Vinyl Windows: The Budget Champion
Vinyl windows dominate the affordable segment due to their low cost and durability. Priced between $200 and $500, they resist moisture, rot, and insects, making them ideal for humid climates. Unlike wood, vinyl doesn’t require painting or staining, saving time and money on maintenance. Popular for replacement projects, these windows offer excellent insulation with fusion-welded corners that prevent drafts.
Aluminum Windows: Strength on a Shoestring
For those seeking a modern look, aluminum cheap windows start at around $250. They’re lightweight, strong, and resistant to corrosion, perfect for coastal areas. While they conduct heat more than vinyl, thermal breaks in budget models improve energy efficiency. Brands like JELD-WEN provide affordable aluminum options with powder-coated finishes in various colors.
Fiberglass Windows: Affordable Durability
Fiberglass is a step up in the cheap windows category, often costing $300-600. It’s incredibly strong—up to eight times stronger than vinyl—and expands/contracts minimally with temperature changes, reducing warping risks. These windows excel in extreme weather, offering a paintable surface for customization. They’re a great mid-range choice for homeowners wanting longevity without luxury prices.
Wood-Clad Windows: Economical Elegance
If you crave the warmth of wood but need affordability, wood-clad cheap windows combine a wooden interior with an aluminum or vinyl exterior. Starting at $400, they provide natural insulation and aesthetic appeal. This hybrid design protects against weathering while keeping costs down compared to full-wood frames.
Each type has its pros and cons, so consider your home’s location, climate, and style when selecting.
How to Choose the Best Cheap Windows for Your Home
Selecting cheap windows requires careful consideration to ensure they meet your specific needs. Start by assessing your budget and measuring existing openings accurately—errors here can lead to costly adjustments.
Prioritize features like multi-chamber frames for better insulation and argon gas fills between panes to prevent condensation. Check for warranties; reputable manufacturers offer 10-20 years on frames and glass, even for budget lines.
Research local building codes, as some areas require impact-resistant glass in hurricane-prone zones. Online tools from sites like Home Depot or Lowe’s can help compare options. Read customer reviews on platforms like Angi or Yelp to gauge real-world performance.
Finally, factor in professional vs. DIY installation. While cheap windows are user-friendly, hiring a certified installer (costing $150-400 per window) ensures proper sealing and maximizes energy savings.
Installation Tips for Cheap Windows: DIY or Pro?
Installing cheap windows can be a rewarding project. For DIYers, gather tools like a level, caulk gun, and shims. Begin by removing old windows carefully to avoid damaging walls. Insert the new frame, shim for plumb, and secure with screws. Seal gaps with low-expansion foam and exterior caulk to prevent leaks.
Common mistakes include ignoring flashing, which directs water away, or over-tightening screws, which can distort frames. If you’re unsure, opt for professional help—many retailers offer installation packages bundling windows and labor for under $1,000 for a small home.
Post-installation, test for smooth operation and air tightness using a smoke pencil to detect drafts.
Maintenance and Longevity of Cheap Windows
To maximize the lifespan of your cheap windows, regular maintenance is key. Clean frames and glass biannually with mild soap and water; avoid abrasive cleaners that scratch surfaces. Lubricate hardware like hinges and locks annually with silicone spray.
Inspect seals and weatherstripping for wear, replacing as needed to maintain efficiency. In harsh climates, apply protective coatings to exterior surfaces. With proper care, affordable windows can last 15-30 years, rivaling pricier counterparts.
Where to Buy Cheap Windows: Top Retailers and Online Options
Finding reliable cheap windows is easier than ever. Big-box stores like Home Depot and Lowe’s stock budget brands with in-store demos. Online giants such as Amazon or Wayfair offer competitive pricing and free shipping on bulk orders.
For custom sizes, check manufacturers’ websites like Simonton or Andersen for direct sales. Local salvage yards or Habitat for Humanity ReStores provide gently used options at steep discounts. Always compare prices and read return policies to ensure satisfaction.
Conclusion: Upgrade Your Home with Cheap Windows Today
In summary, cheap windows are a gateway to enhanced comfort, efficiency, and style without financial strain. By understanding types, benefits, and selection tips, you can confidently invest in affordable upgrades that pay dividends over time. Whether you’re a first-time homeowner or seasoned renovator, exploring budget windows opens up endless possibilities.
Ready to start? Research local suppliers or online deals to find the perfect fit. With the right choices, your home will feel brighter, warmer, and more inviting—all on a budget. Don’t hesitate; affordable window solutions are just a click or call away.
In the bustling region of Northern Virginia, home remodeling contractors play an essential role in turning homeowner dreams into reality. Among the prominent names in this field, Oak Hill Building stands out for its commitment to excellence and innovation. With years of experience and a dedicated team, they have established themselves as a leader in home additions and remodeling projects.
Expertise in Home Remodeling and Additions
Oak Hill Building specializes in offering comprehensive home remodeling services, tailoring each project to meet the unique needs and preferences of their clients. From small updates to extensive renovations, their expertise encompasses all aspects of home improvement, ensuring high-quality results.
Comprehensive Remodeling Solutions
The company excels in various types of home remodeling projects, including kitchen upgrades, bathroom renovations, and basement transformations. Their ability to deliver customized solutions with precision has made them a preferred choice for homeowners looking to enhance their living spaces.
Home Additions: Expanding Living Spaces
Whether it’s an additional bedroom, a sunroom, or a home office, Oak Hill Building’s team is adept at designing and constructing purposeful spaces that seamlessly integrate with the existing structure. They prioritize functionality and aesthetics to ensure that the new spaces complement the current design.
The Oak Hill Building Approach
Oak Hill Building embraces a client-centric approach, focusing on open communication and collaborative planning. Their process is designed to ensure that each project not only meets but exceeds client expectations.
Initial Consultation and Planning
The journey begins with an in-depth consultation. During this phase, the team at Oak Hill Building listens to the client’s vision, budget constraints, and specific requirements. This foundational step is crucial in shaping a project plan that is both practical and inspiring.
Detailed Project Management
From securing necessary permits to selecting materials and coordinating timelines, Oak Hill Building manages every aspect of the project. Their project managers serve as a single point of contact, ensuring that clients are informed and comfortable at every stage of the process.
Quality Craftsmanship and Execution
With a keen eye for detail, Oak Hill Building takes pride in executing projects with precision and high-quality craftsmanship. Their team of skilled professionals ensures that every aspect of construction is carried out to the highest standards.
Why Choose Oak Hill Building?
Choosing the right home remodeling contractors can be overwhelming, but Oak Hill Building makes this decision easy by offering unparalleled services and client satisfaction.
Unmatched Experience and Track Record
With a legacy of successful projects, Oak Hill Building’s extensive experience in the industry is reflected in their portfolio. This proven track record highlights their capability to handle diverse and complex remodeling needs.
Customer Satisfaction as a Priority
The company prides itself on maintaining long-term relationships with clients, emphasizing customer satisfaction in every project. Their commitment to delivering what they promise has earned them a reputation for reliability and excellence.
Contact Oak Hill Building Today
For homeowners looking to undertake home additions or remodeling projects, Oak Hill Building offers the expertise and dedication needed to bring visions to life. Visit their website to explore more about their services and start your journey with one of the leading home remodeling contractors in Northern Virginia.
Explore Oak Hill Building’s Gallery
To see examples of Oak Hill Building’s exceptional work, potential clients are encouraged to browse through their extensive gallery online. This showcase of past projects serves as a testament to their skill and creativity in the world of home remodeling.
For more insights into their work and philosophy, check out their About Us page. Discover how Oak Hill Building consistently leads the way in the home remodeling industry across Northern VA.