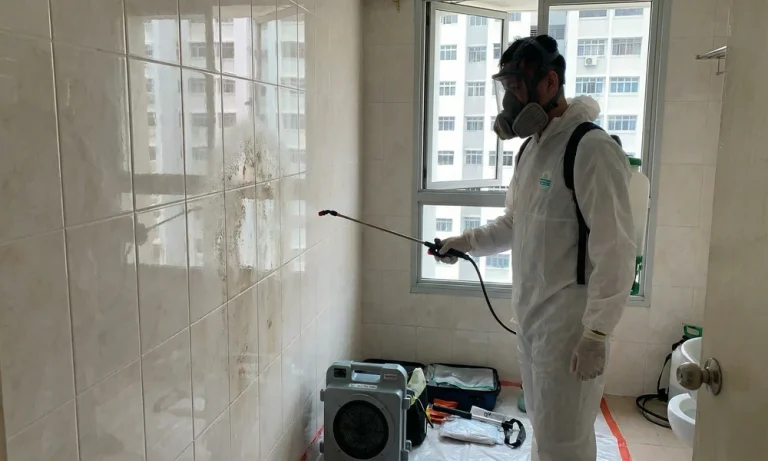
Pest sightings in commercial environments, such as kitchens, retail floors, or warehouses, cause significant operational disruption. Evidence of infestation, including damaged inventory, chewed wiring, and droppings, can lead to loss of customer trust, regulatory non-compliance, severe fines, and temporary business closures.
When pests invade your premises, you cannot afford to figure out how to get rid of rats on the fly. Proactive commercial rodent control acts as a critical line of defence, safeguarding your daily operations, brand reputation, and financial bottom line.
Uninvited Guests: The High Cost of Commercial Invasions
Rats and mice do far more than simply scare away customers. They pose a fundamental threat to your everyday operations, structural safety, and public health compliance.
Rodents possess sharp incisors that grow continuously throughout their lives. To keep these teeth at a manageable length, they gnaw relentlessly on almost anything they find, including wooden support beams, plastic pipes, and electrical wiring. A single chewed wire can spark a disastrous electrical fire, causing thousands of pounds in property damage and forcing an unexpected operational shutdown.
Furthermore, rodents carry dangerous pathogens, including Salmonella, Leptospirosis, and Hantavirus, which they spread via their droppings, urine, and saliva. If you operate in the food and beverage, hospitality, or healthcare sectors, an infestation can trigger immediate health code violations, heavy legal penalties, or complete license revocation.
Spotting the Signs: Catching the Invaders Early
Before you can figure out how to get rid of rats effectively in a commercial environment, staff must learn to recognise the subtle warning signs of an emerging infestation. Rodents excel at hiding in dark, low-traffic areas, meaning you will often spot their footprints long before you see the creatures themselves.
Dark Droppings – Small, capsule-shaped droppings around food stores, waste bins, or behind appliances usually signal active infestations.
Gnaw Marks and Damaged Packaging – Look out for tooth marks on cardboard stock boxes, plastic wrapping, wooden pallets, and skirting boards.
Grease Smudges – Rodents have oily fur and follow consistent pathways along walls, leaving dark, greasy rub marks on surfaces over time.
Shredded Nesting Material – Piles of shredded paper, cardboard, insulation, or fabric tucked away in quiet corners indicate that pests are building nests.
Unusual Noises – Scratching, squeaking, or scurrying sounds coming from suspended ceilings, wall cavities, or under floorboards-especially during quiet evening hours-mean rodents are moving around.
Fortifying Your Perimeter: Strategic Prevention Rules
Stopping pests before they gain entry proves far easier and more cost-effective than managing a full-scale outbreak inside your building. Implementing a robust prevention protocol keeps your facility secure.
Seal All Access Points – Inspect your building’s exterior thoroughly. Rats can squeeze through gaps as small as 20 mm, while mice can fit through holes the size of a ballpoint pen. Fill external gaps around pipes, doors, and vents using durable materials such as steel wool, metal mesh, or heavy-duty sealant.
Enforce Strict Waste Hygiene – Empty indoor trash cans frequently and keep all outdoor skips securely covered with tight-fitting lids. Store rubbish far away from your main building entrances to avoid attracting hungry pests.
Elevate and Store Food Properly – Never leave open food items on counters or floors. Store all dry stock and ingredients in airtight, heavy-duty plastic or metal containers elevated off the floor on metal shelving racks.
Eliminate Standing Water: Fix leaky plumbing joints, clear blocked roof gutters, and remove standing water trays, as rodents require reliable water sources to survive.
Professional Defence: Why DIY Solutions Fail Commercial Spaces
While off-the-shelf traps and retail baits might catch a few stray mice in a residential setting, they rarely solve a commercial pest crisis. Commercial facilities offer complex environments with vast square footage, ceiling voids, and endless hiding spots.
Investing in tailored rodent control provides comprehensive monitoring, specialised equipment, and trained technicians who understand pest behaviour. Professional technicians construct defensive perimeters around your property, utilise non-toxic detection methods inside sensitive production zones, and deliver documented audit reports that satisfy health inspectors and statutory regulations.
Securing Your Business Future
Preventing rodent infestations requires continuous vigilance, proper sanitation practices, structural maintenance, and expert support. By identifying early warning signs, securing potential entry points, and partnering with experienced pest management experts, you protect your operations, safeguard your staff, and preserve your commercial reputation for the long term.
Frequently Asked Questions
How quickly can a rodent infestation damage my business operations?
Rodents breed extremely quickly; a pair of rats can produce hundreds of offspring within a single year. Physical damage to stock, wiring, and health reputations can occur within a few days of their initial entry.
Why do rodents prefer commercial buildings over residential ones?
Commercial sites offer vast amounts of undisturbed space, continuous food supplies, abundant packaging materials for nesting, and multiple hidden entry points, making them prime targets for pests.
Are professional baiting systems safe for food preparation areas?
Yes. Professional pest controllers use non-toxic monitoring tools, secure tamper-resistant bait stations, and clean mechanical trapping systems inside sensitive food production and storage areas to ensure complete safety and regulatory compliance.
What Exactly Are Mould Mites, and Why Should Singaporeans Care?
In Singapore’s humid climate, mould is a common household problem that often goes unnoticed until it causes health issues or damages property. One lesser-known culprit contributing to this problem is mould mites-tiny creatures that thrive in damp, mouldy environments. Understanding what mould mites are and their impact on your home is the first step toward a healthier living space.
Mould mites are microscopic arachnids that feed on mould spores. While they themselves don’t bite or harm humans directly, their presence signals a mould problem, which can exacerbate allergies and respiratory conditions, especially in Singapore where humidity levels often exceed 80%. For families living in compact spaces or older flats, mould mites can contribute to discomfort and potentially worsen asthma or eczema symptoms.
How Do Mould Mites Get Into Your Home, and Why Are They Hard to Spot?
Because mould mites are invisible to the naked eye, many homeowners remain unaware of their infestation. They typically infest areas with persistent moisture – think behind kitchen cabinets, bathroom corners, or air conditioning units, all common in Singapore’s climate. These mites reproduce rapidly wherever mould is present, making it essential to address the root cause: dampness and mould growth.
If you notice a musty smell, visible mould patches, or unexplained allergic reactions, it’s often a sign that mould mites might be present. Unlike larger pests, mould mites don’t leave obvious traces, which makes professional advice and treatment critical to effective removal.
Wondering How to Get Rid of Mould Mites? Here’s What Works
If you’re struggling with mould mites, the good news is that eliminating mould and controlling moisture will significantly reduce their numbers. For those looking for practical, effective solutions, learning how to get rid of mould mites is essential.
Firstly, controlling indoor humidity is key. Singapore’s tropical climate makes this challenging, but using dehumidifiers, improving ventilation, and fixing leaks can help keep moisture levels below 60%, a threshold unfavourable for mould and mites.
Secondly, thorough cleaning with mould-specific detergents or professional-grade fungicides helps remove the mould food source for mites. Simple household cleaning is often insufficient, especially in hidden corners or air-conditioning ducts where mould thrives.
Finally, consider professional mould removal services if the infestation covers a large area or persists despite your efforts. Experts use specialized equipment and treatments tailored to Singapore’s humid environment, ensuring mould and mould mites are eradicated safely and effectively.
How Much Does Mould Removal Cost in Singapore? Breaking Down the Price
When considering professional help, one of the biggest concerns is affordability. Many Singaporeans ask about the mould removal Singapore price, and while it varies depending on the severity and area affected, understanding what influences these costs can help you make informed decisions.
Mould removal pricing in Singapore typically depends on factors such as the size of the affected area, the type of mould, and whether there are structural repairs needed after treatment. For minor infestations, costs may be relatively modest, but extensive mould problems that require specialist intervention and multiple visits can be pricier.
It’s important to remember that investing in professional mould removal can save you money in the long run by preventing property damage, mitigating health risks, and reducing the need for repeated treatments. Reputable companies like Mouldgone provide transparent pricing and tailor their services to your home’s specific needs, ensuring effective remediation without overspending.
What Makes Professional Mould Removal in Singapore Different?
Singapore’s unique climate demands expertise in dealing with mould and its related pests. Professional mould removal companies bring experience and knowledge about local conditions, common mould species, and effective mitigation strategies that work best here.
Beyond just cleaning, experts conduct thorough inspections, moisture assessments, and recommend long-term solutions such as improved ventilation systems or waterproofing measures suitable for Singapore’s environment. This comprehensive approach ensures that mould and mould mites are not just temporarily removed but prevented from returning.
Choosing a trusted mould removal provider also offers peace of mind. Licensed professionals follow safety protocols, use eco-friendly and non-toxic treatments, and provide guarantees on their work. This level of trustworthiness and authority is crucial when dealing with health-impacting issues like mould infestations.
How Can You Prevent Mould Mites from Coming Back?
After successful mould removal, prevention becomes the priority. Singaporeans should maintain good home ventilation, especially in areas prone to moisture like bathrooms, kitchens, and laundry rooms. Installing extractor fans, using air purifiers, and regularly inspecting common mould hotspots can make a big difference.
Regular cleaning routines with mould-inhibiting products help keep spore levels low, reducing the chance for mould mites to establish themselves. Additionally, controlling indoor humidity with air conditioning or dehumidifiers is an ongoing effort in Singapore’s tropical climate.
By combining these proactive measures with expert advice, you can create a healthier indoor environment free from mould and mould mites.
Final Thoughts: Taking Action Against Mould Mites Is Easier Than You Think
Living in Singapore means dealing with humidity and mould challenges more often than elsewhere. Understanding the role of mould mites and learning effective ways to manage them empowers you to protect your home and health. If you’re unsure about the extent of your problem or want professional support, exploring how to get rid of mould mites and checking mould removal Singapore price can guide you to the right solution.
Taking early action not only safeguards your property but also enhances your family’s wellbeing-something every Singaporean deserves in their home.
Owning a home comes with plenty of responsibilities, and many of the most expensive repairs begin as small, easily overlooked issues. Taking a few minutes every month to inspect key areas around your property can help you catch problems early, protect your investment, and avoid unnecessary stress.
Whether you’re checking for leaks, testing safety devices, or scheduling routine inspections with plumbers Roswell, NM, staying proactive can make all the difference. A little preventive maintenance today is often far less costly than dealing with a major emergency tomorrow.
Look for Hidden Plumbing Leaks
Water damage is one of the most common and expensive problems homeowners face. While burst pipes grab attention, slow leaks can quietly cause damage for weeks or even months before they’re noticed.
Take time to inspect under sinks, around toilets, behind washing machines, and near your water heater. Look for damp spots, discoloration, mold growth, or musty odors. Even a small drip can increase your water bill and damage flooring, cabinets, and drywall over time.
Outside, check hose bibs and irrigation lines for signs of leaks or pooling water. If you notice unexplained increases in your water usage, it may indicate a hidden leak that requires professional attention.
Inspect Your Roof and Gutters
Your roof protects everything beneath it, yet it’s easy to forget until a leak appears.
Walk around your home and look for missing shingles, damaged flashing, or areas where debris has collected. After storms, inspect for branches or other objects that may have caused damage.
Gutters deserve equal attention. Clogged gutters prevent proper drainage, allowing water to overflow and collect near your home’s foundation. Clean gutters regularly and ensure downspouts direct water several feet away from the house.
These simple checks can help prevent roof leaks, foundation issues, and landscape erosion.
Check Your HVAC System
Heating and cooling systems work hard throughout the year, especially during extreme temperatures.
Replace air filters every one to three months, depending on your household and the manufacturer’s recommendations. Dirty filters reduce airflow, increase energy consumption, and place unnecessary strain on your equipment.
Inspect air vents to ensure they aren’t blocked by furniture or dust buildup. Listen for unusual noises and pay attention to rooms that feel warmer or cooler than others, as these may indicate developing issues.
Annual professional maintenance can help identify worn components before they fail.
Examine Windows and Doors
Small gaps around windows and doors may seem harmless, but they can significantly affect comfort and energy efficiency.
Look for cracked caulk, worn weatherstripping, or visible drafts. Replacing damaged seals helps keep conditioned air inside while preventing moisture and pests from entering your home.
Check that doors and windows open and close smoothly. Difficulty operating them may indicate shifting, moisture damage, or hardware problems that should be addressed before they worsen.
Inspect Electrical Components
Electrical problems often develop gradually before becoming serious hazards.
Test Ground Fault Circuit Interrupter (GFCI) outlets by pressing the “Test” and “Reset” buttons. Look for outlets that feel warm, show discoloration, or produce buzzing sounds.
Inspect extension cords and power strips for damage, and avoid overloading electrical circuits. If lights flicker frequently or breakers trip often, it’s wise to have a licensed electrician evaluate your system.
Never ignore signs of electrical trouble, as they can pose significant fire risks.
Walk Around Your Foundation
Foundation issues rarely happen overnight, but early warning signs can save substantial repair costs.
Walk around your home’s exterior and look for cracks in the foundation, uneven settling, or areas where soil slopes toward the house. Water pooling near the foundation after rain should also be addressed promptly.
Inside, watch for sticking doors, cracked walls, or uneven floors. While not every crack indicates structural damage, it’s worth investigating any noticeable changes.
Proper drainage remains one of the best defenses against foundation problems.
Don’t Forget the Attic and Basement
These less frequently visited areas often reveal problems before they become visible elsewhere.
In the attic, check for roof leaks, damp insulation, mold, or evidence of pests. Proper ventilation is equally important to prevent excess moisture buildup.
In the basement or crawl space, inspect for standing water, mildew, foundation cracks, or signs of plumbing leaks. Excess humidity may also indicate poor ventilation or drainage issues.
Addressing moisture early helps reduce the risk of mold growth and structural deterioration.
Review Outdoor Hazards
Your home’s exterior deserves just as much attention as the interior.
Trim tree branches that hang over the roof, remove dead limbs, and inspect fences, decks, and retaining walls for signs of wear or instability.
Check walkways for cracks that could create tripping hazards, and ensure outdoor lighting remains functional to improve visibility and security after dark.
Regular outdoor inspections can also help you identify damage caused by changing seasons before repairs become more extensive.
Create a Simple Home Maintenance Routine
Preventive maintenance doesn’t require complicated schedules. Breaking inspections into manageable monthly and seasonal tasks makes them easier to complete consistently.
Consider creating a checklist that includes:
Inspect plumbing fixtures and visible pipes.
Replace HVAC filters when needed.
Clean gutters seasonally.
Examine windows, doors, and weatherstripping.
Check the roof after severe storms.
Walk around the foundation.
Inspect the attic and basement for moisture.
Review outdoor safety hazards.
Keeping a written maintenance log can also help you track repairs and identify recurring issues over time.
Conclusion
Preventive home maintenance is one of the smartest ways to protect your property, save money, and avoid unexpected emergencies. Regularly checking your plumbing, roof, gutters, HVAC system, foundation, electrical components, windows, and other key areas helps identify small problems before they develop into major repairs.
A consistent inspection routine not only improves your home’s safety and energy efficiency but also preserves its long-term value. Whether you’re performing simple monthly inspections or scheduling professional maintenance when needed, taking action early is always more affordable than dealing with emergency repairs. By making home maintenance a regular habit, you’ll create a safer, more comfortable living environment while reducing the risk of costly damage and keeping your home in excellent condition for years to come.
Trees are among the most valuable features of any landscape. They provide shade, enhance visual appeal, improve outdoor comfort, and contribute to the overall character of a property. However, trees require proper care to remain healthy and safe. Without regular attention, even a beautiful tree can develop structural issues that affect both appearance and property safety.
Maintaining healthy trees is not only about preserving aesthetics-it is also about protecting homes, businesses, and the people who use those spaces every day.
The Connection Between Tree Health and Property Safety
Trees are constantly exposed to weather conditions, pests, diseases, and environmental stress. Over time, weakened branches, decaying trunks, or damaged root systems may create potential hazards.
A branch that appears stable from the ground could become vulnerable during strong winds or storms. Likewise, disease-related deterioration may progress internally before visible symptoms appear. Regular inspections allow property owners to identify concerns early and take corrective action before they become larger problems.
Healthy trees are generally stronger, more resilient, and better equipped to withstand environmental challenges throughout the year.
Improving the Appearance of Outdoor Spaces
Well-maintained trees contribute significantly to curb appeal. Their shape, color, and structure add depth and visual interest to landscapes while creating a more inviting atmosphere.
Pruning and maintenance help trees retain an attractive appearance while encouraging healthy growth. In neighborhoods where property presentation influences overall value, tree care often plays a major role in maintaining a polished and well-kept landscape.
When outdoor spaces look organized and balanced, the entire property benefits from a stronger visual impression.
Supporting Long-Term Landscape Health
Trees interact with nearly every element of a landscape. They provide shade for lawns, influence soil conditions, and contribute to local ecosystems. When trees experience health problems, those effects may extend to surrounding plants and outdoor features.
Property owners seeking professional tree services lynn ma often focus on preserving mature trees because replacing them can take years or even decades. Proper care helps maximize the lifespan of existing trees while supporting the overall health of the landscape.
This proactive approach reduces the likelihood of unexpected problems and contributes to a more stable outdoor environment.
Preventing Costly Property Damage
Unhealthy trees can pose risks to structures, driveways, fences, and utility lines. Falling branches or unstable trees may result in expensive repairs, particularly during severe weather events.
Routine assessments and maintenance help identify vulnerabilities before damage occurs. Through professional evaluations, potential issues such as dead limbs, structural weaknesses, or disease-related decline can be addressed in a timely manner.
For property owners researching tree services lynn ma, safety considerations are often a major factor when planning long-term landscape maintenance.
Investing in a Stronger Outdoor Environment
Healthy trees enhance both the beauty and functionality of a property. They create welcoming outdoor spaces, contribute to environmental benefits, and strengthen overall landscape value.
With regular care and attention, trees remain an asset rather than a liability. A thoughtful tree maintenance strategy supports safety, preserves curb appeal, and helps ensure that outdoor spaces continue to thrive for years to come.
Located close to Bend, Redmond is in Central Oregon. If you live in neighborhoods like Eagle Crest and Skyline Village, you may have encountered unique pests in different parts of the year. The region’s high-desert climate results in temperature oscillations, which affect pest activity. As the city expands into open land, construction only impacts existing populations of local species.
Don’t waste your effort on DIY hacks and ideas, because most of these will only treat the visible pests. You need to have a professional name in Redmond, such as Pointepest.com, on your speed dial. The Pointe technicians know everything about pest species in Central Oregon and know the neighborhood patterns in this city. Below is an overview of pests in each season.
Pests in Spring
From March, spring starts in this region, and that’s when you can expect to see many species of ants foraging around, including pavement ants and carpenter ants. Ants are sensitive to temperature shifts and moisture and will enter homes to scout for food. Even stinging insects start scouting around to find locations to build new nests. You may see more wasps and hornets around this time. Increased insect populations also mean more house spiders and wolf spiders, which build webs around exterior lights and foundations.
Summer Activity Peak
From June to August is the peak desert heat time, and many pests that depend on moisture, such as cockroaches, look for humid microclimates of bathrooms, laundry rooms, and kitchens. Other pests, which come through store products, also reproduce heavily, and the list includes cigarette beetles and Indian meal moths. In Redmond, rats and mice are active for most months, and summer irrigation in many homes invites these rodents.
Fall Pest Patterns
As the autumn season arrives in September, house mice and deer mice start finding ways to enter attics and closed rooms of the house. These are nasty and aggressive species, which can chew almost anything, and if you had used foam for sealing holes and gaps, you should recheck those areas. Various beetle species and stink bugs are also common here around this time, especially on sunny walls.
Winter Surge
Species, such as spiders, cockroaches, and silverfish, that managed to enter your home during the fall, will be active during this time. Rodents established in attics will gnaw on wiring and insulation, pose fire risks, and cause property damage that may require expensive repairs. As outdoor pest pressure is at its lowest, this is the time to let technicians inspect the indoor areas, so that all early signs are fixed. If you wake up with nighttime sounds, ensure that you call professionals the next day.
Managing Pests in Redmond
The high-desert location of this city makes it mandatory for homeowners to spend on regular pest control. If you just seek help when you see pests, you will not only spend 4x the amount on urgent remediation but may also have to deal with repeat infestations. Experts usually suggest quarterly audits coupled with treatments for each season to remain proactive. You can consider plans depending on your property needs, and most companies will include a callback offer. This means that if pests persist, you can get assistance and repeat treatments for no extra cost.
Takeaways
If you haven’t had your house checked in the last season, this is the time to ask technicians. With early steps and suggestions from experts, you can reduce the usual pest risks. Ensure you choose a service that has been offering pest control in Redmond for at least a few years. The right team can help you avoid the typical mistakes and habits that create conditions to support infestations.
Bed bug treatment costs $1,000 to $4,000 for most homeowners, with the national average around $2,500. Single-room chemical treatments start as low as $270. Whole-home heat treatments can reach $4,500. Severe infestations requiring fumigation of an entire structure run $4,000 to $50,000 or more. The wide range reflects five genuinely different treatment approaches, not pricing inconsistency.
Bed bugs are one of the most expensive pest problems homeowners face, and that surprises a lot of people. An ant treatment runs $200 to $400. A roach treatment runs $300 to $600. Bed bug treatment costs five to ten times more because it’s structurally a different problem — bed bugs hide in places ordinary pesticide application can’t reach, they reproduce faster than products can keep up, and elimination requires multiple visits over weeks. This guide breaks down what the five treatment approaches actually cost, how to choose between them, and what’s typically not in the headline price.
One thing worth saying upfront
Bed bugs aren’t a cleanliness problem. They affect homes at every income level and every standard of housekeeping. They spread through travel, used furniture, secondhand clothing, and shared walls in apartment buildings. Anyone can get them, and most people who do have done nothing wrong.
The stigma around bed bugs makes the problem worse — people delay calling for treatment because they’re embarrassed, which lets the infestation grow and become more expensive to eliminate. The contractors who treat bed bugs see them in every kind of home, every week. There’s no reason to hesitate.
Five treatment scenarios, five different price points
Bed bug treatment scenarios with cost ranges
Before comparing any quotes, understand which of these five treatment scopes matches your situation.
Scenario 1: Single-room chemical treatment — $270 to $775
Targeted insecticide application in one room where bed bugs are concentrated. Appropriate for early-stage infestations caught quickly, when bed bugs haven’t yet spread beyond the original location. Usually requires 2 to 3 follow-up visits over 4 to 6 weeks because chemical treatments don’t kill eggs effectively, and emerging nymphs need to be treated as they hatch.
Scenario 2: Whole-home chemical treatment — $1,000 to $2,500
The standard residential treatment for most confirmed infestations. Chemical application throughout the home with focus on bedrooms, furniture, baseboards, and other harborage areas. Same multi-visit protocol as single-room. The most common service homeowners actually receive when they call a pest control company.
Scenario 3: Heat treatment, single room — $400 to $1,200
Specialized equipment raises the room temperature to 120-135°F for 6-8 hours, killing bed bugs and eggs at all life stages. Single-visit treatment in most cases. More expensive than chemical for the same area but eliminates the multi-visit requirement.
Scenario 4: Heat treatment, whole home — $2,000 to $4,500
Same approach across the entire home. Requires a portable heating system (or multiple) plus monitoring. Pets, plants, and certain household items have to be removed during treatment. Usually completed in a single 6 to 10 hour session.
Scenario 5: Fumigation of severe infestations — $4,000 to $50,000+
Whole-building tenting and gas fumigation. Reserved for the most severe cases and for multi-unit buildings where adjacent infestation control matters. The home is uninhabitable for 24 to 72 hours during treatment. Rare in single-family homes, more common in apartment buildings, hotels, and commercial properties.
The national average treatment cost lands around $2,500 — between scenarios 2 and 4. That figure averages across treatment types and infestation severities, so your specific situation matters more than the average.
Why bed bugs cost more than other pests
Three structural reasons. Knowing them helps the price feel less arbitrary.
Multi-visit requirement
Most pests are gone after one or two professional treatments. Bed bug elimination requires 2 to 4 visits over 4 to 8 weeks because chemical insecticides don’t penetrate eggs effectively. Each treatment kills the live bugs at that moment, but eggs that hatch over the following weeks need to be treated as new nymphs emerge. A typical bed bug visit costs $415 to $625, and the multi-visit protocol stacks the cost.
Hiding behavior
Bed bugs hide in cracks, seams, electrical outlets, behind picture frames, inside furniture joints, and in walls. Effective treatment requires the technician to physically access these places — pulling apart bed frames, removing outlet covers, treating inside furniture. This is labor-intensive in a way that ant or roach treatment isn’t.
Insecticide resistance
Bed bug populations have evolved resistance to common pyrethroid pesticides over the past two decades. Effective treatment now requires specific products and rotational application strategies that consumer-grade DIY products don’t replicate. Professional licensing is required for the more effective formulations.
The result: bed bug treatment is genuinely 5 to 10 times more labor and material intensive than most pest control work. The pricing reflects real cost rather than markup.
Heat vs. chemical vs. fumigation
Treatment method comparison for bed bug elimination
Once a professional confirms an infestation, the choice between treatment methods depends on severity, budget, and disruption tolerance.
Chemical treatment is the lowest upfront cost and most widely available method. Insecticides are applied to surfaces where bed bugs harbor and travel. Effective when applied thoroughly, but the multi-visit requirement extends the elimination timeline to 4 to 8 weeks. You can sleep in your own bed during the process — most chemicals dry within hours and beds are usable that night.
The downsides: not effective on eggs, requires repeated visits, and homeowners must follow specific preparation protocols (washing all bedding, vacuuming, sometimes removing certain items) before each visit. A treatment that’s not properly prepared often fails.
Heat treatment is the most thorough single-visit option. Raising room temperature above 118°F kills bed bugs at all life stages — eggs included. One visit eliminates the infestation in most cases.
The downsides: more expensive than chemical, requires removing heat-sensitive items (electronics, candles, certain plants, pets) for the duration, and the home is uninhabitable during the 6-10 hour treatment. Heat doesn’t have residual effect — if a single bed bug is brought back into the home (in luggage, on clothes), reinfestation can occur.
Fumigation is the most thorough method, used for severe infestations where other approaches have failed or where a multi-unit structure needs simultaneous treatment. Gas penetrates everywhere bed bugs hide. The home is uninhabitable for 24-72 hours. Most expensive option but most reliable for severe cases.
The honest decision framework:
Early-stage, single-room infestation, budget-conscious: Chemical treatment.
Severe infestation, multi-unit building, prior treatments failed: Fumigation.
Multi-room infestation but want to stay home: Chemical treatment with multi-visit protocol.
Most homeowners with confirmed but not-severe infestations choose chemical for cost reasons. Most homeowners who can afford heat treatment prefer it for the speed and certainty.
What’s typically extra
Beyond the headline treatment price, six line items appear (or should appear) on a complete quote.
Initial inspection: $65 to $200
Determines whether you actually have bed bugs, severity, and treatment scope. Some companies offer free inspections bundled with treatment commitment; some charge separately and credit the fee toward the treatment if you hire them.
Follow-up appointments: $75 to $225
Verification visit 4-6 weeks after treatment to confirm elimination. Some treatments include this; some bill separately.
Furniture treatment or removal: variable
Each piece of furniture requiring direct treatment can add $50 to $200. Severely infested furniture sometimes can’t be saved, requiring disposal at $50 to $200 per item plus replacement cost. Mattresses are the most commonly disposed-of item in bed bug treatment.
Mattress encasements: $50 to $200 each
Sealed covers that trap any remaining bed bugs and prevent reinfestation of the mattress. Recommended after treatment.
Emergency or expedited service: $200 to $500 premium
Same-day or weekend service for severe situations.
Multi-unit coordination (apartments): variable
When treatment requires coordinating with neighbors or property management, the additional inspection and treatment of adjacent units can add significantly to the project.
A complete first-time treatment for a typical single-family home with chemical treatment runs $1,200 to $2,800 covering inspection, initial treatment, and one follow-up. Heat treatment for the same scenario runs $2,500 to $5,000. Quotes notably lower than these are usually missing follow-up visits or assuming a smaller-scope treatment than you actually need.
Why most DIY treatments fail
Bed bug DIY products are everywhere — sprays, powders, foggers, mattress treatments, “natural” remedies. The honest assessment: most don’t work for established infestations.
Three reasons.
Insecticide resistance
The pyrethroid sprays available in consumer products are the same chemicals bed bug populations developed resistance to over the past 20 years. The products kill some bed bugs (the ones still susceptible to pyrethroids) but leave resistant individuals to repopulate. The infestation appears to improve, then comes back worse.
Coverage gaps
Bed bugs hide in cracks, seams, and harborage areas that surface application can’t reach. Spraying visible areas kills visible bugs while the breeding population continues unaffected. DIY spraying often forces bed bugs to spread to new areas of the home rather than eliminating them.
Egg survival
Most consumer products don’t kill bed bug eggs effectively. A treatment that kills 100 percent of adults but leaves eggs intact produces a new generation of bed bugs within 2-3 weeks.
What can work for very early infestations (just a few bugs, caught immediately): vacuuming thoroughly with a bagged vacuum (and sealing/disposing the bag immediately), washing all bedding and clothing in hot water (130°F+) and drying on high heat for 30 minutes, encasing mattresses and box springs, and treating affected items with a portable heat chamber.
What rarely works: foggers/bug bombs (push bed bugs deeper into hiding rather than killing them), DIY heat treatments with space heaters (don’t reach lethal temperature uniformly), most “natural” remedies (essential oils, diatomaceous earth alone), and consumer pyrethroid sprays for active infestations.
The honest math: by the time you can see bed bugs without specifically looking for them, the infestation is past the point DIY products can reliably handle. Time spent on failed DIY is time the infestation grows, which makes professional treatment more expensive when you finally call.
Apartment-specific considerations
Bed bug treatment in apartment buildings is more complex than single-family homes, and pricing reflects this complexity.
Adjacent units matter
Bed bugs travel between apartments through walls, electrical outlets, and shared plumbing. Treating only your unit while neighbors have active infestations almost guarantees re-infestation within months. Effective treatment often requires coordinating with adjacent units, sometimes the entire floor or building.
Landlord responsibilities vary by jurisdiction
Some states and cities require landlords to pay for bed bug treatment in rental units; others place responsibility on tenants. New York City, San Francisco, Chicago, Boston, and several other major cities have specific bed bug laws favoring tenants. Most other jurisdictions leave the responsibility ambiguous in the lease.
Before paying for treatment yourself, check your state and local laws and review your lease. If your landlord is responsible, document the infestation thoroughly (photos, written notification) and request treatment in writing. Pay yourself only as a last resort, and keep all receipts in case you can recover the cost later.
Building-wide treatment is cheaper per unit
When property management coordinates building-wide treatment, the per-unit cost typically drops because pest control companies offer volume pricing. If you’re in an apartment with active infestation, advocating for building-wide treatment serves both your interests and your neighbors’.
Lease termination considerations
A persistent untreated bed bug infestation in a rental may grounds for early lease termination in some jurisdictions, often without breaking the lease. If the landlord won’t treat and the infestation continues despite your efforts, consult a tenant rights attorney about your specific situation.
How to choose a bed bug exterminator
Bed bug treatment is specialty work — not every pest control company is equipped for it. The factors that matter when comparing companies:
Experience specifically with bed bugs
A general pest control company may treat bed bugs occasionally; a company that specializes in bed bug elimination has the equipment, products, and protocols refined for the specific challenges. Ask how many bed bug jobs they handle per month — established specialists handle several per week.
Treatment method options
Companies that offer only chemical or only heat are constrained in what they can recommend. Companies offering both let the choice match your situation rather than their equipment limitations.
Inspection thoroughness
A reputable company sends a technician to inspect before quoting. Quotes given over the phone without inspection are usually low to win the business and revised upward later.
Written treatment plan
The quote should specify treatment method, number of visits, what’s included, what you’re responsible for preparing, and what happens if the infestation persists. Vague “we’ll take care of it” quotes lead to disputes.
Guarantee terms
Reputable bed bug companies offer some form of guarantee — typically free re-treatment if bed bugs return within 30-90 days of completion. Read the terms carefully. Some guarantees exclude common scenarios.
Insurance and licensing
State licensing for pest control is required everywhere. Liability insurance protects you if something goes wrong during treatment.
Multiple quotes
Three quotes is reasonable for any bed bug treatment over $1,500. The spread between quotes is often meaningful — and if all three quotes are similar, that’s confirmation the price is reasonable.
Frequently asked questions
How long does bed bug treatment take?
Chemical treatment requires 2 to 4 visits over 4 to 8 weeks. Heat treatment requires one visit of 6 to 10 hours plus a follow-up inspection. Fumigation requires 24 to 72 hours of unoccupied building time plus aeration. Total elimination timeline is similar across methods (4 to 8 weeks until confirmed clear), but the disruption pattern is different.
Will I have to throw out my mattress?
Sometimes, depending on infestation severity. Heavily infested mattresses are often disposed of as part of treatment. Lightly infested mattresses can usually be treated and saved with a mattress encasement after treatment.
Can I sleep in my bed during treatment?
Yes for chemical treatment (after the initial application dries, usually within hours). No during heat treatment (the room is uninhabitable during heating). No during fumigation (the entire building is uninhabitable).
Will insurance cover bed bug treatment?
Generally no for homeowners insurance — bed bug treatment is considered a maintenance issue. Some renters insurance may cover it; check policy specifics. Some city housing programs offer partial assistance for low-income residents in specific jurisdictions.
How do I prevent bed bugs from coming back?
Inspect any used furniture before bringing it home. Check hotel rooms when traveling (pull back sheets, examine mattress seams). Wash and high-heat dry clothing after travel. Use mattress encasements after treatment. Consider periodic inspections in apartment buildings with prior infestations.
Can bed bugs spread from one apartment to another?
Yes. Bed bugs travel through walls, electrical outlets, plumbing penetrations, and shared spaces. This is why apartment treatment often requires coordination with adjacent units.
How quickly do I need to act after spotting bed bugs?
Immediately. Bed bug populations double approximately every 16 days under good conditions. A small infestation that costs $1,000 to treat becomes a severe infestation costing $4,000+ within a few months. Same-day or next-day inspection is reasonable; waiting weeks or months makes the problem dramatically more expensive.
What does a bed bug bite look like? Small red welts, often in clusters or lines (sometimes called “breakfast, lunch, and dinner” bites). Itchy, similar to mosquito bites but persistent. Bites alone don’t confirm bed bugs — the actual bugs, their shed skins, or fecal stains on bedding are more reliable evidence.
Are professional treatments safe for pets and children?
Modern bed bug treatments are designed to be safe after the initial application dries. Specific products and protocols vary by company. Reputable exterminators discuss safety considerations during inspection and provide written guidance on when occupants and pets can return to treated areas. Heat treatment requires temporary removal of pets and heat-sensitive items.
What if I can’t afford professional treatment?
Several options. Some cities have public health programs offering bed bug assistance. Some pest control companies offer payment plans. Bundling chemical treatment with thorough DIY preparation (washing, vacuuming, encasing) reduces total visits and cost. Treating earlier (when infestation is small) costs significantly less than waiting. Some social services agencies maintain lists of low-cost or sliding-scale pest control providers.
A swimming pool is often the centerpiece of outdoor living, offering relaxation, entertainment, and a place to unwind. However, maintaining a clean and comfortable pool area can be challenging without the right protection. This is where a screen enclosure becomes a valuable addition. Many homeowners are turning to pool screen enclosure builders in Longwood FL to enhance their outdoor spaces while improving functionality and comfort.
Protection From Debris and Pests
One of the most noticeable benefits of a screen enclosure is the barrier it creates against leaves, dirt, and insects. Pools that are left open tend to collect debris quickly, leading to more frequent cleaning and maintenance. With an enclosure in place, you can significantly reduce the amount of time spent skimming and vacuuming.
Additionally, insects such as mosquitoes and flies are kept out, allowing you to enjoy your pool without constant annoyance. This makes a screened pool area ideal for relaxing evenings or hosting gatherings without interruptions.
Enhanced Safety for Families
Safety is a top priority for any homeowner with a pool. A screen enclosure adds an extra layer of protection by creating a defined boundary around the pool area. This can help prevent accidental access by children or pets when the pool is not in use.
While it should not replace other safety measures, it works as an additional safeguard that brings peace of mind. Many homeowners choose to work with experienced providers like LA Construction Custom Screen Builders to ensure the structure is secure and properly installed.
Improved Comfort and Shade
Direct sunlight can make pool areas uncomfortable, especially during hotter months. A screen enclosure helps filter sunlight, reducing glare and creating a more pleasant environment. It allows you to enjoy your pool without excessive heat exposure, making daytime swimming more enjoyable.
The enclosure also provides some protection from light rain, allowing you to continue using your outdoor space in varying weather conditions. This added comfort extends the usability of your pool throughout the year.
Reduced Maintenance and Cost Savings
Maintaining a pool can be time-consuming and expensive. By keeping out debris and minimizing contamination, a screen enclosure helps maintain water quality for longer periods. This means fewer chemicals are needed, and cleaning equipment is used less frequently.
Over time, these reductions can lead to noticeable savings. Investing in custom pool cages in Central Florida is not just about convenience but also about lowering long-term maintenance costs.
Increased Property Value and Appeal
A well-designed pool enclosure can enhance the overall appearance of your home. It creates a polished and organized look that appeals to potential buyers. Outdoor spaces that are functional and easy to maintain are often seen as valuable features in the real estate market.
A screened pool area also gives the impression of a more complete outdoor living environment, making your property stand out. Whether you plan to sell in the future or simply want to upgrade your home, this addition can make a significant difference.
Better Outdoor Living Experience
A pool enclosure transforms the way you use your outdoor space. It creates a comfortable environment where you can relax, entertain, and spend time with family without worrying about the weather or pests.
From quiet mornings by the pool to evening gatherings, the enclosure provides a controlled space that enhances every experience. With the help of skilled professionals, homeowners can design enclosures that match their specific needs and preferences.
Conclusion
Installing a screen enclosure around your pool offers a wide range of benefits, from improved cleanliness and safety to enhanced comfort and property value. It is a practical upgrade that simplifies maintenance while elevating the overall outdoor experience.
By choosing reliable professionals and investing in quality materials, homeowners can enjoy a long-lasting solution that adds both function and style to their pool area.
Spray foam insulation costs $1 to $5 per square foot installed, with most homeowners paying $0.60 to $1.60 per board foot for open-cell foam and $1.30 to $3.10 per board foot for closed-cell foam. A typical attic insulation project runs $3,500 to $7,000. Whole-home spray foam insulation in a 2,000 sqft house runs $4,000 to $10,000 depending on which areas are foamed and which type is used. Garage insulation runs $3,000 to $8,000.
The pricing range looks wider than it actually is because two different units get used interchangeably. Some contractors quote per square foot of surface area; others quote per board foot (a 12″ × 12″ × 1″ measurement). The same job can produce a $0.80 per board foot quote and a $4 per square foot quote, and they may be roughly equivalent depending on how thick the foam is applied. This guide breaks down what spray foam actually costs by area of the home, when open-cell beats closed-cell (and when it doesn’t), and how to convert between the two pricing systems so you can actually compare contractor bids.
Open-cell vs closed-cell spray foam comparison
Spray foam insulation comes in two main types. They’re priced differently, perform differently, and are appropriate for different applications. Picking the right one is the single biggest cost decision in the project.
Open-cell spray foam: $0.60 to $1.60 per board foot installed
Lower density (about 0.5 pounds per cubic foot). The foam expands roughly 100x after spraying, filling cavities thoroughly. R-value is approximately 3.5 to 3.7 per inch — similar to fiberglass batt insulation per inch. Allows water vapor to pass through, which can be either an advantage (in some assemblies) or a disadvantage (in others). Sound dampening is excellent.
Best applications: above-grade exterior walls, interior partition walls, attic ceilings (under the roof deck) in moderate climates, and any area where soundproofing matters. Most cost-effective choice for whole-home insulation when moisture and high R-value aren’t critical concerns.
Closed-cell spray foam: $1.30 to $3.10 per board foot installed
Higher density (about 2 pounds per cubic foot). Expands roughly 30x — fills cavities more controllably. R-value of 6 to 7 per inch — nearly twice that of open-cell. Acts as an air barrier, vapor barrier, and moisture barrier all at once. Adds structural rigidity to walls. The premium product.
Best applications: below-grade walls (basements, crawl spaces), exterior walls in high-moisture climates, areas exposed to potential water intrusion, places where maximum R-value is needed at minimum thickness (rim joists, narrow cavities), and roof decks in cold climates. Required by code for some applications in some jurisdictions.
The honest summary: open-cell is the right answer for most above-grade residential applications. Closed-cell is the right answer for anything below grade, anything moisture-exposed, or anywhere structural strength matters. Picking the wrong one wastes money — closed-cell where open-cell would do the job costs roughly 2x more for marginal benefit; open-cell where closed-cell is needed creates moisture problems that cost far more than the original install.
Cost by application area for spray foam insulation
Whole-home averages mask big differences between specific applications. Here’s what each area actually costs.
Attic insulation: $1,500 to $7,000
The most common spray foam project. Pricing depends heavily on whether the attic is floored (insulating the floor) or unfloored with the roof deck insulated. Open-cell sprayed under the roof deck of a typical attic runs $3,500 to $5,000. Closed-cell on the same surface runs $4,500 to $7,000. Attics are usually the highest-impact application for energy savings because of how much heat is lost upward.
Crawl space insulation: $1,500 to $6,000
Almost always closed-cell because of moisture exposure. Encapsulating a crawl space with closed-cell foam combines insulation and moisture management into one project. Pricing depends on accessibility — tight crawl spaces under 24 inches add labor costs significantly. A typical 1,500 sqft home crawl space encapsulation runs $3,000 to $5,000.
Basement walls: $2,000 to $5,000
Closed-cell on below-grade walls. Provides insulation, vapor barrier, and air sealing in a single application. Often combined with rim joist sealing for a complete basement envelope. Pricing varies with whether existing insulation needs removal first ($500 to $1,500 in additional labor).
Wall insulation in new construction: $1,500 to $5,500 per 1,000 sqft of wall
Easiest application — open studs, full access, fast spraying. Open-cell at full stud cavity depth (3.5 inches in standard 2×4 framing) gives R-13. Closed-cell at 2 inches gives R-13 with room left in the cavity. Most efficient way to insulate new homes.
Wall insulation in retrofit (existing walls): $5,000 to $12,000+ per 1,000 sqft
Significantly more expensive than new construction because access is the problem — drywall must be removed and replaced, or the foam must be injected through small holes (which usually means a different material, injection foam, rather than spray foam). True spray foam retrofit is rare; most “retrofit insulation” is dense-pack cellulose or injection foam.
Garage insulation: $3,000 to $8,000
A single-car garage runs $3,000 to $5,000; a three-car garage runs $5,000 to $8,000. Often closed-cell on walls and ceiling because garages are typically uninsulated and exposed to temperature swings. Worth doing if the garage is attached to the house and shares walls with conditioned space.
Rim joist sealing: $300 to $1,500
The smallest and most cost-effective spray foam application. The rim joist (the band of wood at the perimeter of the basement ceiling) is a major source of air infiltration in most homes. Closed-cell foam at 2 inches on the rim joist of a typical home is one of the highest ROI insulation projects available — small total area, big air-sealing impact. Frequently bundled with basement work.
Whole-home insulation: $4,000 to $14,000+
A complete envelope using a mix of open-cell and closed-cell as appropriate to each area. Pricing varies enormously with home size, what’s already insulated, and what’s accessible. A 2,000 sqft home with attic plus rim joist plus basement walls (the highest-impact areas) runs $5,000 to $9,000. Adding wall insulation pushes the total higher.
The pattern: small targeted applications (rim joist, attic) deliver disproportionate energy savings relative to cost. Comprehensive whole-home applications cost more but deliver more total savings. Both are reasonable depending on budget and goals.
Reading quotes: board foot vs. square foot pricing
Board foot to square foot conversion reference
This is where homeowners get confused, and where contractors sometimes get away with quotes that aren’t actually comparable.
A board foot is a volume measurement: 12 inches × 12 inches × 1 inch. A square foot of surface area sprayed 1 inch thick equals 1 board foot of foam. A square foot sprayed 3 inches thick equals 3 board feet.
This matters because two contractors can quote the same job at different per-unit rates and have wildly different totals. Example: a 1,000 sqft attic sprayed at 3 inches thick:
Contractor A quotes $0.80 per board foot. Math: 1,000 sqft × 3 inches = 3,000 board feet. Total: $2,400.
Contractor B quotes $3.20 per square foot. Math: 1,000 sqft × $3.20 = $3,200. Total: $3,200.
Same job, different quotes, $800 difference. The board-foot quote is the better deal for this thickness. But if you’re spraying at 5 inches instead of 3, the math changes — 5,000 board feet at $0.80 is $4,000, while 1,000 sqft at $3.20 is still $3,200, and Contractor B is now cheaper.
To compare quotes accurately, you need to know two things: the rate (per board foot or per square foot) and the application thickness. Always ask each contractor to specify both. A quote that doesn’t tell you the thickness is incomplete — you’re trusting the contractor to spray the right amount.
Standard application thicknesses:
Open-cell wall cavities: full stud depth (typically 3.5 inches)
Open-cell attic ceilings (under roof deck): 5 to 7 inches for code-compliant R-value
Closed-cell rim joist: 2 inches
Closed-cell basement walls: 2 to 3 inches
Closed-cell crawl space walls: 2 to 3 inches
Closed-cell roof deck: 3 to 5 inches
If a contractor quotes thinner application than these standards, ask why. If they quote thicker, ask why. Both are legitimate in specific circumstances; neither should happen by accident.
What’s actually included in a typical quote
Beyond the foam itself, six line items appear (or should appear) on a complete quote.
Surface preparation: $0 to $1,500
Removing existing insulation, cleaning surfaces, masking off areas that shouldn’t be sprayed. Usually included; verify if it’s not.
Vapor barrier (if applicable): $0.65 to $1 per square foot
Closed-cell foam is its own vapor barrier. Open-cell foam in some assemblies (cold climates, certain wall configurations) requires a separate vapor barrier — usually a “vapor retarder primer” applied after the foam. Required by code in some jurisdictions for open-cell applications.
Mold remediation (if needed): $1,125 to $3,345
Spraying foam over moldy surfaces seals the mold in. Pre-existing moisture or mold problems must be addressed before foam application. A reputable installer will refuse to spray over visible mold and will identify the remediation as a separate cost.
Code inspection: $50 to $500
Required in most jurisdictions for spray foam installation. Sometimes included in the contractor’s quote, sometimes the homeowner pulls and pays separately.
Cleanup and waste disposal: $200 to $600
Spray foam projects generate waste — drop cloths, masking materials, partially-cured foam scraps. Reputable contractors include this; budget contractors sometimes don’t.
Travel and mobilization: variable
Rural or remote properties may incur travel surcharges. Urban projects with parking or staging challenges may include access fees.
A complete quote for a 1,500 sqft attic project with closed-cell foam should include the foam itself plus surface prep, vapor management as required, cleanup, and any code inspections. Total: $5,000 to $7,500 typical. Significantly cheaper quotes are usually missing line items.
Energy savings and payback: the honest math
Most spray foam pieces cite a 5 to 7 year payback period. That figure is sometimes true and frequently optimistic. Real payback depends on five variables.
What you had before
Replacing fiberglass batts (R-13) with open-cell spray foam (R-13) saves almost nothing on heat conduction — the R-values are similar. The savings come from air sealing, which fiberglass doesn’t provide. Replacing nothing (an uninsulated space) with spray foam saves dramatically more.
Climate zone
Heating and cooling load varies enormously by region. The same insulation upgrade saves $200 per year in mild climates and $1,200 per year in extreme climates. Energy Star and DOE provide climate-zone-specific calculators that produce more honest estimates than the generic “5 to 7 years” claim.
Fuel cost
Heating with electric resistance versus natural gas versus oil produces dramatically different annual costs and dramatically different payback math. A homeowner heating with $0.30/therm natural gas saves less in absolute dollars than one heating with $0.50/kWh electric resistance heat.
What was leaking
A home with significant air infiltration — gaps, drafts, uninsulated rim joists — sees enormous improvement from spray foam’s air-sealing properties. A home that was already tight with new windows, weatherstripping, and good fiberglass insulation sees marginal improvement.
Comfort gains separate from dollar savings
Spray foam often improves comfort (consistent temperatures, reduced drafts, better humidity control) more than it improves utility bills. Worth budgeting for if comfort matters, even when raw payback math is mediocre.
Realistic payback estimates by application:
Rim joist sealing: 2 to 4 years (highest ROI of any insulation upgrade)
Attic insulation in cold climates: 4 to 8 years
Attic insulation in mild climates: 7 to 12 years
Whole-home retrofit in cold climates: 6 to 10 years
Whole-home retrofit in mild climates: 12 to 20 years (or longer)
New construction whole-home: payback measured in comfort and resale value rather than just utility savings
If a contractor quotes a “5-year payback” without asking about your current insulation, climate zone, or fuel source, the number is generic, not specific to your situation.
Spray foam vs. fiberglass: when each makes sense
Spray foam costs roughly 3 to 4 times what fiberglass batt insulation costs for equivalent area. The premium is real and not always justified.
Choose spray foam when:
The space is air-leaky and air sealing matters (attic, crawl space, rim joist)
The space is exposed to moisture (basement, crawl space, below-grade walls)
Cavity dimensions are irregular and fiberglass batts won’t fit cleanly
Maximum R-value at minimum thickness is needed (closed-cell)
You’re doing whole-home weatherization and want air sealing built in
Choose fiberglass when:
The application is straightforward (open stud cavities, accessible attic floor)
Budget is the primary constraint
Air sealing is being addressed separately (caulk, weatherstripping, separate air barrier)
DIY installation is desired
The honest comparison: spray foam is the better product for most applications. Fiberglass is the better value for most applications. Both reasoning lines are correct depending on which factor matters more for the specific homeowner.
DIY: where it actually makes sense
DIY spray foam kits exist and are heavily marketed. Brand names include Touch’n Foam, Foam It Green, Tiger Foam, and Dow Froth-Pak. A two-component kit covers roughly 200 to 600 board feet for $300 to $800. They produce real spray foam — same chemistry as professional product.
DIY-reasonable: Rim joist sealing (small area, simple geometry, high impact), small targeted applications (sealing around plumbing penetrations, small attic areas, sealing a single wall section). A homeowner with a careful approach can do these well.
DIY-possible but mediocre: Attic ceiling insulation in a small home, basement rim joists across a longer perimeter. Possible to DIY but achieving consistent thickness and quality is harder than professional installation.
DIY-bad-idea: Whole-home insulation, anything in a finished space, anything requiring large total foam volume, anything where you don’t have full access to the application surface. The kits aren’t designed for these scales — they cure faster than larger truck-mounted systems, application is harder to control, and waste rates are higher. The cost savings vs. professional install evaporate above roughly 600 to 800 board feet.
Safety considerations for DIY: Spray foam isocyanates are respiratory sensitizers — proper full-face respirator with organic vapor cartridges is required, not optional. Skin protection (full coveralls, gloves) is required. Adequate ventilation during application and curing is required. People with asthma or chemical sensitivities should not DIY spray foam. Pets and children should not be in the home during application or for 24 hours after.
Off-gassing, curing, and chemical considerations
Worth mentioning briefly because it’s underdiscussed in cost articles.
Spray polyurethane foam is generally considered safe after proper curing, but the curing process matters. Properly mixed foam cures within 24 hours and is inert thereafter. Improperly mixed foam (wrong A:B ratio, wrong temperature during application, contamination) can fail to cure fully and continue off-gassing for months or years.
Reports of incomplete-cure problems exist and have led to lawsuits and homes that became uninhabitable. The risk is small for properly trained installers using calibrated equipment but isn’t zero.
Mitigation: hire installers certified by the Spray Polyurethane Foam Alliance (SPFA), verify equipment calibration is recent, ensure application happens within manufacturer-specified temperature ranges, and avoid the home during application and for 24 hours after. Ventilate thoroughly for the first week.
Modern formulations have lower VOC content than older versions. Soy-based and water-blown formulations exist for homeowners with chemical sensitivities and run modestly higher in price.
Frequently asked questions
How long does spray foam insulation last?
Properly installed and cured, 80+ years. The International Association of Certified Home Inspectors estimates the lifespan at “the life of the building.” Unlike fiberglass, it doesn’t settle, sag, or lose R-value over time. This longevity is part of why the higher upfront cost can be worth it over decades of homeownership.
Will spray foam insulation increase my home value?
Yes, modestly. Spray foam is a recognized upgrade that appraisers note positively. The value increase rarely matches the install cost dollar-for-dollar, but combined with energy savings and comfort improvements, it’s a reasonable home investment.
Can spray foam be installed in cold weather?
Yes, with caveats. Closed-cell foam can be applied at lower temperatures than open-cell. Manufacturer specifications dictate minimum substrate temperatures (typically 40°F to 60°F). Application below specifications causes incomplete curing. Reputable installers refuse cold-weather work outside specifications; budget installers sometimes don’t, which is how curing problems happen.
Is spray foam waterproof?
Closed-cell foam is essentially waterproof (it’s a vapor barrier). Open-cell foam absorbs water and isn’t waterproof. This is the central reason for choosing closed-cell in below-grade and moisture-exposed applications.
Will spray foam stop pests?
It blocks small entry points (mice, insects), making it a meaningful but not complete pest barrier. It’s not pesticidal — it doesn’t kill or repel pests, just denies them access through sealed gaps. Existing pest problems need to be addressed separately before foam application.
Can I add spray foam over existing insulation?
Generally yes for attic applications (spray over fiberglass batts on the attic floor or under the roof deck). Generally no for wall cavities — spraying foam against existing fiberglass creates uneven application and traps moisture. For walls, existing insulation should be removed before foam application.
Will my homeowner’s insurance be affected?
Sometimes. Some insurers offer discounts for homes with spray foam due to fire-resistance and energy efficiency. Some require notification because the modification changes the home’s risk profile. Notify your insurer and ask about both possibilities.
Does spray foam create a “too tight” home?
Modern building science recommends “build tight, ventilate right” — well-sealed homes need mechanical ventilation (ERV or HRV systems) to maintain healthy indoor air. A spray-foamed home without adequate ventilation can develop indoor air quality problems. If you’re insulating comprehensively, budget $1,500 to $4,000 for an ERV/HRV system if your home doesn’t already have one.
How do I find a reputable installer?
Look for SPFA certification, check verified reviews on multiple platforms, ask to see recent project photos, request references from completed projects in the past year, and verify the contractor carries general liability and workers’ comp insurance. Avoid the lowest bidder if the spread between quotes exceeds 25 to 30% — that usually indicates corner-cutting on materials or application thickness.
Property owners in Lynnwood know that pest problems here aren’t unusual. The region’s moisture-rich environment and dense greenery create ideal conditions for pest activity. Homes near wooded areas often deal with carpenter ants and squirrels, while damp zones can attract subterranean pests in large numbers. More than seasons, rain cycles play a major role in pest patterns here. Here are nine habits you can consider to reduce pest problems in your home.
Schedule regular inspections: If you contact United Pest Solutions, their technicians will come over and check your home for hidden signs. The best approach is to get ongoing services from the United team, which include barrier treatments that help prevent infestations before they start.
Check the gutters: Lynnwood receives significant rainfall annually. You have to ensure that your gutters are clear and free of debris. If water overflows or collects near the foundation, termites and other pests will continue to show up. Professional services can help maintain proper drainage.
Maintain the dry perimeter: Organic wood mulch is common in many homes, but it also acts as a moisture trap for termites and earwigs. Pest experts recommend maintaining at least a 12-inch gap between mulch beds and your foundation. You can use gravel or river rock to break the moisture bridge.
Landscape regularly: Trim tree limbs and branches on a regular basis, because these act as entry routes for carpenter ants, spiders, and squirrels. Maintaining your yard is equally important. Remove unwanted vegetation at least two to three times each year.
Monitor indoor moisture: High humidity in crawl spaces can lead to fungal growth, which softens wood and attracts subterranean termites. Ask your pest control provider about dehumidification measures that can keep humidity under 60%. Also, fix leaks as soon as they appear.
Exclusion is a must: Seasonal changes can trigger pest migration. Seal all entry points, cracks, and crevices that house mice and other pests can use to get inside. Avoid relying only on basic caulk. Professionals use durable materials that rodents cannot chew through.
Inspect at night: Pests like cockroaches can survive weeks without food but only days without water. If you want to identify hidden activity, check kitchens, sinks, and pet areas late at night when pests are most active.
Declutter your home: Cardboard attracts silverfish, roaches, and rodents. Recycle shipping boxes quickly instead of storing them in garages or storage spaces. Clutter creates ideal nesting spots for pests.
Improve waste management habits: Leaving garbage cans open, keeping food waste exposed, or leaving pet food outside can attract pests. While sanitation alone may not solve infestations, good habits significantly reduce risk.
Takeaways
As a homeowner, you should consider signing a yearly contract with a pest control company in Lynnwood. With help from United Pest Solutions, technicians can adjust treatments based on seasonal conditions, provide ongoing protection, and help you maintain habits that reduce pest risks over time.
Bed bugs are among the most frustrating household pests in the United States. These tiny insects hide in mattresses, furniture, and wall cracks, feeding on human blood while people sleep. Once they enter a home, they spread quickly and become difficult to eliminate without a clear strategy. Understanding how infestations begin and how proper bed bugs treatment in Cleveland works can help homeowners respond quickly and protect their living spaces.
Why Bed Bugs Are a Growing Problem
Bed bugs travel easily. They often hitchhike on luggage, clothing, furniture, and even public transportation. In cities with frequent travel and dense housing, infestations can appear in apartments, hotels, dorms, and single-family homes.
Several factors make bed bugs especially difficult to control:
They hide in extremely small spaces
They reproduce rapidly
They can survive for months without feeding
Many over-the-counter sprays fail to reach hidden areas
Because of these traits, infestations often grow before homeowners realize the problem exists.
Common Signs of a Bed Bug Infestation
Early detection makes a major difference in stopping the spread. While bed bugs are small and nocturnal, they leave several noticeable signs.
Look for these warning indicators:
Small reddish bites on the skin, often in clusters or lines
Tiny rust-colored stains on bedding or mattresses
Shed insect skins or pale eggs in mattress seams
A musty odor in heavily infested areas
Live bugs hiding in cracks, headboards, or upholstery
If multiple signs appear at the same time, it may indicate a growing infestation that requires immediate attention.
Where Bed Bugs Usually Hide
Bed bugs prefer locations close to their food source-humans. While mattresses are common hiding spots, they can spread far beyond the bed.
Typical hiding areas include:
Mattress seams and box springs
Bed frames and headboards
Nightstands and dressers
Baseboards and wall cracks
Upholstered furniture and curtains
Electrical outlets and picture frames
Because these pests hide so effectively, proper inspection is a critical step before beginning bed bugs treatment in Cleveland homes.
Effective Treatment Approaches
Removing bed bugs usually requires a combination of methods. A single treatment rarely solves the problem because eggs and hidden insects may survive initial efforts.
Professionals often rely on a multi-step process that may include:
Detailed inspections to locate active hiding areas
Heat treatments that eliminate bugs at all life stages
Targeted insecticides applied to cracks and crevices
Vacuuming and steam cleaning of infested surfaces
Follow-up visits to ensure the infestation is fully removed
Integrated pest management techniques focus on eliminating the insects while minimizing unnecessary chemical use.
Prevention After Treatment
Once an infestation is resolved, prevention becomes essential. Bed bugs can easily return if precautions are not taken.
Homeowners can reduce risk by following these habits:
Inspect hotel rooms and luggage after traveling
Wash and dry clothing on high heat after trips
Avoid bringing used furniture indoors without inspection
Use protective mattress encasements
Reduce clutter where pests can hide
Ongoing awareness helps keep homes protected after bed bugs treatment in Cleveland has been completed.
Protecting Homes Through Awareness
Bed bugs create stress for homeowners, but they can be managed with the right knowledge and timely action. Recognizing early signs, understanding hiding spots, and using thorough treatment strategies all play a role in successful control.
Homeowners looking for more information about pest prevention and responsible management practices often explore resources shared by companies like Tri-State Termite & Pest Control, which contribute to public awareness about identifying infestations and understanding treatment options. Educational guidance and preventative knowledge remain valuable tools in helping Cleveland residents maintain healthier, pest-free living environments.